
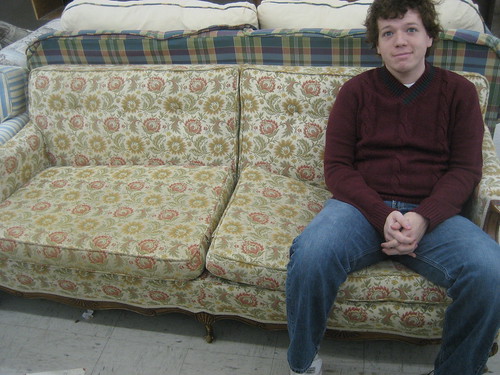
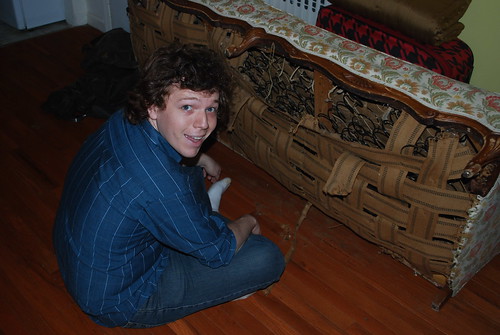
Kris is still super happy about our purchase!

One of the hardest parts was ripping out the old straps and enough of the old nails to put in the new stuff. A lot of the nails were too frail or rusted and the straps, despite being mostly dry rotted, REFUSED TO GIVE unless they wanted to. Also- the couch had obviously been completely filled with dust before sealing it up. In short- the process was messy.
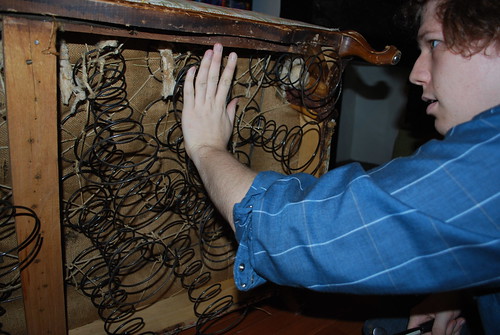
Boing-y springs!
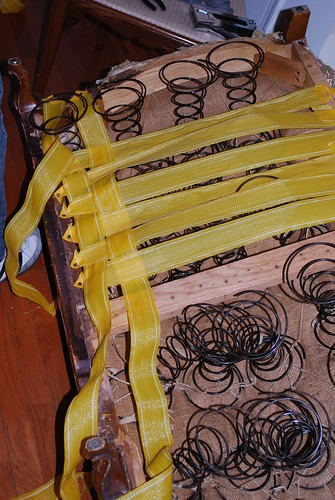
We decided to replace the old straps with new vinyl straps meant for lawn furniture. It took us two bags of $14.99 to recover the bottom and we found the vinyl very easy to use. We started off by trying to reuse some of the old nails, but my shinny new staple gun turned out to be much more practical and efficient.
The couch was naturally sectioned into 3, so we did them one at a time- stapling the straps on both sides along the width first, not worrying about the springs and then stapling one length at a time, weaving it through the cross straps (over, under, over ect.) while the other person pushed the springs down.
 It was pretty easy once we worked out a system.
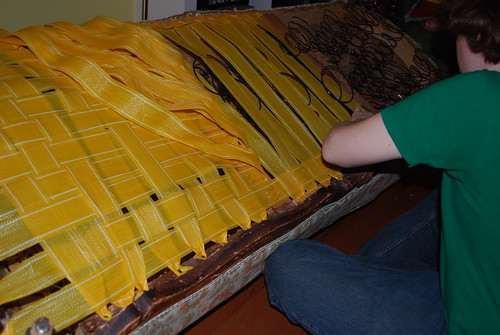 Kris did mess up the over, under pattern a few times, which wasn't be the end of the world, but writing this now about a month after the fact, the sections with no crossing mistakes are holding up perfectly whereas the other section has had a spring start to pop out.
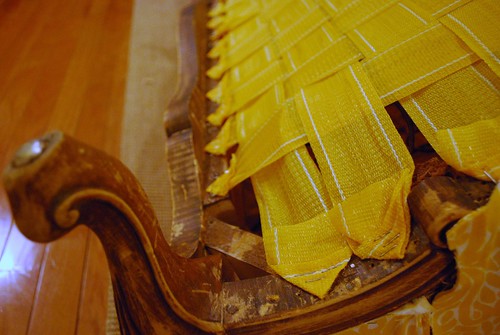
Beautiful perfection on this side!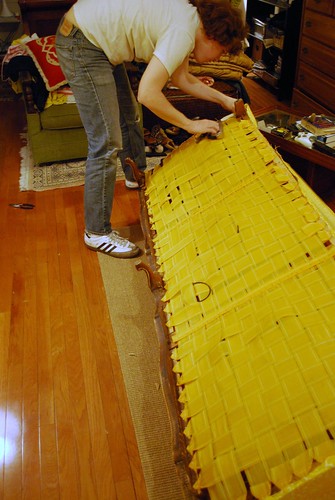 Look at that naughty spring!
We finished everything off by folding over a length of strapping and stapling them down the middle of the 2 sections for extra support since that what had been on the couch before we ripped it all up.
Now if we really wanted to make this professional, we would have hand tied the springs but we (or maybe I) are just too lazy- plus I wasn't sure how to do it at the people who constructed our couch used some fancy metal attachments instead- but I recently stumbled on this blog which shows some professionals doing exactly this with a chair very similar to our couch!
Although it did take the better part of a evening and a morning to complete, the redo has been a huge success and we're no longer afraid of falling through the bottom.
- Cost: $68= $30 vinyl straps + $30 staple gun + $8 staples
- Time: Approx 6 hours
- Ease: Easier than you'd think and worth the investment- especially if you already have a staple gun and staples!
i don't care what you say, this looks really really hard...i'm very impressed!
ReplyDelete