Friday, March 27, 2009

Daring Bakers go Seriously Savory

I hope you're ready for a picture bonanza, because this month's Daring Baker's Challenge was a doozy. I worked on it over the course of about 4 days and that's because this month's challenge was Lasagna! That's right. Homemade, handstreched pasta-old Italian grandma style.

The March 2009 challenge is hosted by Mary of Beans and Caviar, Melinda of Melbourne Larder and Enza of Io Da Grande. They have chosen Lasagne of Emilia-Romagna from The Splendid Table by Lynne Rossetto Kasper as the challenge.

But before I could get my hands doughy, I had to make the ragu. We were given the option of using our own ragu recipe, as long as we posted the recipe and I'm happy to say that this recipe is tried and true. It hails from The Traveler's Lunchbox and I've made it twice now with similar happy results.
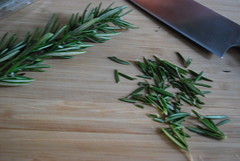

Starting off with some fresh rosemary.


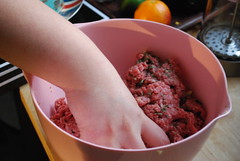
Mix it into the meat along with some diced garlic, salt and pepper.


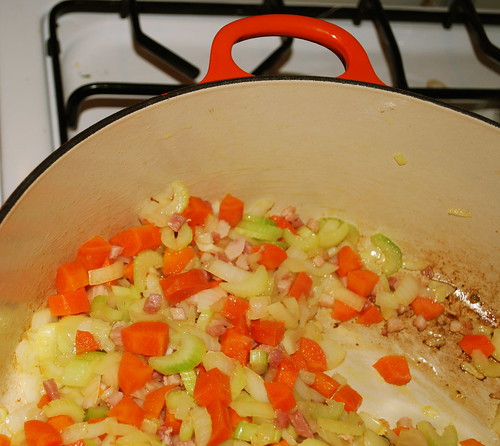
Cook up some pancetta, carrots, celery and onion until they turn golden brown
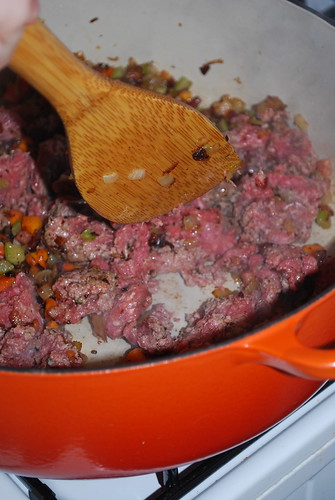
Add in the meat and brown it.
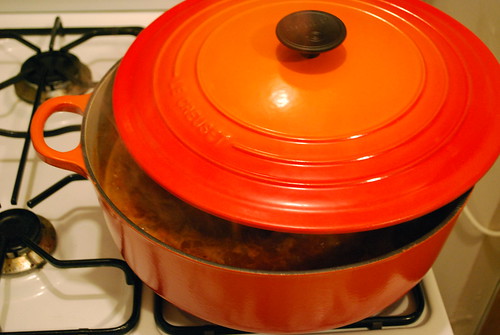

Add the wine, stock and bay leaf and cook on LOW for 2 t0 3 hours.

Now- onto the pasta!!
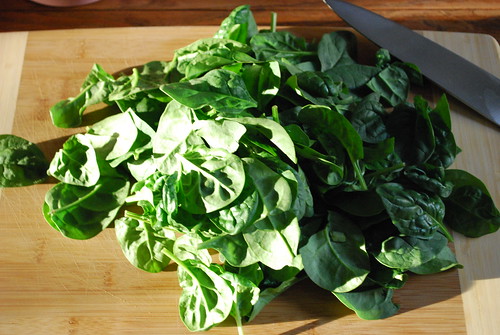


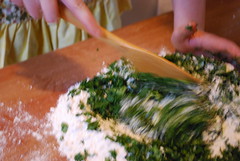
giant pile fresh leafy spinach
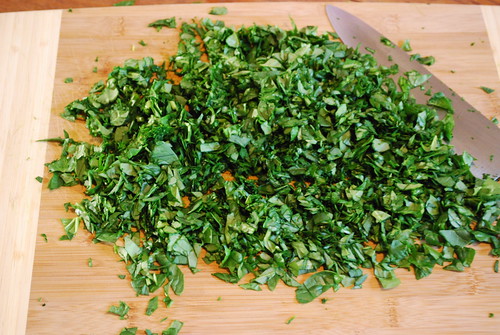

Chop. Chop. Chop.
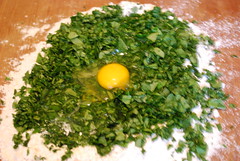


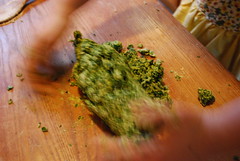
Aaaaaaaand.... TADA!
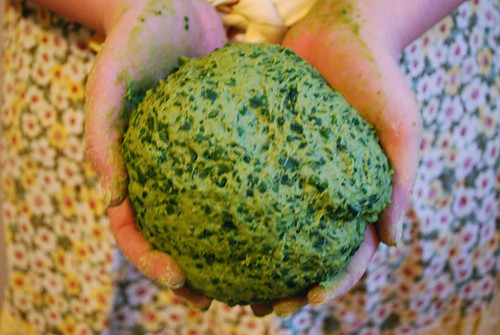
Pasta Dough!

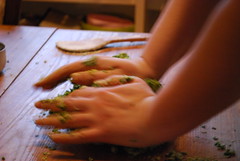
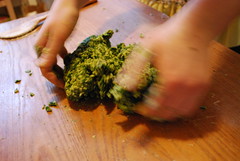
I have to admit that I had no faith when it came to kneading the dough. When you first start combining the mixture, it feels like barely moist sand and I really couldn't see how this would ever combine but 20 minutes of piling the stuff on top of each other, pretending it was dough, did eventually lead to dough. Can't loose the faith people!
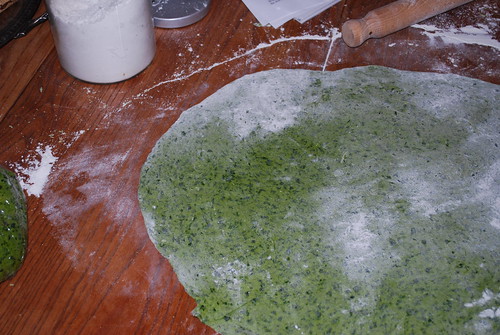

After the dough rests for at least 30 minutes, it's time to roll out that bad boy.
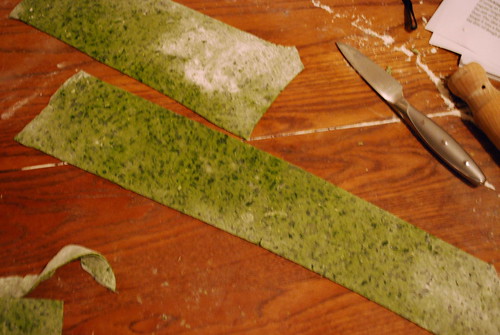
Then cut it to size
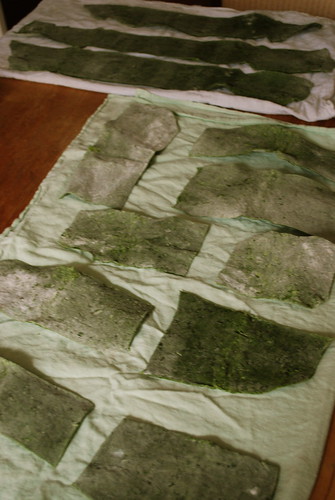


And let it out to dry
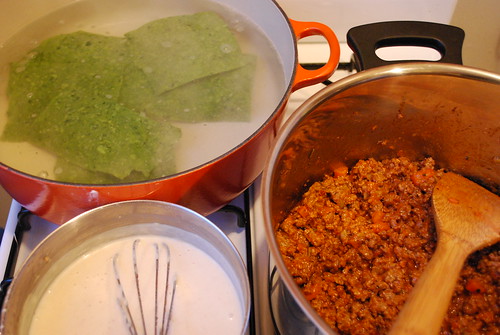
I didn't take pictures of the process of making the Bechamel Sauce but you can see that (sorta) with the Croque Monsieur recipe. So here we have a huge pot of salter water boiling away for the pasta. The bechamel has been made and is being kept warm on the hob and the ragu has been reheated.

Now, because I was kinda freaking during the making-of-the-lasagna (and maybe because by then it was dark on day 4) I didn't manage to take any pictures... and because the stuff was so delicious, I didn't take pictures of the finished product either... *SHAME* i know. No- wait! I DID take one picture of my bowl right before I ate it but it was really more of an afterthought and it was dark out and it made the lasagna look like dog food.. so I'll spare you that. Instead, why don't you head on over to see what the other Daring Bakers cooked up this month! I'm sure they pictures aplenty to satiate your need for lasagna photography. And if you're feeling brave- here are all the recipes:

All recipes below from The Splendid Table: Recipes from Emilia-Romagna, the Heartland of Northern Italian Food by Lynne Rossetto Kasper (published by William Morrow and Company Inc., 1992).

Lasagne of Emilia-Romagna (Lasagne Verdi al Forno)
(Serves 8 to 10 as a first course, 6 to 8 as a main dish)
Preparation Time: 15 minutes to assemble and 40 minutes cooking time

10 quarts (9 litres) salted water
1 recipe Spinach Pasta cut for lasagna (recipe follows) #1
1 recipe Bechamel Sauce (recipe follows) #2
1 recipe Ragu Bolognese (recipe follows) #3
1 cup (4 ounces/125g) freshly grated Parmigiano-Reggiano

Working Ahead:
The ragu and the béchamel sauce can be made up to three days ahead. The ragu can also be frozen for up to one month. The pasta can be rolled out, cut and dried up to 24 hours before cooking. The assembled lasagne can wait at room temperature (20 degrees Celsius/68 degrees Fahrenheit) about 1 hour before baking. Do not refrigerate it before baking, as the topping of béchamel and cheese will overcook by the time the center is hot.

Assembling the Ingredients:
Have all the sauces, rewarmed gently over a medium heat, and the pasta at hand. Have a large perforated skimmer and a large bowl of cold water next to the stove. Spread a double thickness of paper towels over a large counter space. Preheat the oven to 350 degrees Fahrenheit (180 degrees Celsius). Oil or butter a 3 quart (approx 3 litre) shallow baking dish.

Cooking the Pasta:
Bring the salted water to a boil. Drop about four pieces of pasta in the water at a time. Cook about 2 minutes. If you are using dried pasta, cook about 4 minutes, taste, and cook longer if necessary. The pasta will continue cooking during baking, so make sure it is only barely tender. Lift the lasagne from the water with a skimmer, drain, and then slip into the bowl of cold water to stop cooking. When cool, lift out and dry on the paper towels. Repeat until all the pasta is cooked.

Assembling the Lasagne:
Spread a thin layer of béchamel over the bottom of the baking dish. Arrange a layer of about four overlapping sheets of pasta over the béchamel. Spread a thin layer of béchamel (about 3 or 4 spoonfuls) over the pasta, and then an equally thin layer of the ragu. Sprinkle with about 1&1/2 tablespoons of the béchamel and about 1/3 cup of the cheese. Repeat the layers until all ingredients are used, finishing with béchamel sauce and topping with a generous dusting of cheese.

Baking and Serving the Lasagne:
Cover the baking dish lightly with foil, taking care not to let it touch the top of the lasagne. Bake 40 minutes, or until almost heated through. Remove the foil and bake another 10 minutes, or until hot in the center (test by inserting a knife – if it comes out very warm, the dish is ready). Take care not to brown the cheese topping. It should be melted, creamy looking and barely tinged with a little gold. Turn off the oven, leave the door ajar and let the lasagne rest for about 10 minutes. Then serve. This is not a solid lasagne, but a moist one that slips a bit when it is cut and served.

#1 Spinach Egg Pasta (Pasta Verde)
Preparation: 45 minutes
Makes enough for 6 to 8 first course servings or 4 to 6 main course servings, equivalent to 1 pound (450g) dried boxed pasta.

  • 2 jumbo eggs (2 ounces/60g or more)
  • 10 ounces (300g) fresh spinach, rinsed dry, and finely chopped; or 6 ounces (170g) frozen chopped spinach, defrosted and squeezed dry
  • 3&1/2 cups (14 ounces/400g) all purpose unbleached (plain) flour (organic stone ground preferred)

Mixing the dough:
Moud the flour in the center of your work surface and make a well in the middle. Add the eggs and spinach. Use a wooden spoon to beat together the eggs and spinach. Then gradually start incorporating shallow scrapings of flour from the sides of the well into the liquid. As you work more and more flour into the liquid, the well’s sides may collapse. Use a pastry scraper to keep the liquids from running off and to incorporate the last bits of flour into the dough. Don’t worry if it looks like a hopelessly rough and messy lump.

Kneading:
With the aid of the scraper to scoop up unruly pieces, start kneading the dough. Once it becomes a cohesive mass, use the scraper to remove any bits of hard flour on the work surface – these will make the dough lumpy. Knead the dough for about 3 minutes. Its consistency should be elastic and a little sticky. If it is too sticky to move easily, knead in a few more tablespoons of flour. Continue kneading about 10 minutes, or until the dough has become satiny, smooth, and very elastic. It will feel alive under your hands. Do not shortcut this step. Wrap the dough in plastic wrap, and let it relax at room temperature 30 minutes to 3 hours.

Stretching and Thinning:
If using an extra-long rolling pin work with half the dough at a time. With a regular-length rolling pin, roll out a quarter of the dough at a time and keep the rest of the dough wrapped. Lightly sprinkle a large work surface with flour. The idea is to stretch the dough rather than press down and push it. Shape it into a ball and begin rolling out to form a circle, frequently turning the disc of dough a quarter turn. As it thins outs, start rolling the disc back on the pin a quarter of the way toward the center and stretching it gently sideways by running the palms of your hands over the rolled-up dough from the center of the pin outward. Unroll, turn the disc a quarter turn, and repeat. Do twice more.

Stretch and even out the center of the disc by rolling the dough a quarter of the way back on the pin. Then gently push the rolling pin away from you with one hand while holding the sheet in place on the work surface with the other hand. Repeat three more times, turning the dough a quarter turn each time.

Repeat the two processes as the disc becomes larger and thinner. The goal is a sheet of even thickness. For lasagne, the sheet should be so thin that you can clearly see your hand through it and see colours. Cut into rectangles about 4 by 8 inches (10 x 20 cm). Note: Enza says that transparency is a crucial element of lasagne pasta and the dough should be rolled as thinly as possible. She says this is why her housekeeper has such strong arms!
Dry the pasta at room temperature and store in a sealed container or bag.

#2 Bechamel
Preparation Time: 15 minutes
  • 4 tablespoons (2 ounces/60g) unsalted butter
  • 4 tablespoons (2 ounces/60g) all purpose unbleached (plain) flour, organic stone ground preferred
  • 2&2/3 cups (approx 570ml) milk
  • Salt and freshly ground pepper to taste
  • Freshly grated nutmeg to taste
Using a medium-sized saucepan, melt the butter over low to medium heat. Sift over the flour, whisk until smooth, and then stir (without stopping) for about 3 minutes. Whisk in the milk a little at a time and keep the mixture smooth. Bring to a slow simmer, and stir 3 to 4 minutes, or until the sauce thickens. Cook, stirring, for about 5 minutes, until the sauce thickens. Season with salt, pepper, and a hint of nutmeg.

#3 Ragu Bolognese
The recipe is from The Traveler's Lunchbox

For the meat:
  • 1.5 lbs (700g) pork, or half pork and half beef (preferably organic, free-range)
  • 3 large cloves garlic, crushed
  • 1 tablespoon fresh rosemary, chopped1/2 teaspoon
  • salt
  • freshly-ground black pepper
    2 tablespoons olive oil
    4 oz (120g) pancetta, finely chopped
  • 1 large onion, finely chopped
  • 1 fat carrot, peeled and diced
  • 2 stalks celery, diced
  • 1/2 cup (125ml) whole milk
  • 1 cup (250ml) dry white wine
  • 3 cups (750ml) chicken stock, preferably low-sodium (if your stock is very salty dilute it with a little water before measuring)
  • 1/3 cup (80ml) tomato paste
  • 1 bay leaf
  • 1 tablespoon sugar

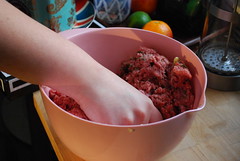
At least an hour and up to a day before starting to cook, knead together the ground meat, crushed garlic, chopped rosemary, salt and pepper. Cover and refrigerate.

In a large heavy pot over medium heat, heat the oil and add the pancetta, onions, carrot and celery. Cook, stirring frequently, until the vegetables are golden and have started to caramelize, about 25-30 minutes. Raise the heat to medium high and add the meat, breaking it up thoroughly with a fork and stirring constantly until medium brown in color, about 10 minutes. Add the milk, stirring until most of the liquid has evaporated. Add the wine, stock, tomato paste and bay leaf, stir well and bring to a boil.

Partially cover the pot, reduce the heat to low, and allow to cook at a gentle simmer for 2-3 hours. At the end of its cooking time the ragu should be juicy and thick, but not liquidy; if after two hours it still looks too wet, uncover and raise the heat slightly. Stir in the sugar, and adjust salt and pepper as needed. Keep warm.

Wednesday, March 25, 2009

Go ahead- Just ask

I don't think I have the ability to refuse a baking request. Last year a colleague casually hinted/requested my cheescake pops for her birthday and despite fully knowing that the process would take oh-i-dont-know- about 9 hours, I did it anyway. On a thursday night. I didn't even manage to finish them that night, so I had to wake up at 5am the following morning to coat each one in chocolate and sprinkles before wrapping them up and heading off to work. She was very grateful.

This weekend, the boyfriend had a much more simple request: "can you make me a cupcake?" Sure! What kind? I asked while grabbing my February edition of Martha Stewart Living which had a huge feature on cupcakes. He looked through the 8 page glossy spread and settlled on vanilla *beat* with vanilla icing.

To his merit, I'm not sure I've ever made plain ol' vanilla anything so I saw this as a true test- can I handle the basics of cupcakery?

Can you spot the fake couple monogrammed cupcake? downright classy.

Appropriately themed cupcakes for my sweetie. He's from the ocean!

Yellow Butter Cupcakes
Yet another recipe from Martha.
Cupcakes will keep, covered, for up to 3 days.
Makes 36.
  • 3 cups cake flour (not self-rising), sifted
  • 1 1/2 cups all-purpose flour
  • 2 1/4 teaspoons baking powder
  • 1 1/2 teaspoons coarse salt
  • 3/4 teaspoon baking soda
  • 9 ounces (2 sticks plus 2 tablespoons) unsalted butter, softened
  • 2 1/4 cups sugar
  • 5 large eggs plus 3 large yolks, room temperature
  • 2 cups buttermilk, room temperature
  • 2 teaspoons pure vanilla extract


Preheat oven to 350 degrees. Line standard muffin tins with paper liners. Whisk dry ingredients in a large bowl. Cream butter and sugar with a mixer until light and fluffy. Add eggs, 1 at a time, beating after each addition.


Reduce speed to low. Mix remaining wet ingredients in a bowl. Add dry ingredients to butter mixture in 3 additions, alternating with wet ingredients and ending with dry. Scrape sides of bowl. Divide batter among muffin cups, filling each full.


Bake cupcakes until testers inserted into centers come out clean, about 20 minutes. Let cool in tins on wire racks.


Bakerella's Buttercream
  • 1/2 pound (2 sticks) salted butter
  • 1 teaspoon vanilla
  • 1 pound powdered sugar
  • Cream or half-and-half for consistency

Cream butter and vanilla, then add powdered sugar in increments. Add cream or half-and-half to reach desired consistency. Color with gel food coloring as desired.

With love,

The Flying Quiche

Tuesday, March 24, 2009

The "Joys" of Cooking with Martha

When I moved back to the states and finally found an apartment, my mom treated me to a subscription to Martha Stewart Living. Now don't go thinking I'm a Martha fan or anything, but the woman has been in my life in some fashion for as long as I can remember. When we still lived in France, my mom treated herself to two international catalogue subscriptions: Vanity Fair and Martha Stewart Living. Since I was too young to care about any of the articles in Vanity Fair, I usually poured over Martha, taking in all the beautiful pictures and "good things".


One of the best "good things" I've come across in a while and it wasn't even a Martha suggestion!

Today I find her fascinating. She's everything I would want to be on paper- a good host, a great cook, living in a gorgeous house which she decorates and up keeps herself. But she has also been to jail and treats it like a funny anecdote. The fact that she pretends to do all this work on her own just boggles my mind. Her magazine usually lists her monthly calendar with her daily activities: March 23rd: prune the plum trees, March 24th: Bathe and groom the ponies. It's all a little ridiculous but I love it nonetheless.


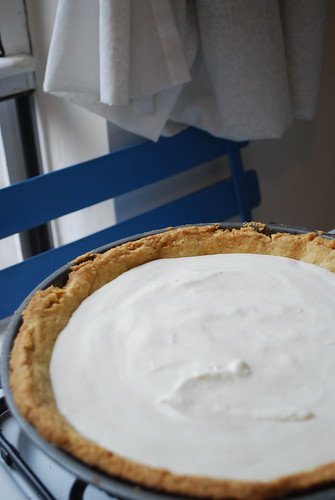
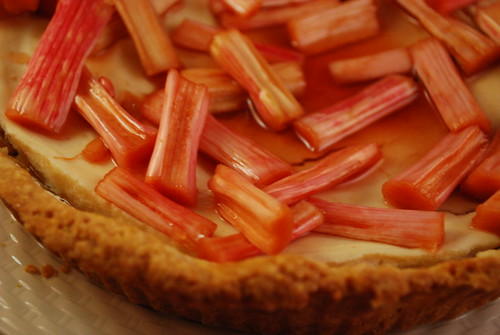
Lemon-Yogurt Mousse- be still my beating heart
Martha also has some notoriety among food bloggers for her less than reliable recipes. One of the first Daring Baker's Challenges was a Crepe Cake which caused severe trauma to several of the Bakers due to a faulty crepe recipe. Anyone who has ever made crepes before, knows that the recipe should not be the challenge- just the flipping. You can read about one Daring Baker's horrific experience here.

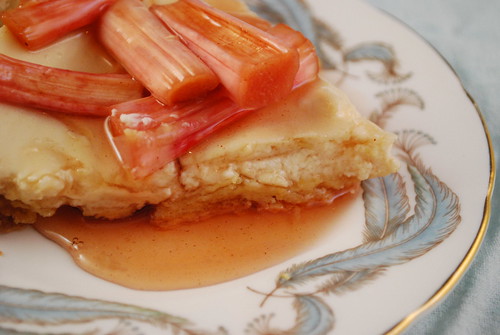
Despite my mom signing me up back in January, I didn't receive my first issue until March and it included a recipe for a Rhubarb Tart with Lemon-Yogurt Mousse that sounded too good to be passed up. As it was the "desert of the month", it is quite lenghthy and complex, but I would say it was almost worth the effort and not worth the cost. The cornmeal crust was a breeze to make and pretty tasty while the lemon mousse was pretty fantastic. The rhubarb however.... it cost me $7 for 1.5 pounds (from whole foods... *grumble*) and it remained stringy. If I made this again, I would omit the rhubarb and somehow make the accompanying reduction because that stuff was downright sinful.


Rhubarb Tart with Lemon-Yogurt Mousse
This lovely recipe for rhubarb tart with lemon-yogurt mousse can be found in the March 2009 issue of Martha Stewart Living.
Serves 8; makes one 10-inch tart.

FOR THE CORNMEAL CRUST
  • 1 3/4 cups all-purpose flour, plus more for parchment
  • 3/4 cup coarse yellow cornmeal
  • 2 tablespoons granulated sugar
  • 1 teaspoon finely grated lemon zest
  • 1/4 teaspoon coarse salt
  • 8 ounces (2 sticks) cold unsalted butter, cut into 1/2-inch pieces
  • 2 large egg yolks
  • 3 tablespoons water

FOR THE LEMON-YOGURT MOUSSE

  • 1 teaspoon unflavored gelatin
  • 1 tablespoon cold water
  • 3/4 cup plus 1 tablespoon heavy cream
  • 3 tablespoons light-brown sugar
  • 1 1/2 cups whole plain yogurt
  • 1 tablespoon finely grated lemon zest
  • Pinch of coarse salt


FOR THE RHUBARB TOPPING

  • 2 cups granulated sugar
  • 1/3 cup water
  • 1 cup brandy
  • 1 cinnamon stick
  • 7 whole black peppercorns
  • 1 teaspoon pure vanilla extract
  • Pinch of coarse salt
  • 1 1/2 pounds rhubarb, halved lengthwise and cut into 1 1/2-inch pieces
  • 1 tablespoon fresh lemon juice
Directions
Make the cornmeal crust: Process flour, cornmeal, granulated sugar, lemon zest, and salt in a food processor until combined. Add butter, and process until mixture resembles coarse crumbs, about 20 seconds. Beat yolks and water in a small bowl. With machine running, pour yolk mixture into flour mixture; process until just combined, about 20 seconds. Shape dough into a disk; wrap in plastic. Refrigerate for at least 1 hour or up to 2 days.

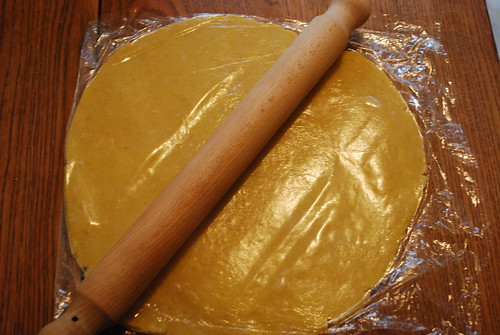
Preheat oven to 375 degrees. Roll out dough on lightly floured parchment to 1/4-inch thickness. Fit into a 10-inch springform pan. Refrigerate until dough is cold and firm, about 20 minutes. Line dough with parchment, and fill with pie weights or dried beans. Bake until edges begin to turn gold, about 25 minutes. Carefully remove weights and parchment. Reduce oven temperature to 350 degrees, and bake until golden brown, 20 to 25 minutes. Let cornmeal crust cool in pan on a wire rack.

Make the lemon-yogurt mousse: Sprinkle gelatin over cold water in a small bowl, and let stand until softened, about 5 minutes. Combine 1 tablespoon cream and brown sugar in a small saucepan over medium heat, stirring until sugar is dissolved and mixture is warm. Stir in gelatin mixture, and remove from heat. Combine yogurt, lemon zest, and salt in a medium bowl. Add brown-sugar mixture, and whisk until smooth. Whisk remaining 3/4 cup cream in a medium bowl until medium peaks form. Gently fold cream into yogurt mixture.

Pour lemon-yogurt mousse into cornmeal crust. Cover, and refrigerate overnight or until firm.
Make the rhubarb topping: Bring granulated sugar and water to a boil in a medium saucepan, stirring until sugar dissolves. Cook, undisturbed, until light amber, about 7 minutes. Remove from heat; add 3/4 cup brandy, the cinnamon stick, peppercorns, vanilla, and salt. Return mixture to a boil for 1 minute, then stir in rhubarb. Bring back to a boil, reduce heat, and simmer, stirring occasionally, until rhubarb is just tender, about 2 minutes. Remove from heat, stir in lemon and remaining 1/4 cup brandy. Cover; let stand 5 minutes. Transfer to a bowl and refrigerate until chilled, about 4 hours. Strain, reserving liquid, and discard cinnamon and peppercorns. Boil reserved liquid in a medium pot until reduced to 1 1/2 cups, about 4 minutes. Let cool.

Spoon the strained rhubarb over the mousse, and serve immediately with the rhubarb reduction on the side.

Just scrape off that rhubarb and you're good to go ;)

Friday, March 20, 2009

Stumbled across this picture this morning..

And it took my breath away.

And you can rent this villa here


When my family lived in the South of France, our house had this view but we were perched higher up and a little more to the left. The house itself was a fantastic mess- built over 4 levels you had to walk down a flight of steps to get into the kitchen, then down another flight into the family room, up another set to get to my bedroom and up yet another flight to access my parents room. In fact the only way for me to get to the kitchen without using the stairs, would have been to walk through the courtyard or walk around the house from the exterior- although I still would have had to walk down the stair directly outside my windows. For you see, my parents chose this house precisely because you could see this view from every room. When my brother and I were first shown the house, my mom took me to my new room, flung open the windows and in a sort of Lion King moment said: “You get to see this view every morning and every morning feel like you own the world.”

We did not get along with the owners of the house. They were a crazy couple who constantly fought with each other and the fact that they owned a house together did not seem to make things easier for them. For some reason, they gave us free reign to alter/improve the house as we saw fit and once my mom found out that the woman didn’t like green, she painted just about anything that needed paint green- forest green for the banister in the dinning room and the stair case leading up to the kitchen and olive green for every square recess detail on all the French windows. And it looked good too! The only time my father protested her painting was when she managed to paint, in one afternoon, our 15 foot chimney a lovely burnt orange color. His problem with the newly painted fireplace stemmed from its shape because it ended up looking like a huge Orangina bottle. My brother and I loved it.

Last July I was lucky enough to meet up with some of my French family in Nice and Monaco for my dad’s birthday. I hadn’t been in the south of France in about 6 years and the experience was unexpected: it was a homecoming. I never knew until then that the closest thing I’ve ever known to a home town was living in the south of France. I spent that extended weekend with a stupid grin on my face realizing just how much I had missed that place and thankful that I still have family living there.

Even if they are French and wear speedos.

Wednesday, March 18, 2009

Chocolate and Banana Ice Cream

The most recent Daring Baker's Challenge was to make a flourless chocolate cake and handmade ice cream. The cake was a cinch, but as I don't have an ice cream maker, I was a little dubious about hand churning. I really can't stand icy ice cream and couldn't fathom how I could make this work in my favor. Since February flew by in about 4 hours, I never had time to find out, but having done some research on the subject, I was led to Ice Cream guru David Lebovitz's blog and this fantabulous recipe. Seriously, this stuff came out so well that I've already made it three times meaning March is already kicking February's ass.


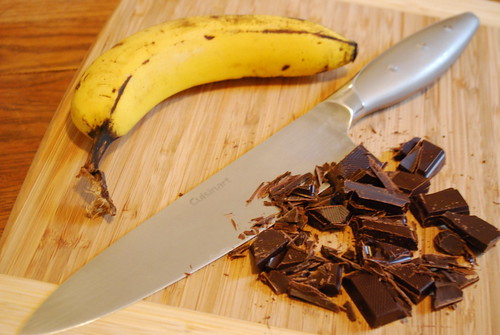
1 ripe banana and some chopped up bittersweet chocolate

Secret Ingredient. Maybe I should have posted this yesterday....


Melt the chocolate with the milk and pour into a blender


Add in the chopped banana, baileys and rum

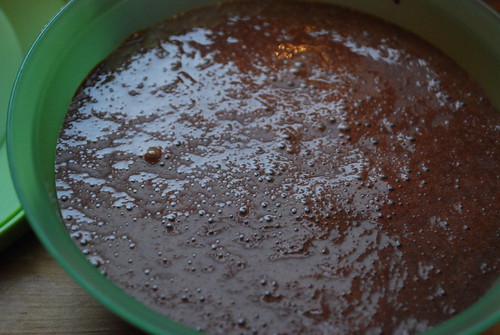
Blitz

So silky smooth already!

CUT TO: four hours later

YUM!

Chocolate and Banana Ice Cream
From this recipe by David Lebovitz
  • 2 ounces (55 g) bittersweet or semisweet chocolate, chopped
  • 6 tablespoons (80 ml) milk, whole or low-fat
  • 6 tablespoons (80 ml) Baileys liquor
  • 1 medium-sized ripe banana, peeled, and cut into chunks
  • 1 tablespoon (15 ml) dark rum

1. In a small bowl set over a pan of simmering water (or in the microwave), melt the chocolate with the milk.
2. Blend the melted chocolate the Baileys, the banana, and rum until smooth.
3. Pour into a plastic or metal container, cover, and freeze for at least 4 hours.


Monday, March 16, 2009

Croque Monsieur

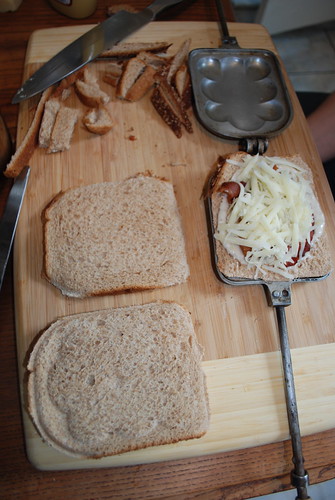
My recent trip to Paris was so jam packed full of work that I missed out on having my French staple: the Croque Monsieur- so I had to remedy the situation as soon as possible. I decided to use an old contraption I had grabbed out of my mom's garage- a contraption I wrongly assumed was an antique croque monsieur maker. After several failed yet delicious attempts, I'm gonna just have to accept that this might just be an antique panini maker.


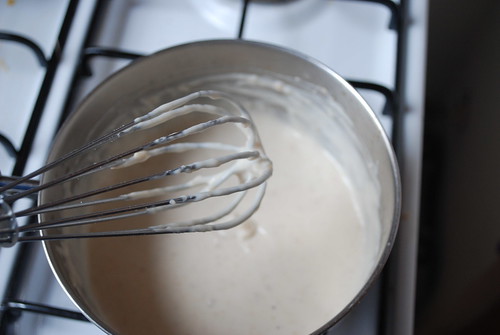
Start by making a Bechamel Sauce. Mine was a little lumpy...didn't whisk hard enough!


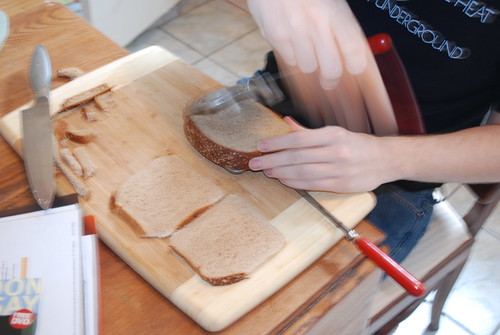
Shaping the bread to fit

It's easiest to snap it shut and cut around the edges.


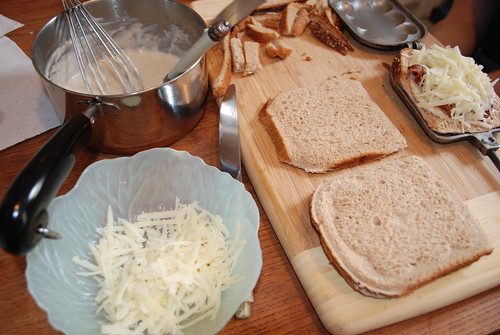
Bechamel sauce, shredded Gruyere, whole wheat bread and bacon. Ain't nothing wrong here!


Croque Monsieur

From this recipe by Ina Garten

When making this recipe, I halved it and (to my boyfriend's dismay) used bacon instead of Virginia Ham. It was still quite tasty.

  • 2 tablespoons unsalted butter
  • 3 tablespoons all-purpose flour
  • 2 cups hot milk
  • 1 teaspoon kosher salt
  • 1/2 teaspoon freshly ground black pepper
  • Pinch nutmeg
  • 12 ounces Gruyere, grated (5 cups)
  • 1/2 cup freshly grated Parmesan
  • 16 slices white sandwich bread, crusts removed
  • Dijon mustard
  • 8 ounces baked Virginia ham, sliced but not paper thin


Preheat the oven to 400 degrees F.
Melt the butter over low heat in a small saucepan and add the flour all at once, stirring with a wooden spoon for 2 minutes. Slowly pour the hot milk into the butter–flour mixture and cook, whisking constantly, until the sauce is thickened. Off the heat add the salt, pepper, nutmeg, 1/2 cup grated Gruyere, and the Parmesan and set aside.
To toast the bread, place the slices on 2 baking sheets and bake for 5 minutes. Turn each slice and bake for another 2 minutes, until toasted.
Lightly brush half the toasted breads with mustard, add a slice of ham to each, and sprinkle with half the remaining Gruyere. Top with another piece of toasted bread. Slather the tops with the cheese sauce, sprinkle with the remaining Gruyere, and bake the sandwiches for 5 minutes. Turn on the broiler and broil for 3 to 5 minutes, or until the topping is bubbly and lightly browned. Serve hot.

Délicieux !

Monday, March 9, 2009

Chocolate-Dipped Strawberry (cake)

As we have already assessed, February kinda flew by for me which goes no where to explaining why I'm posting about my Valentine's Day cake now. Better late than never, right? Plus I have to thank Jen from Use Real Butter for posting this cake on her blog and making me drool over it ever since. I wanted to use her recipe, but she is super precise and gives weight measurements and I don't have a scale yet *shame* also- the chiffon cake has been adapted for high altitudes. And because my internet kept cutting out, I really had no choice but to go with different recipes but this is still definitely her cake.


Starting off with some super expensive out of season but delicious strawberries.

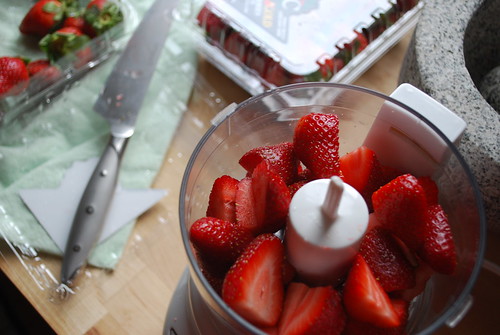
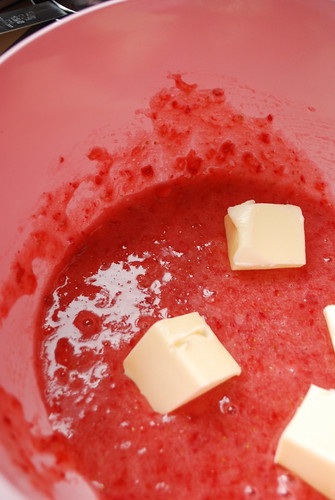
Pured in a food processor and getting ready to beat in some butter.
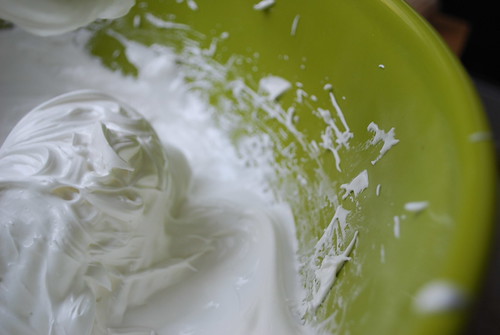

Making some swiss meringue for the swiss meringue buttercream


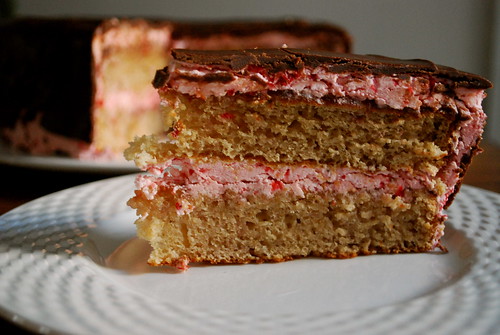
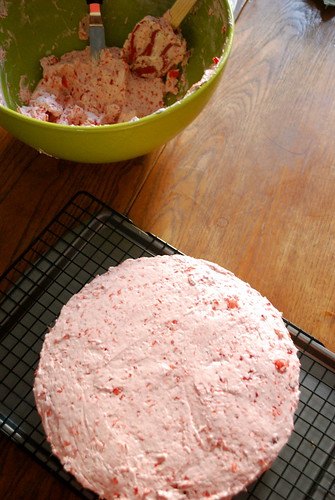
The finished strawberry buttercream and a frosted cake.


mmmmmh strawberry


Then I had to go run some errands and came back after the sun had set which was tragic in terms of picture taking.


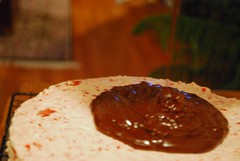
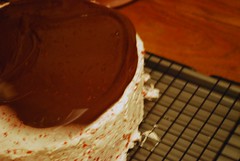
I was an idiot and didn't have the right ingredients for a chocolate glaze, so I went with a chocolate icing recipe from my Larousse Gastronomique and it was spectacular.


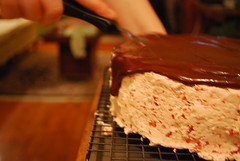
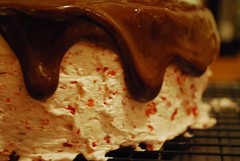
delicious dripping


Chocolate-dipped Strawberry Cake
Inspired by this recipe from Use Real Butter

1 strawberry chiffon cake (9-inch or whatever you want)
1-3 cups strawberry swiss meringue buttercream (depending on size of cake)
strawberry jam
chocolate icing


Strawberry Chiffon Cake

Adapted from this recipe from Martha Stewart
I can't actually remember what recipe I ended up using and I don't think it was a chiffon cake. But here is one that would work well and I will probably try next time.
Makes one 7-inch cake

  • 3/4 cup cake flour, (not self-rising)
  • 1/4 teaspoon baking soda
  • 1/4 teaspoon salt
  • 3/4 cup plus 1 tablespoon granulated sugar
  • 3 large eggs, separated
  • 1/4 cup vegetable oil
  • 1/2 teaspoon pure vanilla extract
  • 1/4 teaspoon cream of tartar
  • 3-4 oz strawberry puree (strawberries run through a blender)


Heat oven to 325 degrees and have ready an ungreased 7-inch tube pan. In a medium bowl, sift together flour, baking soda, salt, and 3/4 cup granulated sugar; set aside.


In a large bowl, whisk together egg yolks, vegetable oil, 1/3 cup water, strawberry pure and vanilla. Add reserved dry ingredients, and beat until smooth.

In the bowl of an electric mixer, beat egg whites on medium speed until foamy. Add cream of tartar; beat on high speed until soft peaks form, about 1 minute. Gradually add remaining tablespoon of granulated sugar; beat on high speed until stiff peaks form, about 2 minutes.
Gradually fold egg-white mixture into the batter; start by folding in 1/3, then fold in the remaining 2/3. Pour batter into pan. Using an offset spatula, smooth the top.


Bake until a cake tester inserted in the middle comes out clean and the cake is golden, about 45 minutes.

Remove cake from oven; invert the pan over a glass soda bottle for 2 hours to cool. Turn cake right-side up. Run a table knife all the way down between cake and pan; invert again, and remove cake.

Strawberry Swiss Meringue Buttercream

Adapted from this recipe from Martha Stewart
  • 5 large egg whites
  • 1 1/4 cups of sugar
  • 2 cups (4 sticks) unsalted butter at room temperature
  • 1 teaspoon Vanilla extract
  • 1/4 teaspoon coarse salt
  • 1/2 cup strawberry puree


Combine egg whites, and sugar in the heatproof bowl of an electric mixer. Set bowl over a pan of simmering water. Whisk constantly until sugar has dissolved and whites are hot to the touch, 5 to 7 minutes.

Transfer bowl to the electric mixer. Using the whisk attachment, mix on low speed, gradually increasing to high speed, until stiff, glossy peaks form, about 10 minutes.

At low speed, add butter to egg whites, and beat until smooth. Add vanilla, strawberry puree and salt, and continue mixing until incorporated.

Chocolate Icing

Sift 100 g (4 oz, 1 cup) icing sugar. Melt 125g (4 1/2 oz) bittersweet chocolate in a bain marie, working it with a wooden spoon. Add the sifted icing sugar, then 65g (2 1/2oz, 5 tblsps) softened butter cut in small pieces. Continue to stir until the mixture is completely melted and remove from the heat. Gradually stir in 100ml (4oz, 7 tblsps) cold water . Use the icing when slightly warm.


Assembly
Set first cake layer down, then spread a thin layer of jam and then spread a layer of buttercream. Repeat again and then top with the last layer of cake. Crumb coat the cake with buttercream. Refrigerate for an hour. Remove cake from refrigerator and set on a rack over a pan or wax paper (to catch the drips). Pour warm glaze over the cake from the center and radiate outward until entire cake is glazed.