Saturday, October 30, 2010

Halloween Round-Up

I sure do love Halloween. This year I had a Haunted Dinner for some friends and also helped organize a Halloween Party which was sorta busted by the cops twice. Now that's the sign of a good party if you ask me.


I've been meaning to dress up like Norma Desmond from Sunset Blvd. for years and the Haunted Dinner was the perfect opportunity. I didn't want to buy much to pull off the look and so I went with the outfit she's wearing in the first scene in which she appears. She wrongly assumes that Joe Gillis is here to bury her dead monkey. She thinks the monkey should be buried in a pink lined-coffin. It's creepy right from the start! Here's Norma:


And here's what I came up with:


I think it worked out really well and I would definitely dress up like this again. I wore a long black silk skirt and a black wrap sweater. I piled on all the gold bracelets I could find and wouldn't ya know that I already had a turban. All I had to buy was a piece of animal print fabric ($1.50 at Joanne's) and some nifty sunglasses ($4.99 at Five Below).


For the Haunted Dinner I wanted to make a really over-the-top indulgent desert- something with candy. I went for what Betty Crocker called a Trick or Treat Cheesecake. I'm not really into cheesecake but this felt right and lemme tell you that it also tasted right!


It's essentially a regular cheesecake with a chocolate wafer crust, but you dump in about 20 fun size candy bars and they settle at the bottom of the crust, making this a really decadent desert. I went with Butterfingers, Snickers & 100 Grand bars. It was awesome.


I'm not sure I had ever used a Betty Crocker recipe before, mostly because it's not really my style, but this one had a great tip: When you preheat your oven place a cookie sheet half filled with water on the lower rack. I really didn't understand it at first and thought that maybe I'd be submerging the cheesecake into the water later, but what it did was provide a great place for cheesecake drippings to fall with making a mess or burning. It might also have helped keep the oven moist so the top of the cheesecake wouldn't crack.

Perfect!

Trick or Treat Cheesecake
Adapted from Betty Crocker

  • 1 1/2 cups crushed chocolate wafer cookies (about 25 cookies)
  • 1/3 cup sugar
  • 1/3 cup butter or margarine, melted
  • 2 packages (8 oz each) cream cheese, softened
  • 1 can (14 oz) sweetened condensed milk (not evaporated)
  • 3 eggs
  • 2 teaspoons vanilla
  • 20 bars (fun-size) candy, unwrapped, cut into quarters (about 2 cups)
Heat oven to 300°F. Spray 9-inch springform pan with cooking spray. Place deep cookie sheet half full of hot water on lower oven rack.


In medium bowl, mix cookie crumbs, sugar and butter. Press into the pan. In large bowl, beat cream cheese and sweetened condensed milk with electric mixer until smooth. Beat in eggs, one at a time, just until combined. Stir in vanilla and candy. Pour into crust.

Bake 40 to 50 minutes or until edge of cheesecake is set at least 2 inches from edge. The center should still jiggle slightly! Turn oven off; open door at least 4 inches. Let cheesecake remain in oven 30 minutes. To loosen cheescake, run a knife or metal spatula around the edge of pan. Cool in pan on cooling rack 30 minutes. Refrigerate at least 6 hours or overnight.


You really only need a small slice. I promise.

Thursday, October 28, 2010

Let the Holiday Baking Season BEGIN!


I hope you've been enjoying the weather and season just as much as I have. There's just something about Autumn in Virginia. Although I really enjoyed New York and London in the fall, they just can't compete with the luscious landscapes around these parts. I keep thinking that if I'm ever going to get into a car accident, it will be because I can't help but stare at a gorgeous sugar maple or beech tree.


A few weekends ago, Kris and I took a bit of a road trip through the Shenandoah valley. We took back roads and ogled at the fall foliage, visited Montpelier and discovered a few gems along the way. One of which is the Moo Thru off of James Madison Highway in Remington, VA.

I'm lucky to have a boyfriend with such mad reflexes because this little shop is in the middle of nothing and will fly by you if you're not paying attention. And when I say, middle of nowhere, I mean it. But they must be doing something right because their little parking lot was just about full. Once we had a bite, we understood. The shop's motto is "Real Ice-Cream from Real Dairy Farmers" and they are not playing around. Guys, it was awesome. I got one scoop each of pumpkin and cinnamon.


Kris got a real chocolate milkshake. Something that tastes like chocolate more than it does like sugar. If I had been paying attention, I would have realized that you can also buy milk and chocolate milk to take home! I deliberated for a few minutes whether to hop back in line to do just that!


All to say that if you're ever in the area, stop by the Moo Thru. James Madison Highway is also quite lovely and takes you through really quaint towns. It was a great way to spend a Sunday. But what I'm really here to tell you about are these Caramel Apple Sticky Buns I made for that same weekend! Here's how they go:


Make your dough and let it rise. The dough actually took me 12 minutes. I know this because I woke up with 14 minutes until the Martha Stewart show was going to start and managed to make this dough without missing a second. And no, I'm not obsessed with Martha. I just really like what she (her team) does...

Next, roll out your dough, trying to approximate a long skinny rectangle. It's hard, but just give it a go. Spread melted butter on the dough and then liberally sprinkle on sugar and cinnamon.

At this point, you will have already made the caramel sauce, poured it into the pan and sprinkled a chopped apple over top.

Roll up your dough and cut it into 1-1.5 inch rolls. The width of your rolls is going to depend of the depth of your pant. I figured this out by pan #2. 

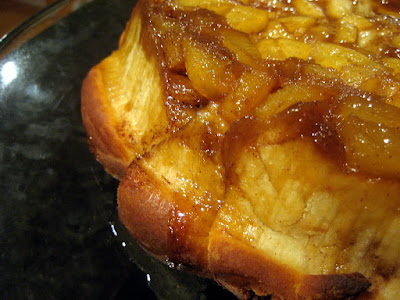
Bake and flip to reveal some AWESOME apply sticky buns!


You can even freeze the baked rolls until later. Just put the frozen buns into a 250 degree oven and bake until heated through- about 35-45 minutes.This would be a shot of me and my college buddies enjoying the buns later. A delicious mess!

Caramel Apple Sticky Buns
Adapted from The Pioneer Woman
Makes 2 9 inch pans full of buns.
I would honestly double it next time and freeze the extra.

For the Rolls:
  • 2 cups Whole Milk
  • ½ cup Sugar
  • ½ cups Canola Oil
  • 1 package (2 1/4 Teaspoons) Active Dry Yeast
  • 4-½ cups Flour, Divided
  • 2 teaspoons Salt
  • ½ teaspoons (scant) Baking Soda
  • ½ teaspoons (heaping) Baking Powder
For the filling:
  • ¾ cup Sugar
  • ¾ cup Melted Butter
  • 4 Tablespoons Ground Cinnamon
 For the Caramel Sauce:
  • 1 stick Salted Butter
  • 1-½ cup Packed Brown Sugar
  • 1 Tablespoon Dark Brown Corn Syrup
  • 2 Tablespoons Cream
  • 2 Tablespoons Apply Brandy Or Apple Juice (optional)
  • 2  Apples, Peeled And Finely Diced
To make the dough:
You could easily do this entire process in the metal bowl from your stand mixer by starting with the bowl in a double boiler and using the hook attachment. Heat milk, oil, and 1/2 cup sugar until warm (do not boil.) Allow to cool to lukewarm. Sprinkle in yeast and 4 cups flour. Stir gently and cover with a tea towel, allowing it to rise for 1 hour. After 1 hour, add remaining flour, baking soda, baking powder, and salt. Set aside.


To make the caramel topping:

Add 1 stick butter, brown sugar, corn syrup, cream, and optional apple brandy to a small saucepan. Allow to melt over low heat until totally combined. Boil for a few seconds, then remove from heat. Set aside.


To make the rolls:
Roll out half the dough into a large rectangle. Pour on half the melted butter, half  the sugar, and half the cinnamon. Roll into a long roll, pinch the edges together to seal in the filling and then slice into rolls.

To assemble:
Pour half the caramel topping into a 9 inch cake pan. Sprinkle diced apple over the top, then arrange sliced rolls all over the pan. Allow to rise for 20 to 30 minutes.

Bake at 375 degrees for 30 to 35 minutes, covered in foil for the first 25 minutes.

Thursday, October 21, 2010

Curing the Sick


Is there anything more comforting than Chicken Noodle Soup, or Chicken and Dumplings? Or even Chicken Noodle Casserole? I didn't think so. According to a recent episode of Jeopardy, Chicken Noodle Soup is known as Jewish Penicillin. I quite agree. As I mentioned in my last post, I have a sick boy on my hands. Luckily, I had just about everything on hand to make this version of Chicken and Dumplings. Full disclosure, I had never made dumplings before. Never really ate them much either. I guess my family is more noodle soup than dumplings. But this was really delicious. The dumplings are way comforting. and salty. This is definitely staying in the repertoire and I can't wait to try it again with my adjustments.  

 Making a tasty broth

 Boiling down the broth to enhance the flavor

Dropping dumplings!

 Adding the meat and veggies back in

No species can resist

Chicken & Dumplings
Loosely based on Mad Hungry
I adapted the recipe so that you don't end up with so many coarsely chopped vegetables in the final product. The trick was to make sure that the broth got flavored but that the veggies don't get soggy by the time the chicken is done. The solution? Two batches of vegetables. It's not wasteful- it's tasty. You could always save and eat the coarsely chopped veggies if you wanted. I just don't like that much turnip in one bite!

For the Chicken
  • 4 chicken thighs
  • 1 onion, halved but root end left intact
  • 1 large carrot, coarsely chopped
  • 1 celery stalk, coarsely chopped
  • 4 sprigs of fresh parsley or thyme 
  • 1-2 turnips and parsnips coarsely chopped  
  • 8 to 10 cups water
  • 1 tbls coarse salt
  • 1 chicken bullion cube
  • 1 large carrot diced
  • 2 celery stalks diced
  • 1 cup peas
For the Dumplings
  • 1 cup all-purpose flour
  • 2 tsp baking powder
  • 1/2 tsp coarse salt
  • 3/4 cup milk  
  • 1 tsp dill, fresh or dried
Add the chicken to a large pot with a lid. Add the coarsely chopped vegetables (onion, carrot, celery, parsley, turnip, and parsnips) to the pot and barely cover with the water.

 
Bring to a boil over high heat, reduce the heat to a simmer, partially cover, and simmer for 30 minutes. Lift out the chicken and vegetables. Discard the vegetables and herb sprigs, reserving the onion. Chop the onion and return it to the broth along with the diced carrot, celery and peas. Continue to simmer the broth for 15 to 20 minutes until the vegetables are tender. Add the salt and bouillon cube. When the chicken is cool enough to handle, remove the meat, shredding it into large pieces.

 
To make dumplings, in a small bowl, whisk together the flour, baking powder, and salt. Stir in the milk and herbs to combine.

 
Drop the dough, 1 tablespoon at a time onto the simmering broth. Cover and cook until the dumplings have cooked through 3 to 4 minutes. Carefully return the shredded chicken to the pot. Reheat for 1 minute or so.

Tuesday, October 19, 2010

Halloween Inspiration

The boxes are out and the decorations are going up. I'm feeling especially crafty this year so here is where I've been turning to recently for some more inspiration on decor for the season:


And how about a recipe to get you even more inspired? I made this yesterday morning for a sick boy. He was just lucky that I had some stale bread. And some Pumpkin Butter.


Pumpkin Butter Stuffed French Toast
For 2 people

Ingredients
  • 3 eggs
  • Milk
  • Pumpkin Pie Spice- or apple pie spice or just a dash of nutmeg, cinnamon and ginger
  • Stale wholewheat Portuguese Bun Bread- or whatever you have that you can slice
  • Pumpkin Butter- got mine from Trader Joe's
  • Butter
  • Maple Syrup
Make your batter by combining the eggs with a couple glugs of milk in a shallow bowl. Add in the spices and whisk well. Slice your bread thick- about an inch. Cut a pocket into the middle of the bread. Squeeze the bread to open the pocket and fill with a couple tablespoons of Pumpkin Butter. Careful though- not too much! My butter was quite savory. Heat a couple tablespoons butter in a skillet. Place your bread in the egg mixture. let set for 10 seconds and flip to let stand for another 10 seconds. Once the butter has stopped foaming, add the eggy toast. Let sit for a few minutes. Once it is golden brown, flip the toast and continue cooking until golden brown. Serve with maple syrup.

Might want to consider the Grade B type of Maple Syrupr. Do you know the difference? I didn't- until now!

Monday, October 18, 2010

What's not to like? Potatoes on the Brain

This is such an easy recipe. You should really just make this tonight. And if your fridge is anything like mine, then you already have everything you need: potatoes (maybe a parsnip or two), cream, thyme, salt and pepper. I added dollops of butter on top before putting it in the oven but I think it was totally unnecessary. 


I also added jarlsberg on top for the last 15 minutes and this was pretty tasty, but I think it too is not essential. The beauty is in the simplicity. Just good ingredients, composed in a simple way.


Don't forget to properly season the vegetables!


 With a fresh garlic sausage, this was a pretty delicious meal. I urge you to give it a try.


Potato & Turnip Gratin
Adapted from Martha Stewart

Ingredients
  • About 2 pounds of potatoes and turnips. Peeled and thinly sliced. I used baby russets, sweet potatoes and turnips.
  • Butter for greasing the dish
  • 3 sprigs of a robust herb, such as a thyme
  • 2 cups heavy cream
Heat oven to 375 degrees and butter a 9 x 13 baking dish. Start by infusing the cream. Bring 1 1/2 cups cream and thyme to just under a boil in a small saucepan, then remove from heat and let stand 30 minutes. Strain the cream and discard thyme

Arrange the potato and turnip slices so they overlap, alternating between the different vegetables. Pour the infused cream over top (it should almost cover the vegetables; add the extra 1/2 cup if necessary) season with salt & pepper and cover tightly with parchment and then foil.

Bake until vegetables are tender, about 45 minutes, then remove foil (this would be a good to add cheese, such as jarlsberg, if wanted) and bake until golden brown and bubbling, about 15 minutes more.
 

Try not to eat it all at once!

Wednesday, October 13, 2010

Can't get enough Maple Syrup

I've a had couple great meals this weekend and some of the dishes have really stuck with me. Oh and look at what I just did, because- ha. ha- both of these recipes are centered around Maple Syrup!  At Birch & Barley in Washington, D.C. I had a ridiculously good side dish of Maple Brussel Sprouts. Kris was literally drooling over them. Each sprout was cut into quarters and seared to the point of burning on a side or two. But each piece was just bursting with maple flavor. Is it possible to brine veggies in a maple marinade?! So tasty without being sweet. Kris is hoping that the bar on the upper floor serves this as bar food. I haven't found any recipes directly from the source, but here is one that looks similar. Gonna have to try that out.

The other maple dish we had this weekend was a Maple Custard from Diner in Williamsburg in New York City. The meal on the whole was excellent (fantastic burger- maybe Free-Range does have something to do with it?) although I still don't like that the menu isn't written down anywhere. The waiter usually sits down with you and tells you about the menu while writing down the main component on the paper tablecloth. They won't even give you the prices unless you ask! But back to the desert- which I think was $8- It was tremendous. Pure maple flavor with a creme brulee consistency. I will definitely be trying to replicate this one asap and here is a good place to start: Maple Custard Cups on Epicurious.

Tuesday, October 12, 2010

Bummer

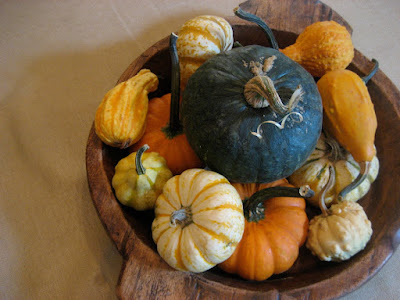
How many gourds have you gotten thus far? I can't seem to stop myself. They are all so beautiful and add instant charm to the season.


Maggie can't seem to get enough of pumpkins either. I couldn't get a single focused shot of her.


Maybe she just likes the attention... 


I would really love to try growing my own pumpkins and squash next year and this is where I would go to get some heirloom seeds. I just wish I could go in person!


I bought this beautiful box of tomatoes fully intending to make Early Girl Tomato Jam which I saw on Martha Stewart last week as part of the Blue Chair Jam Cookbook. The recipe uses a different (supposedly older) method of canning, where you bake the jars in the oven instead of boiling them in a canning pot. Also, the jam looked amazing. Imagine, if you will, in the dead of winter, smearing some peppery tomato jam on toast and topping it with goat cheese? Or thinned out to use as a glaze on beef or pork chops? yum! Unfortunately, the end of last week vanished and then I was away this weekend. When I got home this morning ready to start blanching tomatoes, the whole box had pretty much turned to mush. It was pretty gross. And tragic. Oh! and the recipe has vanished from Martha's website (!!) so it seems that this was really not going to happen for me anyway. I'm trying to figure out if I would have been more upset if the tomatoes were still fine but the recipe was gone. probably not. Oh well!

Instead of a recipe, I thought I would share an interesting podcast I listened to on the long bus ride back: This History of Chocolate. Now that's bound to lift anyone's spirits. I'm off to buy one of those 2 pounds bags of mini snicker's for my ceramic pumpkin dish. Halloween is near!

Thursday, October 7, 2010

Midnight Food Cravings

Sometimes, if it's late and I can't fall asleep, I'll grab my computer and try to find something short to watch like the latest Modern Family or 30 Rock, but not on Tuesday. I got lost on Hulu and landed on the Paula Deen page. Having been deprived from cooking shows for some time, I take pleasure in watching these ridiculous 3min 45sec videos most of which involve frying. I've seen her make Mac & Cheese with a pound of beef in it, Fried Mac & Cheese, Country Fried Steak and Gravy, Symphony Brownies (a boxed brownie mix with a Symphony candy bar placed in the middle!) and the most incredibly thing I've seen her make is a Deep-Fried Bagel Sandwich where almost every component was fried- green tomatoes, the bagel halves and capers. Now don't think I'm hating on Paula right now, because that just wouldn't be true. I think it's safe to say that most of her creations are kinda wacky but in small doses, she can sure add a lot of flavor to a meal.

It was in one of these deep-fried stupors that Hulu automatically played a video that stayed with me- Sweet Potato Doughnuts. Have I told you that I recently bought 25 pounds of sweet potatoes from my farmer? yeah, I did. And I kinda wanted to make something for him but since he only does produce and I usually don't go around handing out savory bakes goods, I wasn't quite sure what to make- until Paula.

First thing to do? Bake, peel and mash up some of those white sweet potatoes


Then, you make it into an easy dough, roll it out and cut out the doughnuts with whatever approximation of a biscuit cutter you can find. I used a juice glass and for the holes, the wide end of a pipping tip.

Heat you oil (or as Paula says "Ohl") to 360 degrees and drop in your doughnuts


Dip the warm doughnuts in icing and some chopped pecans.
It just doesn't get much better than this


Sweet Potato Doughnuts
Adapted from Paula Deen
Depending on the size, makes about 25-30 doughnuts
  • 3 1/2 cups all-purpose flour
  • 1 cup sugar
  • 2 teaspoons baking powder
  • 1/2 teaspoon baking soda
  • 1/2 teaspoon ground cinnamon
  • 1/2 teaspoon salt
  • 2 large eggs, lightly beaten
  • 1 cup sour cream
  • 1 cup cooked mashed sweet potato (about 1 medium potato)
  • Vegetable oil, for frying
  • Maple Icing, recipe follows
  • 1 cup finely chopped pecans
In a medium bowl, combine flour, sugar, baking powder, baking soda, cinnamon, and salt. In a large bowl, combine eggs, sour cream, and sweet potato. Gradually add flour mixture, stirring to combine. Heavily flour your counter and hands before kneading the dough. Roll out dough to 1/2-inch thickness. Paula suggests cutting the dough out with a 2 1/4 inch round cutter, I used a straight edged juice glass of a similar size. The centers should be cut out with a 3/4-inch round cutter, I used a large metal pipping tip of about the same size. Re-roll dough as needed.

In a Dutch oven, heat vegetable oil over medium heat to 360 degrees F. Cook doughnuts, in batches, in hot oil, 2 minutes per side, or until lightly browned. Drain on paper towels. Ice top of doughnuts with Maple Icing, and sprinkle with chopped pecans.
Maple Icing:
2 2/3 cups confectioners' sugar
3 to 4 tablespoons milk
1/4 teaspoon maple extract

In a small bowl, combine confectioners' sugar and 3 tablespoons milk; stir well. Add additional milk to reach desired consistency. Stir in maple extract. If you can't find maple extract, try using about 3-4 tablespoons of maple syrup instead and only add milk as needed to thin out the icing.

And don't forget those doughnut holes!