
The family moved from the house right after I graduated from college and left for London, but not before I spent several days sorting through all of my arts and craps. Most of it was thrown out, some was packed up and now lives in the parents garage waiting for better days.
It's been about 2 years since I've crafted anything so last week, with Easter around the corner and the boyfriend out of town, I figured I should get back to it. With the new Martha Stewart Living magazine on the kitchen table, I decided to give this a try:

Because my kitchen is already pretty colorful and the branches I would be using would definitely not have blooms or greens, I decided to dye the eggs green- maybe throw in a couple white ones- you know, keep it simple.
Step 1: Blow out each individual egg and leave them out to dry.
easy enough right? no- not really. Unless you have a sharp utility knife and a rubber ear syringe. In my case, you poke holes with a needle (and please, whatever you do, don't make them too small!) and blow with your cheeks (and if you're holes are too small, you might just break some blood vessels in your cheeks, like me, so watch it).
Step 2: Dye eggs!
Now I can't exactly recall the last time I dyed eggs, but I certainly don't remember it being this difficult. Martha makes it look super easy- But let me tell you something: eggs float. And that means that makes for some uncooperative little buggers.
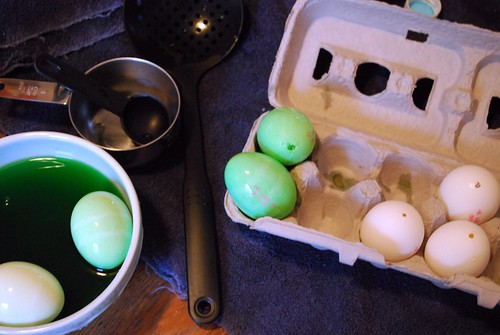
Martha suggests leaving eggs in for 5 minutes for a light color and 10 minutes for a darker color.
I say- go do your laundry and hope your eggs don't get a dark patch on their undersides.
I was aiming for a fresh springy green, but ended up with something too blue which no amount of yellow could correct-
 To finish them off- Martha says to thread some ribbon through the holes and tie it up with a pretty bow. As I only have normal sized needles, this was not happening. In fact, looking back at Martha's set-up, I'd say her needle is about as long as my middle finger... (yeah, I went there.)
I had to compromise by sticking a toothpick through the top to secure the ribbon then another one through the bottom so I could twist the ribbon and then tie the whole thing up like a package and hope it didn't fall off.
I guess it worked out in the end-
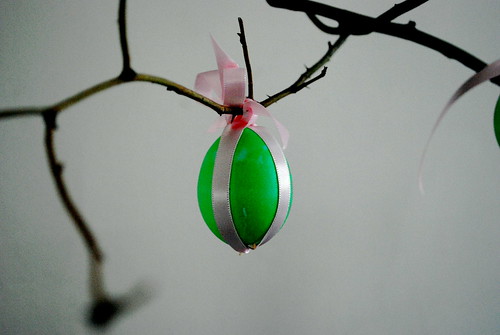 yeah- I'd say that looks just like Martha's picture...
 But even though I wasn't completely thrilled with my return to crafts, I have been enjoying not killing plants! look:
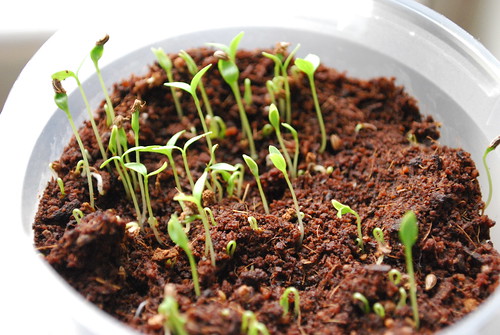
I might actually be growing something beyond garlic and that old onion in the bottom of the pantry! (who am I kidding, I don't have a pantry) Care to guess what these little beauties might one day become?
No comments:
Post a Comment