Showing posts with label winter. Show all posts

Friday, February 1, 2013

The January Blues

I'm trying to ease into a diet. I'm sure you can tell immediately how well I'm doing. The problem with having gone to culinary school is that I'm usually able to make a meal out of anything left in the fridge. And it's not usually very healthy...


Real florist work here: processing 1,000 roses. It smelled fantastic. My arms look like the cat clawed up me


Fried Bacon and Egg Sandwich
Try it with any cheese combo that sounds good. Blue cheese or cheddar would be a big winner here. 
  • 2 pieces of bread
  • 1 tsp canola oil
  • 3 pieces of bacon
  • 1 egg
  • 2 tbl cream cheese
  • 1 slice havarti
  • 2 slices gruyere
  • 1 scallion, cut on the diagonal
Toast your bread. Heat a large skillet over high heat. Add canola oil. Fry bacon in hot oil until crispy on both sides- about 3 minutes on each. Drain on some paper towels. Crack egg into a small bowl. Pour egg into hot bacon fat and fry for about 3 minutes. Finish the eggs by seasoning with salt and pepper and spooning the bacon fat over the egg yolk. If desired, drain the egg on more paper towel. Smear the cream cheese on the toast and top with the cheese. If necessary, throw the toast back into the toaster/ under broiler to melt the cheese. Top the cheese with a few pieces of scallion and the fried egg. 

Monday, January 28, 2013

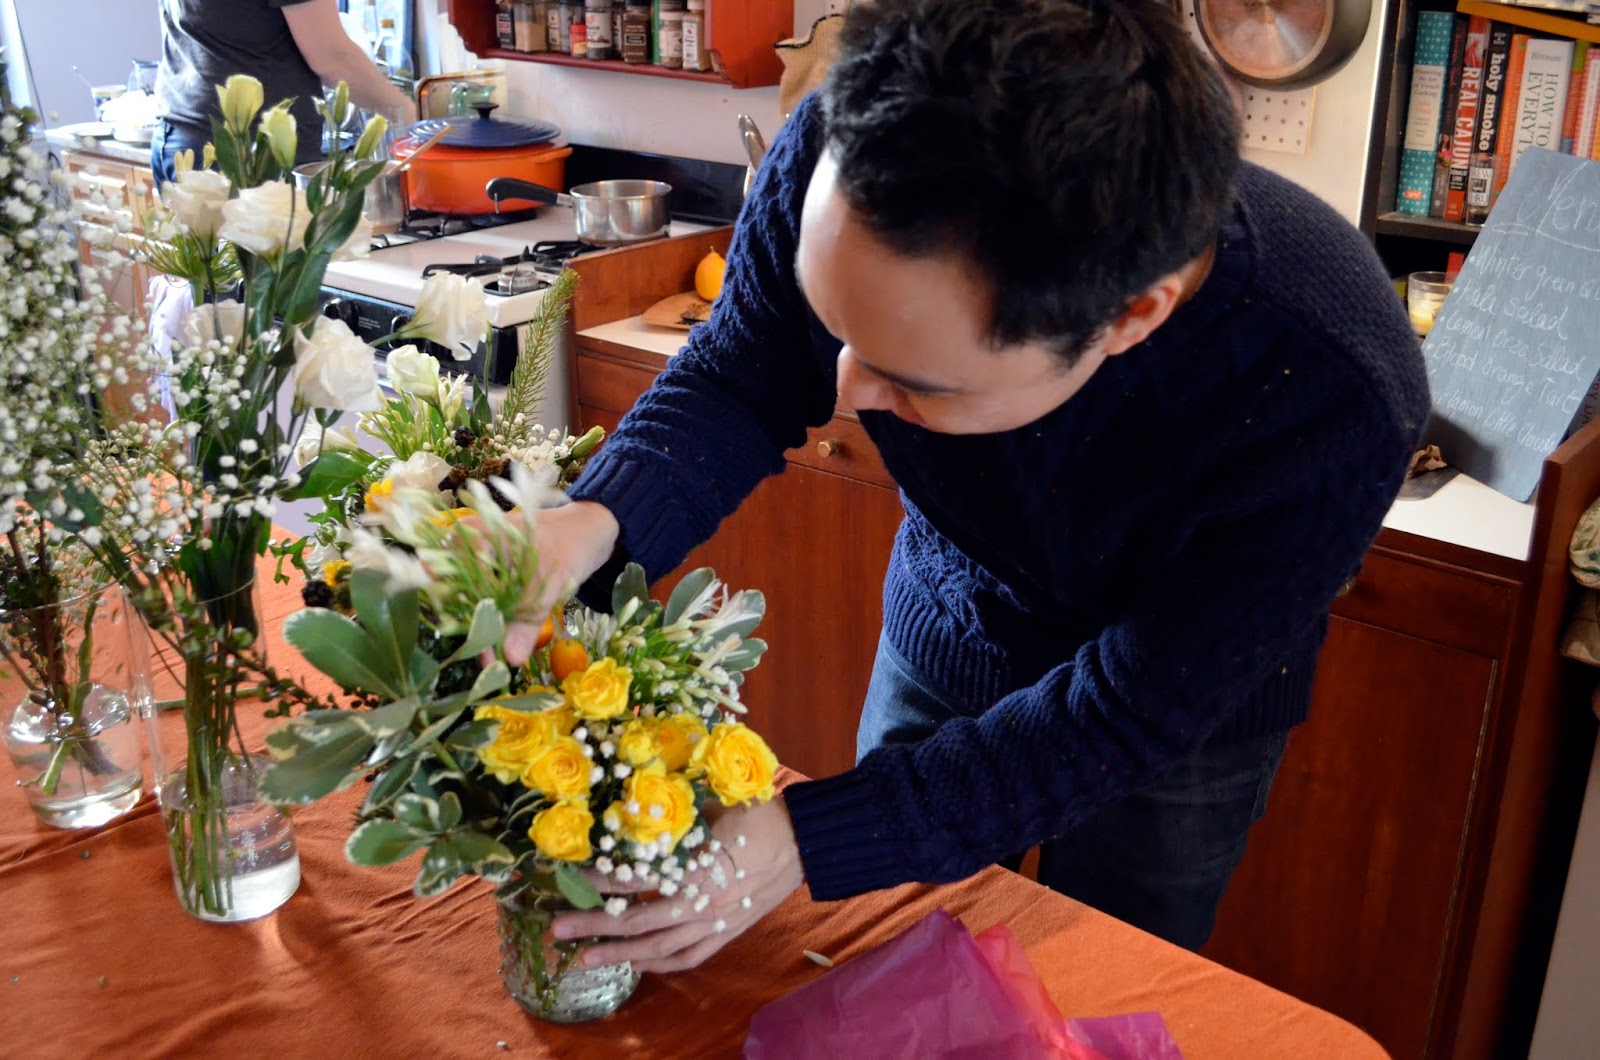
Flowers in the snow

2013 has been rough thus far. New year's eve was spent on the couch, one passed out, the other eating Velveeta cheese dip and watching Brave. Food poisoning soon followed and then some serious allergies (the world's subtle hint that I need to vacuum?)


But things are looking up. Rumor has it that it should be warming up around these parts and spending a morning with bright flowers and equally bright food and people is always a welcome diversion. 


Trying to bring back Baby's Breath


Sunday, January 15, 2012

Leftover Culinary Student Clam Chowder

My plan for feeding myself through culinary school was simple: family meal at school, leftovers from class and tuna fish sandwiches. I've done pretty well thus far but it turns out that I've had to change my plans somewhat since it looks like I could pretty mich live off of the bread left out from the bread making class. I've also been eating my homework. Julienned carrots, macedoined turnips or most recently: potatoes cocotte. When our chefs gave us the option of taking home some fish veloute sauce, I thought that I had just about everything to make some clam chowder. And I was right- All I had to buy was, well- the clams. 

Just some regular ol' sliced celery and carrots. Can you spot the cocotte potatoes? Swimming in their starchy water

Have I mentioned that I don't have a place to live yet? Or a job? Yeah- shit has been real round these parts but it's all good. Things are going to work out because- as the career services lady at school said: well, they just have to work out. Chowder is certainly a comfort food but for me it's also the soup that my mom made for Thanksgiving every year in France. She would have my dad bring back a few cans of clam chowder from the States and would doctor them up and serve it in a beautiful stoneware tureen. For years I had no idea that she didn't make this soup from scratch. I was shocked. But sometimes you have to make do with what you have or if you can't get what you want, you have to improvise. This is my improvised and indeed very comforting clam chowder. 


I'm sure I don't have to tell you that I didn't have a soup tureen in which to serve this, right? Ah well, I'll have time for that once I move into my own place. 

Almost perfect cocotte! Just another 50 or so potato and I should get it

Leftover Culinary Student Clam Chowder
This recipe is clearly not for everyone as you probably don't have leftover fish veloute lying around. To make it at home, buy 2 cans of clams and use the juice from both cans and adjust with cream or milk as needed. You can also add the clams from both cans instead of just one. If you don't feel like learning to cocotte a potato, just peel and dice 2 potatoes into roughly the same size. 

  • 2 tablespoons butter
  • 2 shallots, minced
  • 3 stalks of celery, sliced
  • 2 carrots, sliced
  • 4 cups fish veloute
  • 1 cup heavy cream
  • 10oz can of clams in their juices
  • 12 cocotte potatoes (or 2 potatoes peeled and diced)
  • Salt + Pepper
In a dutch oven or medium-low heat, melt the butter. Add the shallots and slowly sauté until translucent. Add the carrots and celery and continue to cook slowly until tender. Add the fish veloute, heavy and the juice of the clams. Stir to combine and adjust with more cream, milk or clam juice as needed. Add the potatoes and slowly simmer until the potatoes are tender. Add the clams and heat through. Season the soup with salt and pepper. Enjoy with some crusty bread. 

Friday, January 6, 2012

Felted Hot Water Bottle

Is it cold enough? Has it ever been this cold? I came to New York prepared but I can't seem to wear enough layers to make it out alive. Luckily culinary school has me running around enough to keep me warm on the walk back home when it's nearing midnight. 

Full discloser- it has not snowed in NY. This picture is from THE PAST!

This hot water bottle would certainly keep me warm but I gave it away. It was a Christmas gift I made as part of my handmade-gifts-because-I-now-have-student-loans. It turned exactly how I envisioned it which is weird because I happened upon this sweater by accident (IE: my brother moved out and left it behind. Score!)  I love this hot water bottle cover and should really make one to keep- just as soon as I find another perfect lambswool caramel colored sweater.... 

Don't worry about my brother and his swiped sweater- he was the recipient of one of these babies so he's probably warmer than I am right now.

Felted Hot Water Bottle Cover
If you have a sewing machine, this is super quick work. If you don't, you can probably hand stitch this puppy in an evening in front of the TV. When choosing a sweater, make sure it's 100% wool or it won't felt properly. The wool will get softer (IE: less itchy) once felted, but it always helps to find a soft wool sweater to start!

  • 1 old XL Men's WOOL sweater (will be enough for 2 hot water bottle covers)
  • 1 Hot water bottle
  • Needle, thread ect...

Start out by felting the sweater. If you have a mesh bag, throw your sweater in there as an extra precaution against fluff clogging up your washing machine. Set your machine to HOT and run the sweater through a short cycle first. The sweater will shrink A LOT. Check the felting- you shouldn't really be able to see the weave of the wool anymore. You can run the sweater through another cycle to felt it some more or if you're pretty satisfied, put it in the dryer. The dryer will also shrink the sweater if it is set to hot heat so keep that in mind when adjusting the time and temperature. 

Once you have a felted sweater, cut off the sleeves at the shoulder and cut up the seams on either side of the body to leave you with some flat pieces. Use the hot water bottle as a guide and cut around it, adding an extra 1/2 inch. 


Cut out another piece of the same size.


Cut the cuff off from one of the sleeves. Now you have all your pieces and are ready to sew! Pin the two large pieces together and sew all the way around leaving a 4 inch hole at the top where the neck will be.


Insert the cuff of the sleeve into the sewn body and pin the cut side of the cuff to the opening.  Sew around the cuff to attach it to the body. 


Flip everything right side out again and insert your hot water bottle.  Now you can be warm!

Fill me with hot water!!


Sunday, January 1, 2012

Momofuku Milk Bar Birthday Cake


SO, I'm in culinary school. My first class was on Thursday. We did a lot of chopping. I got a knife kit and homework (more chopping). I'm living in New York- or rather- couch surfing in Brooklyn- trying to get my life set-up. I still need a job and a place to live... I came here so prepared, right? If I sound a little shell-shocked it's because I am. It's just been such a long month and now I'm here. I've been working for months to get here and now I am. Holy shit.

Chiffonade - Textbooks and Turnips - Bringing the uniform home - Tranches of carrots - THE knife kit

 I won't be having a full weekend for the next 9 months, but it's all in the name of higher learning and food. When I found out on day 1 of culinary school that we would not be having class on New Years Eve, I was psyched about having 4 days off in a row and having just finished reading the new Momofuku Milk Bar cookbook, I decided to make one of their crazy cakes. A birthday cake seemed appropriate. 


I loved this cake. Not only because I made it as an excuse to over-indulge in sugar since I can't over-indulge in booze this NYE. And lemme tell you that it worked like a charm. I was totally hung-over on sugar this morning and proceeded to eat an eye-brow-raising amount of cake for dinner as well.


The cake is super fluffy and jam-packed full of sprinkles. The frosting has cream cheese and citric acid in it. And it's damn good. Like it out of the jar, but awesome. And the truly amazing part of this cake? Crumbs. Not just leftover cake, but birthday cake crumbs specifically baked to be crunchy and also packed full of sprinkles. I heeded Christina Tosi's advice and made a double batch to snack on and add to vanilla ice cream. I guess my new year's resolution is not to cut back on sugar...

Happy Birthday World! I wish I got some candles!

If you want the full recipe, please check out the cookbook- it's rather lengthy and involved but all together not that more difficult than a regular layer cake. Plus it looks like the cake from my childhood dreams. Bonkers.  I was so glad to end and begin a new year with this cake. 2012 is gonna be massive. I can just tell.

Wednesday, December 28, 2011

A Colonial Potato Wreath

Cotton blossoms, white pine, bittersweet and antlers

This year Christmas was spent in Chesapeake with my boyfriend's awesome family. A dinner in Colonial Williamsburg was a real treat as I had never been at Christmas and they are quite famous for their natural and authentic decorations- so, word to the wise: be sure to arrive before nightfall- colonial times did not include Christmas lights.


 We just loved the decorations and kept trying to figure out all the fruit, vegetables, dried flowers and other ornamentals that comprised each wreath. Pomegranates, oysters, apples, artichokes, bread rolls, playing cards, sliced and dried clementines, and even some burlap and woven wool were mixed into white pine, boxwood and fraiser fir wreaths. We were in love and vowed to make our own versions next year.

Natural wreaths and my momma

But then we got an idea. One hearty vegetable had been overlooked and we couldn't find one single potato in those adornments. Maybe they didn't have pretty potatoes back in the day, but today, you can pick up some gorgeous pink and purple potatoes in just about any grocery store. On our way back from dinner, we stopped off to get the necessary stuff to make our own natural wreath and here is what we came up with:


Do you love it? I love it. It's a freaking edible potato wreath! I have some ideas on how to improve the wreath for next year, but I would say this was a huge success. Looks good with a candle too. 


Tag's Potato Wreath
If possible, get similar sized potatoes which will help them roast evenly when you decide to cook the wreath.
  • Assortment of mini white, red and purple potatoes
  • 3-4 springs of rosemary
  • 2 disposable pie dishes
  • Olive oil
  • Salt & pepper
  • Garlic powder
Using some kitchen sheers or scissors, cut a line through the middle leaving about 3 inches to the edge of the pie dish on both sides. Cut a few more lines through the middle of that line until you can easily bend the pointy edges back onto themselves (towards the edge of the pie dish) to create a sort of edge around the middle of the dish. You can kinda see this in the first picture of the wreath above. Do this with 2 pie dishes for some added support. Stack the pie dishes on top of one another.

Wash and scrub your potatoes and start adding them to the ring, making sure to alternate the colors. Add some springs of rosemary in and round the potatoes, trying to mask the edge of the pie dish.

At this point you can leave the wreath on a table for a few days before the rosemary starts wilting. If you'd like to keep it longer, you can either some water to the base of the ring or stick the rosemary stems in some water tubes hidden under the potatoes.

Once you are ready to eat the wreath, just add over the top, a tablespoon or two of olive oil, some salt, pepper and maybe a few shakes of garlic powder and roast in your oven set at 375 degrees for about 20 minutes or until tender. If some of your potatoes are much larger, you might want to cut them in half to ensure even cooking.

I left before the wreath was cooked but I imagine it was gorgeous on the table and tasty on the plate!

Wednesday, December 7, 2011

RAW Brussel Sprout Salad

Due to tremendous demand, I have pushed aside the PILE of other posts I had lined up and now bring you my now famous and widely coveted Brussel Sprout Salad with Pomegranates and Candied Pecans. I really don't see what's not to like in this salad. Brussel Sprout haters? Bet you've never tried it raw- am I right? And you know what- raw brussel sprouts aren't like raw kale where your jaw gets a workout and your innards get a good scrubbing. This salad reminds me of a coleslaw- rough greens with a tangy dressing and lots of delicious little goodies. And if you insist, go ahead and add some bacon- it wouldn't be amiss.


Brussel Sprout Salad with Pomegranate Seeds and Candied Pecans
Inspired by a salad from Radish in Williamsburg, NY
I dressed this salad up for Thanksgiving with candied pecans, but for an everyday salad just throw in some toasted walnuts. It's all good. And the dressing asks for white balsamic vinegar but this is to avoid muddying up the salad. I've made this a couple times and still haven't procured any white balsamic vinegar... do as I say not as I do- am I right?!

For the Salad
  • 1 overflowing pint of Brussel Sprouts
  • 1 Pomegranate

For the Shallot Dressing
  • 1/4 cup minced shallots
  • 3 tablespoons white balsamic vinegar (or regular)
  • 3 tablespoons olive oil
  • 1 tablespoon dijon mustard
  • 1 teaspoon honey
  • 1 teaspoon salt
  • 1 teaspoon ground white pepper (or black)

For the Candied Pecans
Adapted from Smitten Kitchen
These nuts are very easy to make and make a great gift. Just add mason jar + ribbon!
  • 1/3 cup dark-brown sugar
  • 2/3 cup white granulated sugar
  • 1 teaspoon kosher salt 
  • Generous pinch of cayenne pepper 
  • 1 teaspoon ground cinnamon
  • 1 pound pecan halves
  • 1 egg white, room temperature
  • 1 tablespoon water
Start off by making the candied pecans. Preheat the oven to 300 degrees

Combine the sugar, salt, cayenne pepper and cinnamon making sure there are no lumps. In a medium bowl whisk together the egg white and water until frothy. Add the nuts to the egg white mixture and mix until coated. Sprinkle the sugar mixture on top and keep adding it everything is nicely coated. Spread onto a parchment lined baking sheet, making sure the nuts are in one layer. Bake for 30 minutes, stirring occasionally to avoid clumps of sugar nuts. Remove from oven and let cool completely. Store in an airtight container.

For the dressing, combine all the ingredients in a mason jar and shake vigorously until emulsified. Set aside

To remove the seeds from the pomegranate, fill a large bowl with water. Carefully cut the pomegranate in quarters. Working underwater, tear the quarters apart, releasing the seeds. The white pith will float to the top and the seeds will sink. Once you've freed all the seeds use a fine mesh strainer to strain out the pith floating at the top, then poor the water out through the strainer to catch the seeds. Rest the strainer over the bowl to dry the seeds while you finish the salad. 

The easiest way to cut the brussel sprouts is to use a food processor. Wash and trim the brussel sprouts and feed them through the food processor tube fitted with the slicing attachment. If you don't have a food processor, you can use a mandolin or a knife! Just slice as thin as you can manage. 

Toss the shredded brussel sprouts about 3/4 of the pomegranate seeds and 1/2 the dressing to start. Once you are happy with the ratios, top with a good handful of the candied pecans. 

This salad keeps pretty well in the fridge for a few days. 


No, not the slider- the salad beside it!

Monday, December 5, 2011

Double Apple Pork Shoulder

Sliders! and Brussel Sprouts!! Did I lose you there? I hope not because the brussel sprouts aren't even here yet- now it's all about a roasted pork shoulder and sliders!


This recipe clearly necessitates some planning as it needs 5 hours in the oven, but it is super simple and if you can think to throw this in the oven while making dinner on a Tuesday- you can eat for the rest of the week.


And that salad on the side? It's an adaptation from one of my favorite shops in Brooklyn- Radish. I loved the idea behind their Raw Brussel Sprout Salad with Pomegranate Seeds and Walnuts and so I kinda kicked it up a few notches and made a better version ifIdosaysomyself. It was so good, we had it for Thanksgiving too.


Double Apple Pork Shoulder Sliders
Adapted from whatkatieate.blogspot.com
If you don't have Pickled-Candied Apples, try getting your hands on some pomegranate molasses.

For the Pork Shoulder

Combine the wet ingredients and massage it into the pork. Place the shoulder into an oven dish and bake at 275 degree for about 5 hours or until the pork can easily be pulled apart. Pull the pork apart with 2 forks.

For the Sliders
  • mini slider buns
  • Roasted Apple Butter
  • Dijonnaise (or combine some Dijon Mustard with Mayo to make your own)
Toast your buns under a broiler for about 2 minutes. Do not look away! Slather about 1 tsp of Dijonnaise on one side of your bun and slather maybe 2 tsp of Apple Butter on the other side. Pile on as much of the pulled pork shoulder as you can manage and secure everything between the two buns. Use toothpicks if necessary. 


APPLE BUTTER + PULLED PORK = YUM

Thursday, December 1, 2011

Mini Nut Wreaths


Last year I made a nut wreath for my front door. Then I made one for my Secret Santa recipient. See, I worked for a historic site that has a squirrel as a mascot. I thought I was being terribly clever. This year I couldn't wait to pull out the wreath again and when I did I thought that it would be fun to have some mini-wreaths to decorate the indoors. 


They are the perfect size for pillar candles. And any unused nuts make for a great seasonal and decorative but bowl- Just add a nut cracker and an empty bowl for people to discard the shells.


And if you want to get extra merry- add some fake berries!


Mini Nut Wreaths
  • Nuts! Almonds, Walnuts, Hazelnuts and Brazil Nuts
  • Mini-wreath ($1.99 at Micheal's)
  • Hot glue gun and glue
  • Branch of fake berries ($1.99 at Micheal's) 
  • Pliers
  • Pillar candle
Place you pillar candle in the middle of the wreath to make sure it fits once all the nuts have been added. Use your hot glue gun to add the nuts.Work in sections, beginning with the walnuts and brazil nuts, filling in with the hazelnuts and almonds. Once you've made it all the way around, you can begin adding the fake berries. Use the pliers to clip the berry sprigs off of the branch. It helps to periodically place the wreath on a dinning room table and sit down to see if there are any big open spots- I had to adjust my nuts and berries to fill in the bottom. 

Wednesday, November 23, 2011

Cranberry Pie


I'm gonna be honest. I've been cooking all day and I've had a few beers but I need to post this cranberry pie because it's awesome, I made it again tonight and no one believes in its awesomeness. This is for tomorrow when people are all: "OMG cranberry pie! Gimme recipe!!" *shoves pie into mouth*


If you've got your pie dough down, this recipe is super easy. Ya just mix the filling ingredients together in a big bowl and DONE. I highly recommend the double crust, but do what makes you happy. Today, what made me happy was a lattice crust. I've never done that before so we'll see how this one turns out. But go nuts! This is the time to experiment with maple leaf and turkey cookie cutters- or sprinkling raw sugars on top at the end after using an egg wash or maybe even a milk wash! Can you feel the enthusiasm!!

"Gobble gobble!" means HAPPY THANKSGIVING

Cranberry Pie 
Adapted from "Sampling's from Sully's Hearth"
My only thought here is to make sure to keep a double crust. The filling is fantastic with the crust and you just need to make sure that the ratio is right. Also- if your pie dish is deep, increase the filling by 50% but do not add more water. My pyrex dish above was fine with the regular recipe, but my Emile Henry pie dish needs the extra half recipe.
  • 2 balls of Pie Dough
  • 3 cups fresh cranberries
  • 1 cup raisins
  • 2 tbls flour
  • 1 1/4 cup sugar
  • 1/2 cup water
  • 1 tsp vanilla
Roll out both balls of dough between 2 pieces of parchment paper. Use 1 to line a 9" pie plate and leave the other between the parchment paper. Place both in the fridge.
Preheat oven to 450 degrees.
Combine all ingredients in a large bowl and place in chilled pie shell. If desired, cut out decorative elements, then lay the rolled dough over the pie shell. Fold the edge under the lower pie shell and crimp the two layers together.
Bake for 10 minutes, then reduce oven to 350 degrees and bake for another 30 minutes. Cool before serving.

Thursday, February 4, 2010

As someone pointed out- It's "Super Bowl" time again!

Just wanted to drop in to share my menu for the Super Bowl! Just in case you're still looking for inspiration. Let's get excited!!


I sent the link to the BF yesterday and he pretty much freaked out and send it to all his friends. The recipe is super simple (place ingredients in pot- cook for 6 hours) and there are step by step picture instructions so there are no reasons you can't be enjoying this sandwhich right along with us on Sunday. Hello delicious!


Maple-Beer-Chili Chicken Wings

This recipe comes from a recent article on NPR and that's really all I have to say. I think the name speaks for itself. I will report back on whether they lived up to my mental hype.


Hot Sausage Dip

A repeat from last year. This time, with an actual can of Rotel (which I recently found out is pronouced "roh-tehl" and not "rottle"). Maybe I can get a more apetizing picture of it this time!


Other ways to prepare for the Super Bowl?


Review the Puppy Bowl starting lineup! My money is on Bandit .

Wednesday, December 23, 2009

Gingerbread House

Hello Daring Bakers!! I can't believe I wasn't able to participate for these last few months and I had to set aside my only free weekend (the first one in December) to tackle this challenge! But I'm not here to complain because this was such a fun task- even if it did kill my hand mixer...

The December 2009 Daring Bakers’ challenge was brought to you by Anna of Very Small Anna and Y of Lemonpi. They chose to challenge Daring Bakers’ everywhere to bake and assemble a gingerbread house from scratch. They chose recipes from Good Housekeeping and from The Great Scandinavian Baking Book as the challenge recipes.

Here's the short and sweet version:

Make your hand-mixer-killer-gingerbread dough recipe and chill. I got lucky and started this in advance and then realized this dough has to chill overnight.

Take your dough out of the fridge about an hour before you are ready to cut the pieces. Again, this dough is killer- just about killed my wrists just trying to roll it out! Make sure that your dough's thickness is nice and even. Cut out the pieces using your template- making sure that you cut down into the dough withouth dragging your knife (otherwise you'll end up with some ugly cuts that will then cook up ugly).


While your dough is cooking, assemble your candy- the cat is not essential for this stage.


And just look at those beautiful gingerbread walls and roof top! Let them cool completely.

Next, make your syrup which you will be using to assemble the gingerbread house. Try not to burn it.. I never knew you could get such a dark black without using food coloring!


The candy is ready and waiting. The candy buttons were probably my favorite to use as they are small and colorful. I had high hopes for the Necco wafers (adorble roof shingles maybe?) but the colors are so bland! I gave away the Leone candy boxes (and can I just say that although the Polar Strong box is adorable, the candy tastes HORRIBLE!). If this experience taught me anything is that candies are heavy and frosting can only hold so much weight.

Roof Attempt Number 2. You don't want to see Attempt Number 1. Trust me.


Looking a little sad... Can I just say that the Royal Icing recipe I used sucked? I can't remeber which one it was- oh wait, it was Martha! But it was far too liquidey and I ended up using 2 pounds of sugar to even things out- and look! It still dripped all over the place! We couldn't even pretend that the drips were icicles! (Can you tell my the exclamation points that this is a hot topic with me?)

TADA!
Gumball fence- coconut snow and snowman with a Mint Meltaway hat and Big League Chew scarf- Cut down Mint Meltaway wreaths- Necco Wafer walking path- Fruit Salad gummy bushes with Candy Button flowers.


In the end though I think we pulled it off. We settled on a simple roof and stopped fighting the heavy candy and just let them hang out at ground level. But next time, I'll be getting smaller candy and a different dough recipe (unless Santa brings me a mixer that can handle it!)