Showing posts with label Year round. Show all posts

Friday, February 1, 2013

The January Blues

I'm trying to ease into a diet. I'm sure you can tell immediately how well I'm doing. The problem with having gone to culinary school is that I'm usually able to make a meal out of anything left in the fridge. And it's not usually very healthy...


Real florist work here: processing 1,000 roses. It smelled fantastic. My arms look like the cat clawed up me


Fried Bacon and Egg Sandwich
Try it with any cheese combo that sounds good. Blue cheese or cheddar would be a big winner here. 
  • 2 pieces of bread
  • 1 tsp canola oil
  • 3 pieces of bacon
  • 1 egg
  • 2 tbl cream cheese
  • 1 slice havarti
  • 2 slices gruyere
  • 1 scallion, cut on the diagonal
Toast your bread. Heat a large skillet over high heat. Add canola oil. Fry bacon in hot oil until crispy on both sides- about 3 minutes on each. Drain on some paper towels. Crack egg into a small bowl. Pour egg into hot bacon fat and fry for about 3 minutes. Finish the eggs by seasoning with salt and pepper and spooning the bacon fat over the egg yolk. If desired, drain the egg on more paper towel. Smear the cream cheese on the toast and top with the cheese. If necessary, throw the toast back into the toaster/ under broiler to melt the cheese. Top the cheese with a few pieces of scallion and the fried egg. 

Sunday, January 29, 2012

French Toast Pie

I tend to avoid starch and carbs if at all possible. I think I can blame my parents for this. My dad for uncovering a diet that actually worked for him (meat and veg only!) and my vegetarian mother who insisted on having 5 different colored vegetables on the table every night for dinner. For me it's not that hard to forgo potatoes and bread. I'm not one of those people who could live off of bread alone. However when you are trying to save money by eating whatever culinary schools gives you, you might end up with a lot of starch and carbs. I don't mind really. 


You've seen the croutons already and I've spared you the tuna fish sandwiches and freezer full of breadcrumbs. I have already posted twice about french toast but this was too good not to document.  I'm calling it a French Toast Pie and it was amazing. Maybe the best. Maybe the best French Toasted thing I've ever had. I think the bread making students are really the ones who deserve the acclaim- they provided the whole grain loaf and the stunning Kugelhopf- a traditional bread from the Alsace region of France. It tastes like brioche with a sweet and slightly crunchy crust, mine was topped with almonds and studded with raisins and dried cherries. 

Spoils from the new job. A box full of baby's breath
 
I only made this pie so I could be terribly clever and have it in the freezer for a surprise instant brunch one morning. The surprise was on me- it lasted one day in the freezer and one morning on the table. Delicious!


French Toast Pie
The Kugelhopf really makes this dish amazing. If you can't find one- do not fret! Just substitute in some brioche and add dried raisins and cherries. This freezes well, just wrap the pie in 2 layers of cling film and 2 layers of aluminum foil. Press the bread down with some frozen food to submerge all the food into the custard. To reheat the pie, place it in a preheated 375 degree oven for about 30 minutes or until heated through. If the top starts getting brown, cover with foil.


  • 1/3 small whole grain loaf (about 2 cups, shredded)
  • 1/4 loaf kugelhopf or brioche (about 4 cups, shredded)
  • Raisins, dried cherries and almonds (optional)
  • 4 eggs
  • 1 cup half & half
  • 1 cup milk
  • 1 tablespoon cinnamon
  • 1/4 tsp almond extract (optional)
  • 1-2 tablespoons Demerara sugar
Tear bread into pieces and layer it into the pie dish. If using brioche, throw in the dried fruits and nuts. Try to make the top of the pie relatively flat- you can even squash it down if necessary. In a medium bowl whisk the eggs, half & half, milk, cinnamon and extract, if using. Pour over the bread- you may have some extra. Wrap the pie up with two layers of cling film and one layer of aluminium foil. Place the pie in the fridge overnight but place some heavy object on top of the pie to help submerge all the bread into the custard. 

The following day, preheat your oven to 375 degrees. 
Sprinkle the Demerara sugar over the pie and bake uncovered for about 30 minutes. If you can't see the custard, top it off with some extra milk. You really want custard all the way up! If the pie starts to brown, cover it with some of the foil. Your pie is done when the bread has absorbed most of the custard and everything is spongy, golden and delicious looking.

Enjoy with maple syrup, a pat of butter and coffee. 


Freeze it for a rainy, lazy sunday morning! Maybe after going to the gym?

Sunday, January 22, 2012

French Croutons

Hey guess what? I got a job! I now work at a flower shop! Woo! I also ran out of allergy medecine the day before starting! I just couldn't understand later that night why I kept sneezing in cooking class. I think my classmate was ultimately the one to figure it out. "Do you have allergies?" OH right! I do! To flowers and stuff! I can be so thick sometimes. 


Today I made my first bouquet and I was so damn nervous. I haven't been quite trained yet so this was totally on the fly but by the third bouquet (3 people came in for a bouquet!) I think I had it down. White and pink hydrangeas, ornamental kale and some baby's breath. I really wish I could have taken a picture. 

Meanwhile culinary school has been keeping me well fed with bread, leftovers and bread. My last haul included a duck confit leg, gravlax, an oatmeal loaf and a kugelhopf. I left the bread out a little too long and needed to find a plan B that didn't result in even more breadcrumbs for the freezer. I thought I'd practice something we did in class as part of Soup Day. Buttered croutons! Lotsa BUTTER croutons. 


I'm just gonna brag a little bit and say that I was able to perfectly toss these bread cubes in that pan. Just like they say: it's all in the wrist (and the hands of god). 


French Croutons
This will probably seem like too much butter at first, but the croutons will soak it all up and taste delicious. Eat these soon as they won't keep that long with all that butter. Shouldn't be a difficult task.

2 thick slices of hearty loaf bread
2 tablespoons butter
Salt & Pepper

Cut the bread slices into equal sized cubes. In a saute pan melt the butter on medium heat. Wait until the butter has stopped foaming and throw in the bread cubes. Toss the cubes to coat them in butter. Keep tossing until they start to turn gold. Aggressively season the cubes with salt and pepper (as in- lots of both!). Taste a cube and adjust. If the croutons seem too greasy, lay them out to dry on some paper towel. 

Wednesday, December 28, 2011

A Colonial Potato Wreath

Cotton blossoms, white pine, bittersweet and antlers

This year Christmas was spent in Chesapeake with my boyfriend's awesome family. A dinner in Colonial Williamsburg was a real treat as I had never been at Christmas and they are quite famous for their natural and authentic decorations- so, word to the wise: be sure to arrive before nightfall- colonial times did not include Christmas lights.


 We just loved the decorations and kept trying to figure out all the fruit, vegetables, dried flowers and other ornamentals that comprised each wreath. Pomegranates, oysters, apples, artichokes, bread rolls, playing cards, sliced and dried clementines, and even some burlap and woven wool were mixed into white pine, boxwood and fraiser fir wreaths. We were in love and vowed to make our own versions next year.

Natural wreaths and my momma

But then we got an idea. One hearty vegetable had been overlooked and we couldn't find one single potato in those adornments. Maybe they didn't have pretty potatoes back in the day, but today, you can pick up some gorgeous pink and purple potatoes in just about any grocery store. On our way back from dinner, we stopped off to get the necessary stuff to make our own natural wreath and here is what we came up with:


Do you love it? I love it. It's a freaking edible potato wreath! I have some ideas on how to improve the wreath for next year, but I would say this was a huge success. Looks good with a candle too. 


Tag's Potato Wreath
If possible, get similar sized potatoes which will help them roast evenly when you decide to cook the wreath.
  • Assortment of mini white, red and purple potatoes
  • 3-4 springs of rosemary
  • 2 disposable pie dishes
  • Olive oil
  • Salt & pepper
  • Garlic powder
Using some kitchen sheers or scissors, cut a line through the middle leaving about 3 inches to the edge of the pie dish on both sides. Cut a few more lines through the middle of that line until you can easily bend the pointy edges back onto themselves (towards the edge of the pie dish) to create a sort of edge around the middle of the dish. You can kinda see this in the first picture of the wreath above. Do this with 2 pie dishes for some added support. Stack the pie dishes on top of one another.

Wash and scrub your potatoes and start adding them to the ring, making sure to alternate the colors. Add some springs of rosemary in and round the potatoes, trying to mask the edge of the pie dish.

At this point you can leave the wreath on a table for a few days before the rosemary starts wilting. If you'd like to keep it longer, you can either some water to the base of the ring or stick the rosemary stems in some water tubes hidden under the potatoes.

Once you are ready to eat the wreath, just add over the top, a tablespoon or two of olive oil, some salt, pepper and maybe a few shakes of garlic powder and roast in your oven set at 375 degrees for about 20 minutes or until tender. If some of your potatoes are much larger, you might want to cut them in half to ensure even cooking.

I left before the wreath was cooked but I imagine it was gorgeous on the table and tasty on the plate!

Thursday, December 8, 2011

Pralines- Not the French Kind

These treats are so god damn good. There I said it. But have you ever had one? I hadn't until Kris and I went to New Orleans for our anniversary back in February. We took a cooking class that I literally had to drag Kris to.. "But it's all old people!" He was glad in the end because we had these and I now know how to make em. Now you can too. 

For Pete's (and your teeth's) sake have this with unsweetened coffee

The teacher in our class said that these last about a day (mostly because she can't keep her sons away from them). But I've found that they remain tasty for at least 3 days- I haven't managed to keep any in my house beyond that. Piled high in some cellophane bags, gussied up with a bow, these would make an amazing hostess gift.


And if you need to fancify them further, I hear you can dip them in chocolate. The heck you say?

Pralines
Adapted from The New Orleans School of Cooking
Makes 1-50 depending on size
Pronounced praw-leens. When spooning out the mixture, work quickly or the pralines will turn extra cloudy and the sugar will harden into clumps. Still tasty though!

1 1/2 cups white sugar
3/4 cups brown sugar
1/2 cup milk
6 tablespoons butter
1 1/2 cups pecans
1 teaspoon vanilla

Combine all the ingredients in a deep saucepan fitted with a candy thermometer, heat over medium-high heat. While STIRRING CONSTANTLY bring the mixture to a softball stage (238 - 240 degrees). Remove from heat.

Continue stirring until the mixture thickens slightly and turns cloudy- pecans should stay suspended. Spoon the pralines out one by one onto a silpat or some parchment paper. They can be any size but I aim for about 1 inches in diameter. Leave the pralines to cool and harden for about 1 hour. Peel off of silpat and store in an airtight container. Keeps for at least 3 days.

Wednesday, October 26, 2011

Lunch Salads

My co-workers always want to know what I'm having for lunch. It usually leads to a soliloquy on How Easy it Was and Oh, These Are Just Some Done-Up Leftovers. My boss recently asked me, in all seriousness: "Do you cook.... every day?" Yeah! Don't you?

Well for those who can't wrap their heads around bringing in lunch from home, here are a few of my recent salads. I love a good salad. 


cherry tomatoes + crumbled bacon +chopped walnuts + avocado + spinach + honey balsamic vinaigrette

Tip: Cook the bacon in a 400 degree oven on a cookie rack placed over some aluminum foil on a cookie sheet. Takes about 15-20 minutes and won't smoke up your kitchen!


broconcini + roasted peppers with capers + slice of Great Harvest bread + baby carrots

Tip: These peppers are better the following day so they make a great lunch


cherry tomatoes + roasted red peppers + black olives + assorted cheeses + assorted deli meats + lemon vinaigrette + spinach

Tip: Raid your office's fridge! This was all leftover from a social event and I happened to have spinach. Free lunch!


spinach + roasted beets + toasted pine nuts + goat cheese + fried egg

Tip: Okay, so I did this salad at home because even I can't fry an egg at the office.. But I roasted the beets the day before while making dinner so all I had to do was peel the skins off and BAM: delicious salad

General Tips:

  • Clean, shred and bag your salad a day or two early. I like to keep my leafy greens at the ready in a large ziploc bag with a paper towel thrown in to absorb excess moisture. Romaine and spinach will hold up rather well and spinach is super good for you!
  • Make a big batch of vinaigrette in a mason jar. I happen to love a honey balsamic vinaigrette and can make do with only that option so whenever I make some, I usually make a lot so I have it on hand. Not that it's hard to make: In a mason jar combine 1 tsp dijon mustard, 1 tsp honey, a few cracks of pepper, pinch of salt, 1 finger of balsamic vinegar and 3 fingers of olive oil. Seal the mason jar and shake to combine. 
  • Aaah Nuts! I will add nuts to just about every salad, especially if it doesn't contain any other kind of protein. I have just about every nut out there and keep them fresh by freezing them. Don't let your nuts get rancid in your cupboard! 
  • Get some small Tupperware and sandwich bags. If you don't want to take a whole mason jar worth of dressing to work, put it in a tiny Tupperware container. These are also handy for transporting things like hummus, olives ect. I use my sandwich bags for toast (when the salad doesn't seem hearty enough to get me through the day), baby carrots, snacking nuts, crumbled bacon bits, roasted pumpkin seeds- cookies! 
  • Have dessert. I'm definitely not a chocoholic nor do I have a big sweet tooth but I have to admit that I'm a happier person if I finish my meal with something sweet. And it doesn't have to be big or "bad for you". I'm quite content with a piece of bittersweet chocolate or peach black tea sweetened with some honey. Treat yo'self 


Thursday, June 30, 2011

Homemade Tagliatelle with Green Olive Sauce

I don't eat much pasta. I love it but it's one of those things I can easily do without, like bread. Maybe it's because it's so often underwhelming. Not much flavor other than gummy bread. Or maybe it's because I first thought I was "cooking" when I doctored pasta from a jar. The boyfriend and I would cook some chicken in a skillet, maybe add some red pepper flakes to the jarred sauce and TA DA! We cooked! I'm not trying to be condescending to anyone who makes and eats that kind of pasta, I still savor it when I have it on that rare occasion, but the stuff that really gets me going is homemade pasta. Pasta with eggs. Pasta with flour, eggs and little else. It's a real treat.


My first time making and maybe even eating homemade, fresh pasta was a Daring Baker's challenge for Lasagna. We had to finely chop a giant pile of spinach and knead it into the pasta dough. It took forever. My wrists hurt. Then it had to rest (as did I). Next up- rolling the dough out until it was thin enough to see through- no easy task- especially on a wooden kitchen table. This time around, the dough comes together in a food processor and there is no kneading required. Just give the dough some time to sit. Rolling the dough still isn't a piece of cake, unless you are equipped, but a marble counter top certainly helps.


Just a few minutes in some boiling water and you've got yourself something to write home about.

Crunch, crunch, yum

Homemade Tagliatelle with Green Olive Sauce
Inspired and Adapted from 101 Cookbooks and The Minimalist
Serves 4

For the pasta:
  • 2 cups flour
  • 1 tsp salt, plus more as needed
  • 3 egg yolks
  • 2 whole eggs

For the sauce:
  • 3 cloves garlic, finely chopped
  • 1 large yellow onion, finely chopped
  • 3 tblsp extra-virgin olive oil
  • 3/4 cup vegetable or chicken broth
  • 1/3 cup heavy cream
  • 1 2/3 cup green olives, pitted and chopped
  • fresh lemon juice
  • 1/4 cup pine nuts

In a food processor, pulse together the flour and salt. Add the eggs and pulse until a ball starts to form. If the dough is too grainy, add a few drops of cold water. If the dough is too sticky, add a tablespoon of flour. Turn out the dough onto a floured counter. Roll into a ball and wrap in plastic wrap. Let the dough sit for 30min - 1 hour on the counter or up to 24 hours in the fridge.

Meanwhile in a large skillet, saute the garlic and onion in olive oil until tender. Add the broth and cream and bring it to a simmer. Remove from heat and add the olives. Let the mixture cool for a few minutes and then blend either with a handheld blender or a blender. Add lemon juice to taste and keep the sauce warm. In a small dry skillet, toast the pine nuts until fragrant and golden. Do not take your eyes off them!

Bring a large pot of water to a boil. Once the dough is rested, cut it in half and roll the dough out as thin as you can manage without driving yourself crazy. Cut into 1/2 inch strips and add to boiling for 2-3 minutes. Drain the water, reserving 1/2 cup. If the sauce is too thick, add some of the pasta water. Once the sauce is as you like it, add the pasta and swirl around for a minute or two. Serve topped with toasted pine nuts and if you need it, Parmesan.

Friday, May 20, 2011

Chocolate Chip Cookie Pie

Last week my boyfriend had a birthday and as I tend to do, I made him a cake. Well no, I made him a pie. No, actually, I made him 4 pies- he got 2 of them.


Maybe you're wondering: "but Claire, I thought you were on a diet? Or at least attempting to be healthier? this does not seem to fit into that plan!" Well dear reader(s), I was very well behaved. I sampled. I just hope a pie post doesn't make me a cheater!


And the reason I made 4 pies? I based the recipe off one by Ms. Paula Deen and hers is meant to make two 9" pies. Who scales a recipe to that size?! It's like reading through the CIA cookbook all over again! "To make 6 banana loaves, begin by creamer 12 sticks of butter". Craziness!


I probably could have avoided the whining by halving the recipe but I figured with people in town, we could use the extra pie- only problem is that my mother apparently doesn't own a pie dish. I had the one Kris gave me for Christmas one year so I greased that one up and went searching for my mom's. I must have been making it up because I couldn't find it anywhere. In fact, Mother- you who loves pies- do you even MAKE pies?! Because I can't recall any! I know you went through a Lemon Meringue Pie Phase but then WHERE is the pie dish!? I found 2 tart pans! and 2 mini loaf pans and 2 regular loaf pans- a bundt cake pan, an angel food cake pan and even a tube pan! but no pie dish!


Mom- I think you've been outed as a pie phony.


Here- have some pie and realize what homemade deliciousness you've been missing out on.


I still love you.


Chocolate Chip Cookie Pie
Adapted from Paula Deen
Makes two 9" pie (or one 9" pie and three 3" pies)
  • 2 3/4 cups all-purpose flour
  • 1 1/2 tsp salt
  • 1 tsp baking soda
  • 1 1/4 tsp baking powder
  • 1 cup (2-sticks) unsalted butter, softened
  • 1 1/2 cups packed light brown sugar
  • 1/2 cup granulated sugar
  • 3 large eggs
  • 1 tbls vanilla extract
  • 1 cup semisweet chocolate chips
  • 1 cup butterscotch chips
  • 1 cup bittersweet chocolate chips
  • 2 cups chopped walnuts

Preheat oven to 350 degrees. Grease two 9" pie dishes.


In a large bowl sift together the flour, salt, baking soda and baking powder. In a mixer, cream together the sugars and butter until nice and fluffy. To the mixer, add the eggs one at a time, mixing well between each. Add the vanilla to the mixer then add the flour in little batches until well combined (without overbeating). Remove the bowl from the mixer and fold in the chocolate chips and walnuts.


Divide between the two pie dishes and level out with a spatula. Bake in the oven for about 25 minutes or until a toothpick comes out clean. Let the pies cool before serving topped with whipped cream (from the can), chocolate syrup and sprinkles. Don't forget the sprinkles.


Chocolate Syrup
Adapted from Bobby Flay's Burgers, Fries & Shakes

  • 1 cup water
  • 1/2 cup sugar
  • 1 tbl light corn syrup
  • 2/3 cup unsweetened good quality dutch processed cocoa powder
  • 1 tsp vanilla extract
In a small saucepan combine the water, sugar and corn syrup. Bring to a boil and whisk in the chocolate powder. Continue whisking until slightly thickened- about 2 minutes. Remove from heat and whisk in the vanilla. Let cool completely and transfer to a squeeze bottle and store in the fridge.

Monday, April 4, 2011

Bacon & Eggs

 This past weekend was my birthday and as my friend Anna would say- I'm now in her box.. I guess I'm still technically in my mid-twenties, but I've passed the half-way point. I wonder at what age I'll start worrying about being old. Not yet it seems! I think I struck a perfect balance between grown-up and childish fun this weekend. Saturday night was spent with the boyfriend at the Drive-In for a triple feature. We saw Rango, Source Code & The Adjustment Bureau (B, C+, B-) and made it all the way to the National Anthem at the very end. Well done us. The grown-up part of my weekend was cooking 5 courses out of The French Laundry Cookbook. The boyfriend got me the Thomas Keller box set for Christmas and it includes The French Laundry Cookbook and Ad-Hoc at Home. I figured I would cook out of the Ad-Hock cookbook (and I'm pretty sure we used his recipe for Fried Chicken when my friend Jeremy and I cooked Fried Chicken and Waffles for his birthday) but the French Laundry Cookbook was intimidating. It was going to be a coffee table book. It had beautiful pictures and some great stories, but I never really planned on cooking from it. But then I started reading the back catalog on Carol's blog: The French Laundry at Home and all of a sudden the recipes seemed feasible. Don't get me wrong, they have a lot of steps and recipes within-recipes but everything was super do-able, especially if you plan ahead. For 3 days I cooked after work every night to prepare for this meal but it was well worth it. This is some of the best food I have ever prepared and I will definitely be adding some of these dishes to my permanent rotation.

For the next few days I''m going to be posting the dishes we prepared along with adapted recipes and some photos. I want to record this meal because it was truly phenomenal. First Off: Bacon & Eggs

A few fays ahead, Kris made a brunoise which is finely chopped carrots, turnips and leeks. On the day I blanched the brunoise for about 30 seconds.


Here are some lovely quail eggs I got for cheaper than cheap- $1.48 at an Asian grocery store. 


Not so cheap Bacon ($9- what?!) But VERY TASTY bacon


"Using a serrated knife, cut through half of the quail egg at the fat end of the egg." This was much easier written then done, Mr. Keller. The first one went: cut-cut-crack-splat.


Once poached (in at least 6 inches of water) transfer the quail eggs to an ice bath, then using scissors, cut the tails off. This is when I was hoping I hadn't overcooked the little suckers. There is nothing worse than overcooked egg yolks. BLECH.


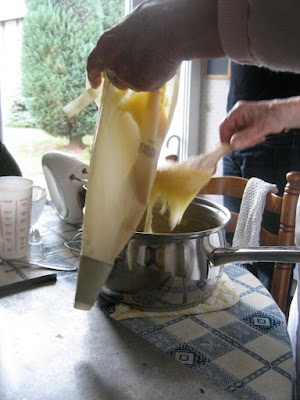
 And then you do something funny- you reheat the poached eggs in some butter with 2 tsp of Brunoise. 


To plate- add one poached egg with sauce (AKA: BUTTER) to each spoon and top with a shard of fried bacon.


Try to eat something besides Quail Eggs & Bacon for the rest of the day. We re-filled this baby twice. 
And I still have some quail eggs and bacon in the fridge! If my brother is lucky, he might get to sample this one tonight. 

Bacon & Eggs
The poached eggs can be stored in an ice bath in the fridge for 2 days. 

  • 10 Quail Eggs (+ extra in case of breakage)
  • 2 tbls white wine vinegar
  • 1-2 slices of the best Bacon you can get
  • 2 tsp Brunoise (All finely chopped: 1 part carrot, 1 part turnip, 1/2 part leek)
  • 3 tblsp Butter
  • Salt & Pepper
Thomas Keller offers this advice for cracking open the quail eggs: rest the egg on its side on a dish towel and with a serrated knife, carefully cut through half of the shell before breaking it off. Make sure to cut through the bigger end of the egg so that the yoke will easily come out. Stand the cut quail eggs in their carton until ready to use.

Bring  a pot of water to a simmer making sure the water is at least 6 inches deep. Add the white wine vinegar. Slowly tip the quail egg over so the yolk slides into the water. Let the egg poach for about 2 minutes or until the eggs whites have turned white. Retrieve with a slotted spoon and place into an ice bath. 

Fry the bacon until crispy. Let drain on paper towels. Break into shards. 

In a small saucepan slowly melt the butter and add the poached eggs to reheat. Add the brunoise and cook for a few more minutes. Season to taste. 

To assemble: on a spoon place one poached quail eggs with some butter and brunoise and top with a shard of bacon. 


We are fans. 

Wednesday, November 18, 2009