

 |
| Some yellow leaves are appearing and my monster plant is quite happy |
So for about a week I couldn't do anything with my haul of pumpkins but stare and hope they didn't rot.

And the sun finally came out so I finally played around with them. I had visions of piling them high atop a cafe table, like I had seen online but my table was a little too wobbly and my pumpkins were kinda massive. In the end I ended up with this-

I grabbed a plastic urn planter that still had some mint and lemon verbena growing in it and plopped a Cinderella pumpkin on top and topped that with a Boer Squash

This little orange guy was the one we actually picked from an actual pumpkin patch! Tip: bring a knife!

My brother Tristan hates this cement dog so my mom called it Tristan. There is another cement dog on the other side of the door also named Tristan. My mom is hilarious.

And I've been wanting to make Whoopie Pies for a while- and all I needed was an excuse: Boss Day! Did you know it was Boss Day on Monday?

I have loved everything I've made out of my Baked cookbook so I had no hesitations in making their Pumpkin Whoopie Pies.
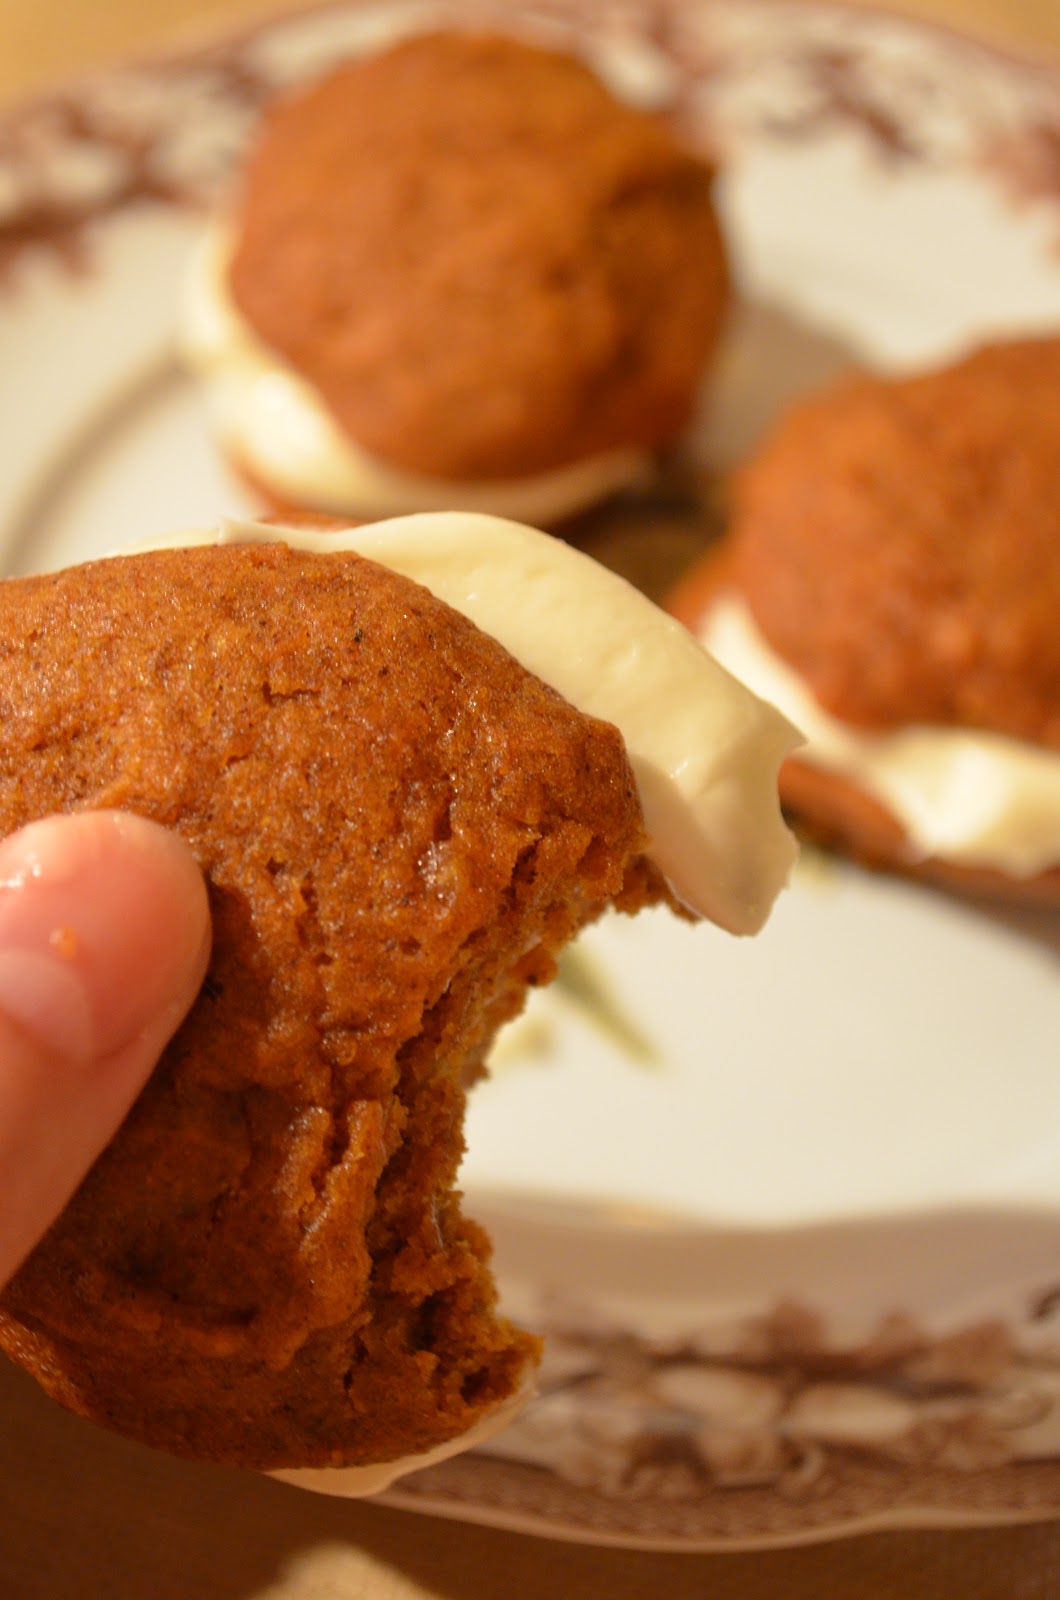
Just don't eat more than one. Promise? After testing my batch I thought this picture would surely be enhanced by having one pie with a bite mark but then you can't just put the pie back on the plate after that- so I naturally ate it. And regretted it. These are moist, creamy and decadent. Don't get greedy!
 |
| Just one Whoopie Pie |
Pumpkin Whoopie Pies
Adapted from Baked: New Frontiers in Baking
Makes 12-24 whoopie pies
(I used a 1/2 inch ice cream scoop and got about 24 pies that seemed big enough for me)
3 cups all-purpose flour
1 teaspoon salt
1 teaspoon baking powder
1 teaspoon baking soda
2 tablespoons ground cinnamon
1 tablespoon ground ginger
¼ teaspoon ground nutmeg
2 cups firmly packed light brown sugar
1 cup canola oil
3 cups chilled pumpkin puree
2 large eggs
1 teaspoon pure vanilla extract
1 teaspoon salt
1 teaspoon baking powder
1 teaspoon baking soda
2 tablespoons ground cinnamon
1 tablespoon ground ginger
¼ teaspoon ground nutmeg
2 cups firmly packed light brown sugar
1 cup canola oil
3 cups chilled pumpkin puree
2 large eggs
1 teaspoon pure vanilla extract
3 cups confectioners’ sugar
½ cup (1 stick) unsalted butter, softened
8 ounces cream cheese, softened
1 teaspoon pure vanilla extract
½ cup (1 stick) unsalted butter, softened
8 ounces cream cheese, softened
1 teaspoon pure vanilla extract
Preheat the oven to 350*F. Line two baking sheets with parchment or silicone mats.
In a medium bowl, whisk the flour, baking soda, baking powder, salt, cinnamon, ginger, and nutmeg.
In a large bowl, whisk the brown sugar and oil until mixed. Add the pumpkin and whisk to combine. Add the eggs and vanilla, whisk to combine.
Sprinkle the flour over the pumpkin mixture and whisk to combine.
Use a small ice cream scoop to drop spoonfuls of dough an inch apart onto baking sheets. Bake for 12-14 minutes or until the cookies are cracked on top and an inserted toothpick comes out clean. Allow cookies to cool completely on the pans.
For the icing, sift the confectioners’ sugar into a medium bowl.
Fit an electric mixer with the paddle attachment. Mix the butter and cream cheese on medium speed until smooth and combined. Add the confectioners’ sugar and beat until combined. Lower speed and add the vanilla, beat until just mixed.
Place about 1-2 tbls of filling on the flat side of one cookie and sandwich with another. Press gently to spread the filling to the edges of the cookies. Store covered in the refrigerator, separating layers of whoopie pies with waxed paper.

 Well that's a bit of a lie as I didn't really get to rip anything off- see the trick to recovering a couch is to keep the pieces of fabric intact, only ripping the seams- this was you will already have a pattern for each piece you need to cut out from your new material.
 Like this! You just take the piece of fabric from your couch (i believe this the bottom of a cushion) and lay it down flat on your new fabric and cut it out.

 To finish it off, we had to find some trim to cover all those staples. The orignal couch had some really gross white braided satin trim, but once we sanded down the wooden features, the couch was feeling a little beachy so I just bought some twine from the hardware store (far too much twine, I might add).
 This part was actually the most painful- it took 4 episode of Law & Order, 2 rows of twine and 3 severe burns to my fingers.
 But looking back at this monstrosity....
 Detail shot! Hello beautiful wooden features!
 aaaaaah- Totally worth it.


 It was pretty easy once we worked out a system.
 Kris did mess up the over, under pattern a few times, which wasn't be the end of the world, but writing this now about a month after the fact, the sections with no crossing mistakes are holding up perfectly whereas the other section has had a spring start to pop out.


 Got myself 4 of these


