Showing posts with label Dessert. Show all posts

Sunday, January 1, 2012

Momofuku Milk Bar Birthday Cake


SO, I'm in culinary school. My first class was on Thursday. We did a lot of chopping. I got a knife kit and homework (more chopping). I'm living in New York- or rather- couch surfing in Brooklyn- trying to get my life set-up. I still need a job and a place to live... I came here so prepared, right? If I sound a little shell-shocked it's because I am. It's just been such a long month and now I'm here. I've been working for months to get here and now I am. Holy shit.

Chiffonade - Textbooks and Turnips - Bringing the uniform home - Tranches of carrots - THE knife kit

 I won't be having a full weekend for the next 9 months, but it's all in the name of higher learning and food. When I found out on day 1 of culinary school that we would not be having class on New Years Eve, I was psyched about having 4 days off in a row and having just finished reading the new Momofuku Milk Bar cookbook, I decided to make one of their crazy cakes. A birthday cake seemed appropriate. 


I loved this cake. Not only because I made it as an excuse to over-indulge in sugar since I can't over-indulge in booze this NYE. And lemme tell you that it worked like a charm. I was totally hung-over on sugar this morning and proceeded to eat an eye-brow-raising amount of cake for dinner as well.


The cake is super fluffy and jam-packed full of sprinkles. The frosting has cream cheese and citric acid in it. And it's damn good. Like it out of the jar, but awesome. And the truly amazing part of this cake? Crumbs. Not just leftover cake, but birthday cake crumbs specifically baked to be crunchy and also packed full of sprinkles. I heeded Christina Tosi's advice and made a double batch to snack on and add to vanilla ice cream. I guess my new year's resolution is not to cut back on sugar...

Happy Birthday World! I wish I got some candles!

If you want the full recipe, please check out the cookbook- it's rather lengthy and involved but all together not that more difficult than a regular layer cake. Plus it looks like the cake from my childhood dreams. Bonkers.  I was so glad to end and begin a new year with this cake. 2012 is gonna be massive. I can just tell.

Thursday, December 8, 2011

Pralines- Not the French Kind

These treats are so god damn good. There I said it. But have you ever had one? I hadn't until Kris and I went to New Orleans for our anniversary back in February. We took a cooking class that I literally had to drag Kris to.. "But it's all old people!" He was glad in the end because we had these and I now know how to make em. Now you can too. 

For Pete's (and your teeth's) sake have this with unsweetened coffee

The teacher in our class said that these last about a day (mostly because she can't keep her sons away from them). But I've found that they remain tasty for at least 3 days- I haven't managed to keep any in my house beyond that. Piled high in some cellophane bags, gussied up with a bow, these would make an amazing hostess gift.


And if you need to fancify them further, I hear you can dip them in chocolate. The heck you say?

Pralines
Adapted from The New Orleans School of Cooking
Makes 1-50 depending on size
Pronounced praw-leens. When spooning out the mixture, work quickly or the pralines will turn extra cloudy and the sugar will harden into clumps. Still tasty though!

1 1/2 cups white sugar
3/4 cups brown sugar
1/2 cup milk
6 tablespoons butter
1 1/2 cups pecans
1 teaspoon vanilla

Combine all the ingredients in a deep saucepan fitted with a candy thermometer, heat over medium-high heat. While STIRRING CONSTANTLY bring the mixture to a softball stage (238 - 240 degrees). Remove from heat.

Continue stirring until the mixture thickens slightly and turns cloudy- pecans should stay suspended. Spoon the pralines out one by one onto a silpat or some parchment paper. They can be any size but I aim for about 1 inches in diameter. Leave the pralines to cool and harden for about 1 hour. Peel off of silpat and store in an airtight container. Keeps for at least 3 days.

Wednesday, November 23, 2011

Cranberry Pie


I'm gonna be honest. I've been cooking all day and I've had a few beers but I need to post this cranberry pie because it's awesome, I made it again tonight and no one believes in its awesomeness. This is for tomorrow when people are all: "OMG cranberry pie! Gimme recipe!!" *shoves pie into mouth*


If you've got your pie dough down, this recipe is super easy. Ya just mix the filling ingredients together in a big bowl and DONE. I highly recommend the double crust, but do what makes you happy. Today, what made me happy was a lattice crust. I've never done that before so we'll see how this one turns out. But go nuts! This is the time to experiment with maple leaf and turkey cookie cutters- or sprinkling raw sugars on top at the end after using an egg wash or maybe even a milk wash! Can you feel the enthusiasm!!

"Gobble gobble!" means HAPPY THANKSGIVING

Cranberry Pie 
Adapted from "Sampling's from Sully's Hearth"
My only thought here is to make sure to keep a double crust. The filling is fantastic with the crust and you just need to make sure that the ratio is right. Also- if your pie dish is deep, increase the filling by 50% but do not add more water. My pyrex dish above was fine with the regular recipe, but my Emile Henry pie dish needs the extra half recipe.
  • 2 balls of Pie Dough
  • 3 cups fresh cranberries
  • 1 cup raisins
  • 2 tbls flour
  • 1 1/4 cup sugar
  • 1/2 cup water
  • 1 tsp vanilla
Roll out both balls of dough between 2 pieces of parchment paper. Use 1 to line a 9" pie plate and leave the other between the parchment paper. Place both in the fridge.
Preheat oven to 450 degrees.
Combine all ingredients in a large bowl and place in chilled pie shell. If desired, cut out decorative elements, then lay the rolled dough over the pie shell. Fold the edge under the lower pie shell and crimp the two layers together.
Bake for 10 minutes, then reduce oven to 350 degrees and bake for another 30 minutes. Cool before serving.

Wednesday, November 9, 2011

5 Pound Caramel Apple Pie

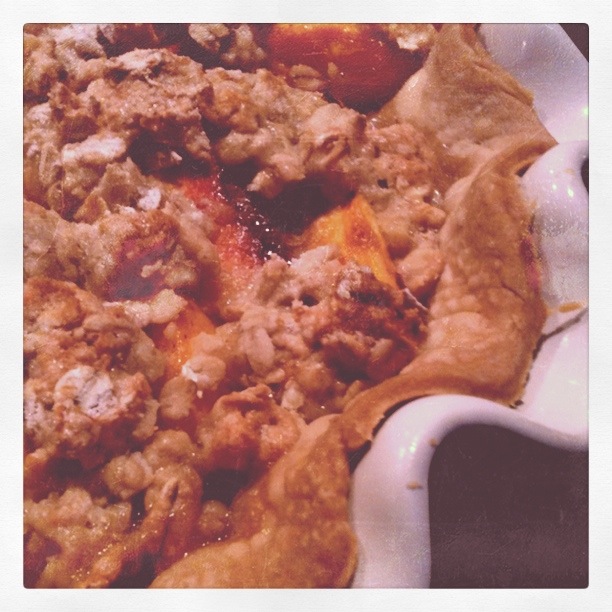
I finally have the second part to my pie video up! If you recall the last video, I made enough pie dough for 2 double crusted pies. Well here I show you how to make the caramel apple filling for my favorite 5 Pound Caramel Apple Pie. This time I made a crumble topping for the pie but I think I'll make it a double crusted pie next time. Just can't get enough of that buttery crust!


5 Pound Caramel Apple Pie
Makes 1 9" deep dish pie
Filling
  • 2.5 pounds tart apples
  • 2.5 pounds sweet apples
  • 1/2 cup brown sugar
  • 1/2 cup white sugar
  • 1/2 tsp lemon zest
  • 1/4 tsp salt
  • 1/2 tsp cinnamon
Caramel
  • 3 tbl sugar
  • 1/2 tsp cinnamon
  • a few dashes of nutmeg
  • 2 tbl butter
Crumble Topping
  • 1/2 cup sugar
  • 1/2 cup flour
  • 1/2 cup oatmeal
  • 1 egg
  • pinch of salt
  • 3 tbl butter, melted
Start out by peeling, coring and slicing your apples into same sized slices. I think I cut my apples in sixes unless they were small and I just quartered them. In a large dutch over combine the apples, sugars, lemon zest, salt and cinnamon. Put over a medium flame and stir to combine. Let the apples simmer, occasionally stirring very gently, until they are tender and can be easily pierced with a fork. Remove pie dough from fridge to allow it about 10 minutes to warm. Place a colander over a large bowl and empty the apples into the colander. Let cool. 

Place the juice released by the apples into a small pot over a medium flame. Add sugar and keep stirring the juice until it becomes very thick and syrupy. remove from heat and add spices and butter. Stir to melt an incorporate the butter. 

Now is a good time to roll our your dough. Place the dough disk between two sheets of parchment and roll it out, making sure to rotate the dough for an even thickness. Roll the dough until it is 1.5-2 inches larger than your pie dish. Remove the top layer of parchment paper and use the bottom layer to maneuver your dough into the pie dish, with the remaining parchment now on top. If you cannot remove the parchment without breaking the dough, put everything back in the fridge for 5-10 minutes. Once the dough is in the pie dish and you've removed the parchment paper, tuck the dough into the corners of the dish. If your apples still aren't quite cool, crimp the edges of your dough: If you have a lot of overhand, fold the dough under and tuck the excess into the pie dish. I'm not going to try to explain, crimping- just watch the video! I use my index and thumb to shape the dough- but do what works for you! maybe you just want to crimp with the tines of a fork- go for it. No one will care because you made them pie!!  If you're still working on your caramel sauce or your apples aren't quite cool, put your finished pie dough back into the fridge.

Preheat oven to 425 degree. Place a baking sheet on the lowest rack of your oven.

If making the crumble, combine the sugar, flour, oatmeal, 1 egg and pinch of salt into a medium bowl and mix to combine. 

Once you've got all your component together (pie crust, filling, caramel sauce, crumble topping) it is time to assemble! Place about 1/2 your apples in the crust and top with 1/2 the caramel sauce. Add the other half of the apples and the other half of the caramel sauce on top of that. You're probably going to have to be careful about adding those apples but they will fit! Top the whole thing off with the crumble topping.

Bake your pie on the preheated baking sheet for 25 minutes, then reduce the temperature to 375 and bake for another 25-30 minutes or until everything looks brown and crispy. If for some reason your pie doesn't turn beautiful and golden, turn your broiler on for about 2 minutes. Watch that pie!!

Let your pie cool for about 2 hours before serving.


Monday, October 31, 2011

Halloween Treats

Do you know what's awesome? Halloween. Even in the snow, even when you don't have time to make those cookies you've been planning all month until you're actually in NY, even when those "one size fits all" orange knit tights don't quite fit, even when you have to bully a boyfriend and subsequently his brother into dressing up and donning some makeup, even when people keep guessing that you're a pumpkin- but especially when Halloween involves 1 scary movie per day (!!), Asian Buddy Holly, midnight showings of Frankenstein & Bride of Frankenstein and these sandwich cookies which are frankly too sweet. Great with black coffee though!


To everyone who has already celebrated Halloween or will be handing out treats (or tricks) tonight, have a happy Halloween!


Salt-N-Pepper Sandwich Cookies
Adapted from Baked Explorations

For the Cookies

3 1/2 cups all purpose flour

3/4 teaspoon salt

1/4 teaspoon fleur de sel, plus more for decorating

2 teaspoons white pepper (I used 1 tsp)
1/4 cup dark unsweetened cocoa powder (like Valrhona)
1 1/2 cups (3 sticks) unsalted butter,cut into 1 inch cubes, cool but not cold.
1 1/4 cups granulated sugar
1 3/4 cups confectioner's sugar
3 large egg yolks
1 tablespoon pure vanilla extract
3 ounces good quality dark chocolate (60 to 72%), melted


For the Vanilla Filling

5 ounces vegetable shortening, at room temperature

4 tablespoons (1/2 stick) unsalted butter, cut into small

 chunks, at room temperature
3 1/4 cups confectioners' sugar, sifted
1/2 teaspoon salt
1 tablespoon pure vanilla extract
1 teaspoon light rum


Make the Cookies
In a large bowl, sift together the flour, salt, fleur de sel, white pepper, and cocoa powder. Set aside.

In the bowl of a standing mixer fitted with the paddle attachment, beat the butter and sugars together until light and fluffy, about 3 minutes. Scrape down the bowl, and add the egg yolks, one at a time, beating until each isincorporated. Add the vanilla and melted chocolate and beat until uniform in color. Scrape down the sides and bottom of the bowl and beat again for 10 seconds.
Add half of the dry ingredients and beat for 15 seconds. Again, scrape down the bowl, add the remaining dry ingredients and beat until just incorporated.
Loosely shape the dough into two balls, wrap them tightly in plastic wrap, and refrigerate them for at least 3 hours (due to unforeseen circumstances, mines was in the fridge for 3 days...)
Preheat the oven to 350 degrees F. Line two baking sheets with parchment paper.
Unwrap one ball of dough and divide it into two equal portions. Place the first portion on a lightly flour-dusted work surface and return the other to the refrigerator.
Use your hands to knead the dough until pliable and form into a small disc. Roll the dough into a 1/4 inch-thick round. It will be slightly sticky, so you may have to flip and lightly flour it a few times while you work. Use a 2-inchround cookie cutter to create your sandwich tops and bottoms, and transfer them to the prepared baking sheets, leaving about 1 inch of space around each cookie. Continue the process with the remaining dough. Extra doughscraps can be refrigerated and rerolled, if desired.
Sprinkle the tops of the cookies with a little fleur de sel, then bake them for 10 to 12 minutes, rotating the sheets halfway through the baking time. The tops of the cookies should look a bit dry and possibly cracked. Place the baking sheets on wire racks to cool for 5 minutes. Use a spatula to transfer the cook­ies to the racks to cool completely before filling them.

Make the Vanilla Filling
In the bowl of a standing mixer fitted with the paddle attachment, beat the shortening and butter until lump free and smooth. Add the sugar in three parts, mixing each part until just combined. Add the salt, vanilla, and rum and beat again for 10 seconds. The filling should be thick but spreadable (like the inside of an Oreo). If it is too thick, add a drop or two of water as needed. Keep adding water to reach the desired consistency, but do not add too muchwater or the filling will be too thin.
Alternatively if the mixture is too thin, add a few tablespoons of confection­ers' sugar.

Assemble the Salt-N-Pepper Sandwich Cookies
Use a pastry bag or a small spoon to apply about 2 tablespoons of filling to the flat side of a cookie. Place another cookie, flat side down, on top. Press down slightly so that the filling spreads to the edges of the cookie. Repeatuntil all the sandwich cookies are made. Let them set up for about 15 minutes before serving. Store the cookies at room temperature in an airtight container for up to 3 days.


Malted Milk Sandwich Cookies
Adapted from Baked Explorations
I didn't have any malted milk powder so I just left it out and while I'm sure it would make for a delicious cookie, my batch did not suffer without it. 


For the cookies:
4 cups all-purpose flour
3/4 cup malt powder
2 teaspoons baking powder
1/2 teaspoon baking soda
1/2 teaspoon salt
1 cup (2 sticks) unsalted butter, at room temperature
1 cup firmly packed dark brown sugar
1 cup granulated sugar
2 eggs
1/3 cup sour cream
2 teaspoons pure vanilla extract 


For the vanilla filling:
5 ounces vegetable shortening, at room temperature
4 tablespoons (1/2 stick) unsalted butter, cut into small chunks, at room temperature
3 1/4 cups confectioners’ sugar, sifted
1/2 teaspoon salt
1 tablespoon pure vanilla extract
1 teaspoon light rum


To make the cookies
In a large bowl, whisk together the flour, malt, baking powder, baking soda, and salt. Set aside. 


In the bowl of a standing mixer fitted with the paddle attachment, beat the butter and sugars together until light and fluffy. Scrape down the bowl and add the eggs, one at a time, beating until each is incorporated. Add the sour cream and vanilla and beat until just incorporated. Add half of the dry ingredients all at once and beat for 15 seconds. Again, scrape down the bowl, then add the remaining dry ingredients and beat until just incorporated. The mixture should come together almost in a ball. 

Loosely shape the dough into two balls, wrap them tightly in plastic wrap, and refrigerate for at least 3 hours. 


Preheat the oven to 350°F. Line two baking sheets with parchment paper.


Divide each dough ball in half, to make four portions. Place one portion on a lightly flour-dusted work surface and return the other three to the refrigerator. 


Roll out the dough so that it is ¼ inch thick. The dough will be sticky, so you may have to flip and lightly flour it a few times while you work. Use a 2-inch round cookie cutter to create the sandwich tops and bottoms, and transfer them to the prepared baking sheets, leaving about 1 inch of space around each cookie. Extra dough scraps can be refrigerated and rerolled once more, if desired.


Bake the cookies for 10 to 12 minutes (mine took 7 min), or until they are just slightly browned.


Place the baking sheets on wire racks to cool for 5 minutes. Use a spatula to transfer the cookies to the racks to cool completely. While the cookies cool, prepare the filling. 


To make the vanilla filling
In the bowl of a standing mixer fitted with the paddle attachment, beat the shortening and butter until lump free and smooth. Add the sugar in three parts, mixing each part until just combined. Add the salt, vanilla, and rum and beat again for 10 seconds. The filling should be thick but spreadable (like the inside of an Oreo). If it is too thick, add a drop or two of water as needed. Keep adding water to reach desired consistency, but do not add too much water or the filling will be too thin.
Alternatively if the mixture is too thin, add a few tablespoons of confectioners’ sugar.  
To assemble the malted milk sandwich cookies
Use a pastry bag or a small spoon to apply about 2 tablespoons of filling to the flat side of a cookie. Place another cookie, flat side down, on top. Press down slightly so that the filling spreads to the edges of the cookie. Repeat until all the sandwich cookies are made. Let them set up for about 15 minutes before serving. Store the cookies at room temperature in an airtight container for up to 3 days.

Saturday, October 29, 2011

Sweet and Spicy Roasted Pumpkin Seeds


I have one last Halloween idea to share. If you are like my boss who doesn't let his kids carve their pumpkins until the day before Halloween (supposedly to avoid bugs and mold), you can still plan to make these roasted pumpkin seeds. I'm fairly certain I've done roasted pumpkin seeds before but I don't think they were very good (or I would have remembered...). This recipe is the tops. I roasted the seeds out of two pumpkins and ate half of them on Sunday. My jaw still hurts from that endeavor.


The hardest part of roasting pumpkin seeds is cleaning the seeds off of pumpkin gunk. When carving my pumpkins I usually have a garbage bowl and a colander over a bowl for the seeds. I find it easiest to clean the seeds in the sink under running water.


I opted to dry the seeds off a little before mixing them in a mixture of egg white, sugar, sea salt and cayenne pepper. The second time around I baked them for almost twice as long as the recipe suggested and ended up with really crunchy and caramelized pumpkin seeds. Majorly recommended. 


Besides just eating these by the handful, I've also thrown these into a lunch salad and on top of a Sweet Potato Soup with Goat Cheese.


But my favorite way to eat these is on top of an ice cream Sunday. If you dig the salty/sweet line, this is your Sunday: Vanilla Ice Cream + warm Bittersweet Chocolate Fudge Sauce + Marshmallow Fluff + chopped Walnuts + Sweet & Salty Roasted Pumpkin Seeds. It's the bomb diggity. 

Sweet & Spicy Pumpkin Seeds
Adapted from 101 Cookbooks

  • 1 cup pumpkin seeds, cleaned
  • 1 egg white
  • 1/4 cup sugar
  • 1/2 tsp cayenne pepper, ground
  • 1/2 tsp sea salt

Preheat oven to 375
Place your pumpkin seeds in a bowl and add just enough egg white to coat. In a small bowl combine the sugar, cayenne pepper and salt. Add the sugar mixture to the pumpkin seeds and toss to combine. Place the seeds in a single layer on a cookie sheet fitted with a silpat or parchment paper. Bake for 12-20 minutes until golden. To really get a nice color, you may want to bump your oven temp to 425 for the last 5 minutes. When you pull them out of the oven, sprinkle everything with some more sugar and cayenne pepper. 
Stores well in an airtight container for a few days. 

Monday, October 24, 2011

Pear Sorbet

I don't think people like pears as much as I do. I know my dad loves them, but he's not around to help me get through a full container of this pear sorbet I recently made. 

A great way to use up those less then beautiful pears

My CSA recently included some pears in my box but by the time they made it to my door, they were looking rough. I was hoping that I could find something to do with them in my Canal House Cookbooks and I was quite lucky.

That pear has got to be mealy by now
They have an easy recipe for pear sorbet that includes pear brandy and I happen to have a bottle of Pear Brandy that my dad has lugged around since before I was born. I mean, the bottle looks old enough, doesn't it? And I have distinct memories of looking at this bottle as a child and wondering how they got that pear in there. 


I've been slowly eating away at the entire container of this pear sorbet. It's amazing and I hope there is still some left when my dad finally gets back for Thanksgiving.


Pear Sorbet
I've been eating this sorbet with scoops of vanilla because I like the contrast between the creamy and the fragrant. I also love it topped with toasted hazelnuts and salted caramel sauce. 

  • 5 fragrant, juicy, ripe pears
  • 3/4 cup sugar
  • 1/4 cup pear brandy
Make the simple syrup by combining the sugar with 1/2 cup water in a small saucepan. Heat the mixture while stirring until the sugar is dissolved. Let cool

Meanwhile peel and core the pears. Cut them into chunks and add them to a food processor. Puree the mixture until smooth. In a medium bowl combine the pear puree, the simple syrup and the pear brandy. Make sure the mixture is quite cold before processing it in your ice cream maker.  The sorbet will firm up in the freezer after a few hours. 

The recipe says this sorbet is best eaten within 1 week, but I'm quite content with mine and it's already been a few weeks. 


Wednesday, October 5, 2011

Pie Dough!

I got this crazy idea over the summer that I was going to perfect my pie making skills. Let me re-phrase that- I had this crazy idea that I would acquire some pie making skills. The Virginia State Fair is this week and I was going to enter a pie. I spent several months getting ready for the fair. I made all sorts of pies: peaches and dream pie, deep dish apple pie, pie dough made with water, pie dough made with vodka, pie with crumble topping, pie with streussel topping, cold pie, warm pie, blueberry pie, fancy cut crust pie, mixed berry pie, apple pear and pecan pie and the winner: 5 Pound Caramel Apple Pie. Apple pie was my front runner for a while but would I dare compete in such an iconic category? I thought my pie was up to the task. Unfortunately I found out too late that I was meant to register in advance. Well damn. But I've pretty much perfected my pie dough and that is what I am here to share with you today. Don't let my perseverance and ultimate oversight go to waste! Everybody- Make Pie! It's the fall, after all!


Pie Dough
Makes enough dough for 2 double crusted pies
  • 18 oz Flour
  • 13 oz Butter
  • Pinch of Salt
  • 8-10 Tbls ice cold water
Measure out the flour and the butter. Place the butter in a food processor and top it off with the flour and salt. Pulse about 20 times, until the mixture looks like sand. Place the mixture into the bowl of a kitchen aid mixer fitted with the paddle attachment. Add 5 tablespoons of ice water and then turn the machine on low, continue adding the water until the dough comes together. The dough will probably need about 20-30 seconds in the mixer. Turn the dough out onto a cold surface and cut it into 4 equal pieces. Shape each piece into a ball and flatten it down into a 4 inch disk. Wrap each disk very tightly and refrigerate for at least 1 hour. The dough can stay in the fridge for 3 days or in the freezer for 1 month.


Here are some of those pies:

Peach Crumble Pie

 Wild Blueberry Pie (with anemic crust....)

Deep Dish Apple Pie

5 Pound Apple Crumble Pie

Blueberry and Plum Pie

Peaches and Dream Pie

Apple, Pear & Pecan Pie

5 Pound Caramel Apple Pie (split into 2 pie dishes...)

Slice of Apple Crumble Pie

Wednesday, June 1, 2011

Memorial Day Menu

I don't think I've ever been so excited for Memorial Day. I didn't have any big plans, but I have been extra eager for spring's gentle warmth to turn into long summer days. And I was not disappointed this weekend. My (admittedly black) car registered 102 degrees as I was driving down 14th street in Washington on Monday. And while I'm not ready to bow down to the gods of heat and humidity quite yet, it was a nice change of weather for now.

With friends in town and the weather being what it was, it seemed obligatory to run out to the grocery store on Sunday and try to rustle up the makings of a Memorial Day BBQ. And I'm here to tell you that I timed it, and we had everything ready to be served within 1 hour of getting back from the grocery store. I used as many shortcuts as possible, some better than others (the extra 5 minutes to make a graham cracker crust will be well worth it) and in the end I think everything turned out pretty awesomely, if-I-do-say-so-myself.


So here is the play by play of what I made and how I did it. Oh and I should mention that this menu is assuming you have someone else taking care of burgers. But I'm sure you can bribe some guy into making and grilling some beef patties. These are some of my favorite quick dishes to make all summer long, so I hope you'll find something to add to your table!

Let's start with DESSERT!


Key Lime Pie
From my mom (who I think stole the recipe from the Marriott on Marco Island?)
Makes a 9" pie
  • 1 1/2 cups graham crackers, crushed (about 1 sleeve)
  • 1/4 cup sugar
  • 1/3 butter, melted
  • 2 14oz cans sweetened condensed milk
  • 1/2 cup key lime juice (fresh is great- bottled is faster!)
  • 1 lime, zested
  • whipped cream
In a 9" pie dish, combine the crushed graham crackers, sugar and butter. Spread evenly around the pie dish to form a crust that goes up the sides by about 1/2 inch.

In a large bowl combine the sweetened condensed milk, key lime juice and zest. Taste and add more key lime juice if desired. Pour the filling into the pie crust and freeze for about 1 hour. You can cut and eat the pie directly from the freezer- just be sure to top it with whipped cream!


Now that we've got dessert in the bag, let's use those leftover ingredients to make a drink for the cook (and maybe your burger helper).

Gin Refresher
Makes 1 refreshing drink
  • 1 part gin
  • 4 parts Fresca
  • .5 part key lime juice, or to taste
  • lime slices (from the now naked lime from the pie)
Fill a large pint glass half way up with ice. Add 1 part gin and top with 4 parts Fresca. Add a good squirt of lime juice and garnish with lime slices.


On to some veggies! This broccoli slaw is very easy because you don't have to cook the broccoli but this means that you want to make sure and chop the broccoli very finely. I would suggest making this early on so it can sit in the dressing and start to get a little more tender. Although grated cheese is easier, I just can't make myself buy the stuff (it's coated in cornstarch....) so I either grate it myself OR just chop it ! Chunks of cheddar are way better anyway (plus, it's cheaper than the stuff in the bag).


Broccoli, Cheddar & Bacon Coleslaw
Adapted from our old neighbor Annette
Feeds 10-12 people
  • 6 slices bacon
  • 4 broccoli crowns (about 2 bunches), finely chopped
  • 6 oz sharp cheddar, chopped or grated
  • 1/2 small red onion, finely chopped
  • 1/2 cup dried cranberries
  • 1/2 cup buttermilk
  • 1/3 cup mayonnaise
  • 2 tbls cider vinegar
  • 1 tbls sugar
Heat a pan to hot and cook the bacon in batched until crispy. Drain on some paper towel and crumble. In a large bowl combine the broccoli, cheddar, onion, cranberries and bacon. In a small bowl make the dressing by combining the buttermilk, mayonnaise, vinegar and sugar. Taste and season with salt & pepper. Add 2/3 of the dressing to the salad and toss to combine. Taste and add more dressing if necessary.

Keeps well in the fridge for a few hours.


Texas Caviar
Adapted from my mom's friend Kimba
Feeds a crowd
  • 1 can corn, drained and rinsed
  • 1 can black beans, drained and rinsed
  • 1 jar salsa
  • 1/3 cup chopped cilantro (if you like the stuff....)
  • 1 avocado, chopped (optional)
  • 1 bag tortilla chips
In a large bowl combine the beans, corn and salsa. TA DA!

We don't like cilantro so we didn't add any and none of the avocados were ripe yet so we had a pretty simple texas caviar but it's still delicious on a tortilla chip!

Friday, May 20, 2011

Chocolate Chip Cookie Pie

Last week my boyfriend had a birthday and as I tend to do, I made him a cake. Well no, I made him a pie. No, actually, I made him 4 pies- he got 2 of them.


Maybe you're wondering: "but Claire, I thought you were on a diet? Or at least attempting to be healthier? this does not seem to fit into that plan!" Well dear reader(s), I was very well behaved. I sampled. I just hope a pie post doesn't make me a cheater!


And the reason I made 4 pies? I based the recipe off one by Ms. Paula Deen and hers is meant to make two 9" pies. Who scales a recipe to that size?! It's like reading through the CIA cookbook all over again! "To make 6 banana loaves, begin by creamer 12 sticks of butter". Craziness!


I probably could have avoided the whining by halving the recipe but I figured with people in town, we could use the extra pie- only problem is that my mother apparently doesn't own a pie dish. I had the one Kris gave me for Christmas one year so I greased that one up and went searching for my mom's. I must have been making it up because I couldn't find it anywhere. In fact, Mother- you who loves pies- do you even MAKE pies?! Because I can't recall any! I know you went through a Lemon Meringue Pie Phase but then WHERE is the pie dish!? I found 2 tart pans! and 2 mini loaf pans and 2 regular loaf pans- a bundt cake pan, an angel food cake pan and even a tube pan! but no pie dish!


Mom- I think you've been outed as a pie phony.


Here- have some pie and realize what homemade deliciousness you've been missing out on.


I still love you.


Chocolate Chip Cookie Pie
Adapted from Paula Deen
Makes two 9" pie (or one 9" pie and three 3" pies)
  • 2 3/4 cups all-purpose flour
  • 1 1/2 tsp salt
  • 1 tsp baking soda
  • 1 1/4 tsp baking powder
  • 1 cup (2-sticks) unsalted butter, softened
  • 1 1/2 cups packed light brown sugar
  • 1/2 cup granulated sugar
  • 3 large eggs
  • 1 tbls vanilla extract
  • 1 cup semisweet chocolate chips
  • 1 cup butterscotch chips
  • 1 cup bittersweet chocolate chips
  • 2 cups chopped walnuts

Preheat oven to 350 degrees. Grease two 9" pie dishes.


In a large bowl sift together the flour, salt, baking soda and baking powder. In a mixer, cream together the sugars and butter until nice and fluffy. To the mixer, add the eggs one at a time, mixing well between each. Add the vanilla to the mixer then add the flour in little batches until well combined (without overbeating). Remove the bowl from the mixer and fold in the chocolate chips and walnuts.


Divide between the two pie dishes and level out with a spatula. Bake in the oven for about 25 minutes or until a toothpick comes out clean. Let the pies cool before serving topped with whipped cream (from the can), chocolate syrup and sprinkles. Don't forget the sprinkles.


Chocolate Syrup
Adapted from Bobby Flay's Burgers, Fries & Shakes

  • 1 cup water
  • 1/2 cup sugar
  • 1 tbl light corn syrup
  • 2/3 cup unsweetened good quality dutch processed cocoa powder
  • 1 tsp vanilla extract
In a small saucepan combine the water, sugar and corn syrup. Bring to a boil and whisk in the chocolate powder. Continue whisking until slightly thickened- about 2 minutes. Remove from heat and whisk in the vanilla. Let cool completely and transfer to a squeeze bottle and store in the fridge.

Friday, April 29, 2011

A Royal Wedding

I didn't get caught up into the whole royal wedding frenzy until yesterday. I knew I was going to bake something for the event and then I figured I could probably rig the big screen TV in our reception area at work to stream the event. Yesterday I went about figuring out when the whole she-bang was going to commence and was faced the realization that it was going to be an early morning affair...


Cut to my alarm going off at 5:30am this morning (after Kris woke me up at 4:30am thinking we had overslept....) and me frosting two cakes all the while trying to catch the first glimpse of THE dress. And while I'm not usually one to get excited for such things, it really was fun to watch such pageantry with 1 billion other people.

Princess Kate Paper Doll is kinda awesome

So why two cakes? Well one of my colleagues passed along a newsletter with a recipe for Prince William's famous groom's cake AND she happened to win a couple giant chocolate easter eggs last week, the remnants of which were still laying around the office. And I had pretty much already decided to make a Victoria Sponge cake since an old colleague from a job in London had passed her recipe along and I still hadn't tried it. Also- I saw someone decorate the top with berries to look like the Union Jack and that is just too freaking cute to pass up.


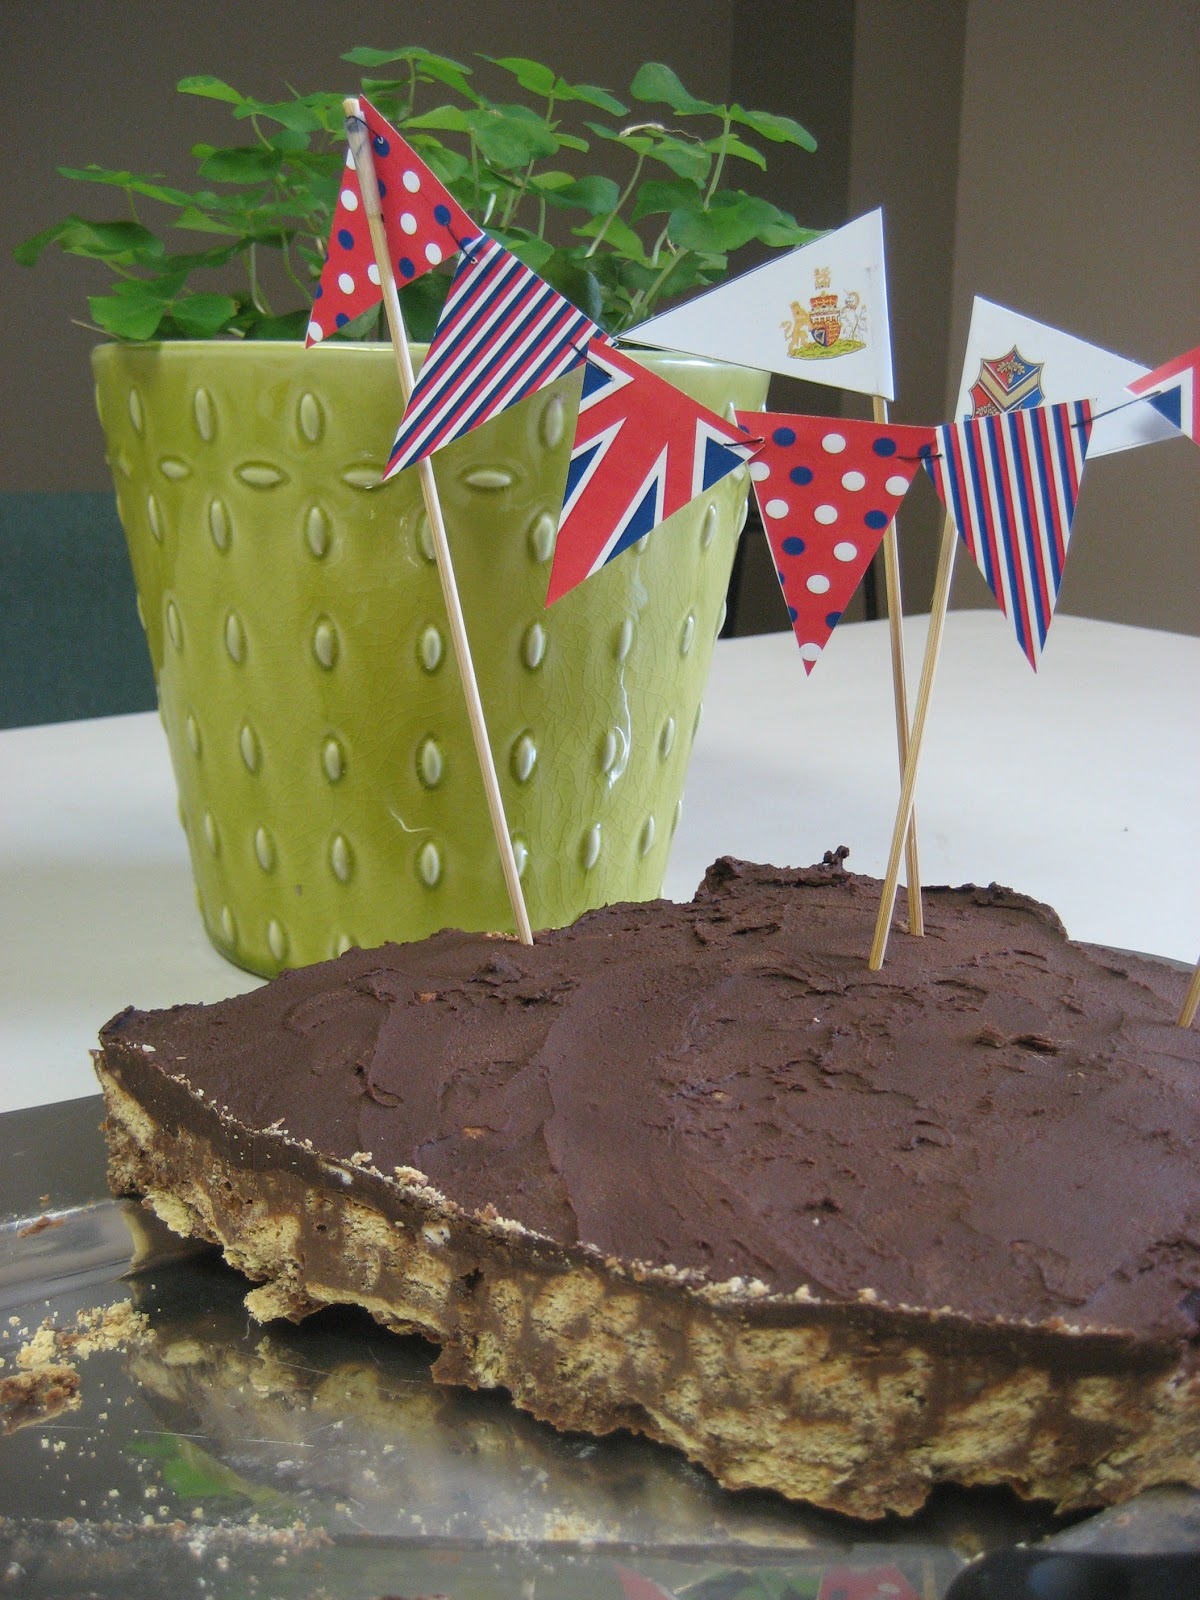
Prince William's Chocolate Biscuit Cake
Adapted from The Daily Candy
Makes enough for at least 15 people

For the cake
  • 1 box graham crackers
  • ¼ cup raisins (or more!!)
  • ¼ cup nuts, chopped (or more!)
  • 5 oz. dark chocolate
  • 5 oz. milk chocolate
  • 1 stick butter, room temperature
  • 1 14-oz. can condensed milk
For the frosting
  • 5 oz. dark chocolate
  • 2 tbls. butter
  • 1 tsp. milk

Start by breaking all the graham crackers into bite size pieces and putting them all in a large metal bowl. Then for good measure take a wooden spoon and smash that into the graham crackers a few times to really break everything down. Add the raisins and nuts and mix.

In a small saucepan over medium heat, combine the milk chocolate, dark chocolate, butter and condensed milk, stirring frequently until melted and combined. Add the chocolate mixture to the graham cracker mixture and mix very well. The original recipe has you put the "cake batter" into a 11" X 3" lasagna dish covered with wax paper, but I think this would look much better in a cake pan or two. Whatever receptacle you choose, just be sure to first lay down a layer of wax paper. Chill in the fridge for at least 2 hours.

For the frosting, melt the remaining chocolate and milk in a small saucepan, stirring constantly until mostly melted, add the butter and continue stirring off the heat until combined. Using an offset spatula, spread the frosting over and around the cake. Serve in small slices- this thing is like a giant candy bar.


Victoria Sponge Cake (a l'Americaine)
Adapted from a friend's recipe
Makes enough for about 8 people

For the cake
  • 8 oz. butter, softened
  • 8 oz. sugar
  • 4 eggs
  • 8. oz self-raising flour
  • 2 tsp. baking powder
  • 4 tbsp berry jam (or more to taste)
For the frosting
  • 1/2 bar of cream cheese
  • 4 oz. butter, softened
  • 1-2 cups powdered sugar
  • 1 tsp vanilla extract
  • About 5 strawberries
  • Raspberries
  • Blueberries
Preheat the oven to 350 degrees and butter and paper two 8" cake pans.

In a large bowl combine the butter, sugar, eggs, flour and baking powder. Mix well (I did this by hand and it was a cinch). Divide the batter between the two cake pans and spread the batter out evenly.

Bake for 25 minutes or until a toothpick comes out clean. Let the cakes cool for about 10 minutes before flipping them. Allow to cool completely before spreading the jam between the two cake layers, making sure to level the cakes if needed.

For the frosting, combine the butter and cream cheese in the bowl of an electric mix and beat for about 2-3 minutes until light and fluffy. Add the sugar 1/2 cup at a time until you are happy with the taste and texture. Add the vanilla once you are satisfied.

Spread the cream cheese frosting over the top of the cake and decorate the top with berries. If doing the Union Jack, it's easiest to start with the strawberry halves and work outwards in sections.