Monday, October 31, 2011

Halloween Treats

Do you know what's awesome? Halloween. Even in the snow, even when you don't have time to make those cookies you've been planning all month until you're actually in NY, even when those "one size fits all" orange knit tights don't quite fit, even when you have to bully a boyfriend and subsequently his brother into dressing up and donning some makeup, even when people keep guessing that you're a pumpkin- but especially when Halloween involves 1 scary movie per day (!!), Asian Buddy Holly, midnight showings of Frankenstein & Bride of Frankenstein and these sandwich cookies which are frankly too sweet. Great with black coffee though!


To everyone who has already celebrated Halloween or will be handing out treats (or tricks) tonight, have a happy Halloween!


Salt-N-Pepper Sandwich Cookies
Adapted from Baked Explorations

For the Cookies

3 1/2 cups all purpose flour

3/4 teaspoon salt

1/4 teaspoon fleur de sel, plus more for decorating

2 teaspoons white pepper (I used 1 tsp)
1/4 cup dark unsweetened cocoa powder (like Valrhona)
1 1/2 cups (3 sticks) unsalted butter,cut into 1 inch cubes, cool but not cold.
1 1/4 cups granulated sugar
1 3/4 cups confectioner's sugar
3 large egg yolks
1 tablespoon pure vanilla extract
3 ounces good quality dark chocolate (60 to 72%), melted


For the Vanilla Filling

5 ounces vegetable shortening, at room temperature

4 tablespoons (1/2 stick) unsalted butter, cut into small

 chunks, at room temperature
3 1/4 cups confectioners' sugar, sifted
1/2 teaspoon salt
1 tablespoon pure vanilla extract
1 teaspoon light rum


Make the Cookies
In a large bowl, sift together the flour, salt, fleur de sel, white pepper, and cocoa powder. Set aside.

In the bowl of a standing mixer fitted with the paddle attachment, beat the butter and sugars together until light and fluffy, about 3 minutes. Scrape down the bowl, and add the egg yolks, one at a time, beating until each isincorporated. Add the vanilla and melted chocolate and beat until uniform in color. Scrape down the sides and bottom of the bowl and beat again for 10 seconds.
Add half of the dry ingredients and beat for 15 seconds. Again, scrape down the bowl, add the remaining dry ingredients and beat until just incorporated.
Loosely shape the dough into two balls, wrap them tightly in plastic wrap, and refrigerate them for at least 3 hours (due to unforeseen circumstances, mines was in the fridge for 3 days...)
Preheat the oven to 350 degrees F. Line two baking sheets with parchment paper.
Unwrap one ball of dough and divide it into two equal portions. Place the first portion on a lightly flour-dusted work surface and return the other to the refrigerator.
Use your hands to knead the dough until pliable and form into a small disc. Roll the dough into a 1/4 inch-thick round. It will be slightly sticky, so you may have to flip and lightly flour it a few times while you work. Use a 2-inchround cookie cutter to create your sandwich tops and bottoms, and transfer them to the prepared baking sheets, leaving about 1 inch of space around each cookie. Continue the process with the remaining dough. Extra doughscraps can be refrigerated and rerolled, if desired.
Sprinkle the tops of the cookies with a little fleur de sel, then bake them for 10 to 12 minutes, rotating the sheets halfway through the baking time. The tops of the cookies should look a bit dry and possibly cracked. Place the baking sheets on wire racks to cool for 5 minutes. Use a spatula to transfer the cook­ies to the racks to cool completely before filling them.

Make the Vanilla Filling
In the bowl of a standing mixer fitted with the paddle attachment, beat the shortening and butter until lump free and smooth. Add the sugar in three parts, mixing each part until just combined. Add the salt, vanilla, and rum and beat again for 10 seconds. The filling should be thick but spreadable (like the inside of an Oreo). If it is too thick, add a drop or two of water as needed. Keep adding water to reach the desired consistency, but do not add too muchwater or the filling will be too thin.
Alternatively if the mixture is too thin, add a few tablespoons of confection­ers' sugar.

Assemble the Salt-N-Pepper Sandwich Cookies
Use a pastry bag or a small spoon to apply about 2 tablespoons of filling to the flat side of a cookie. Place another cookie, flat side down, on top. Press down slightly so that the filling spreads to the edges of the cookie. Repeatuntil all the sandwich cookies are made. Let them set up for about 15 minutes before serving. Store the cookies at room temperature in an airtight container for up to 3 days.


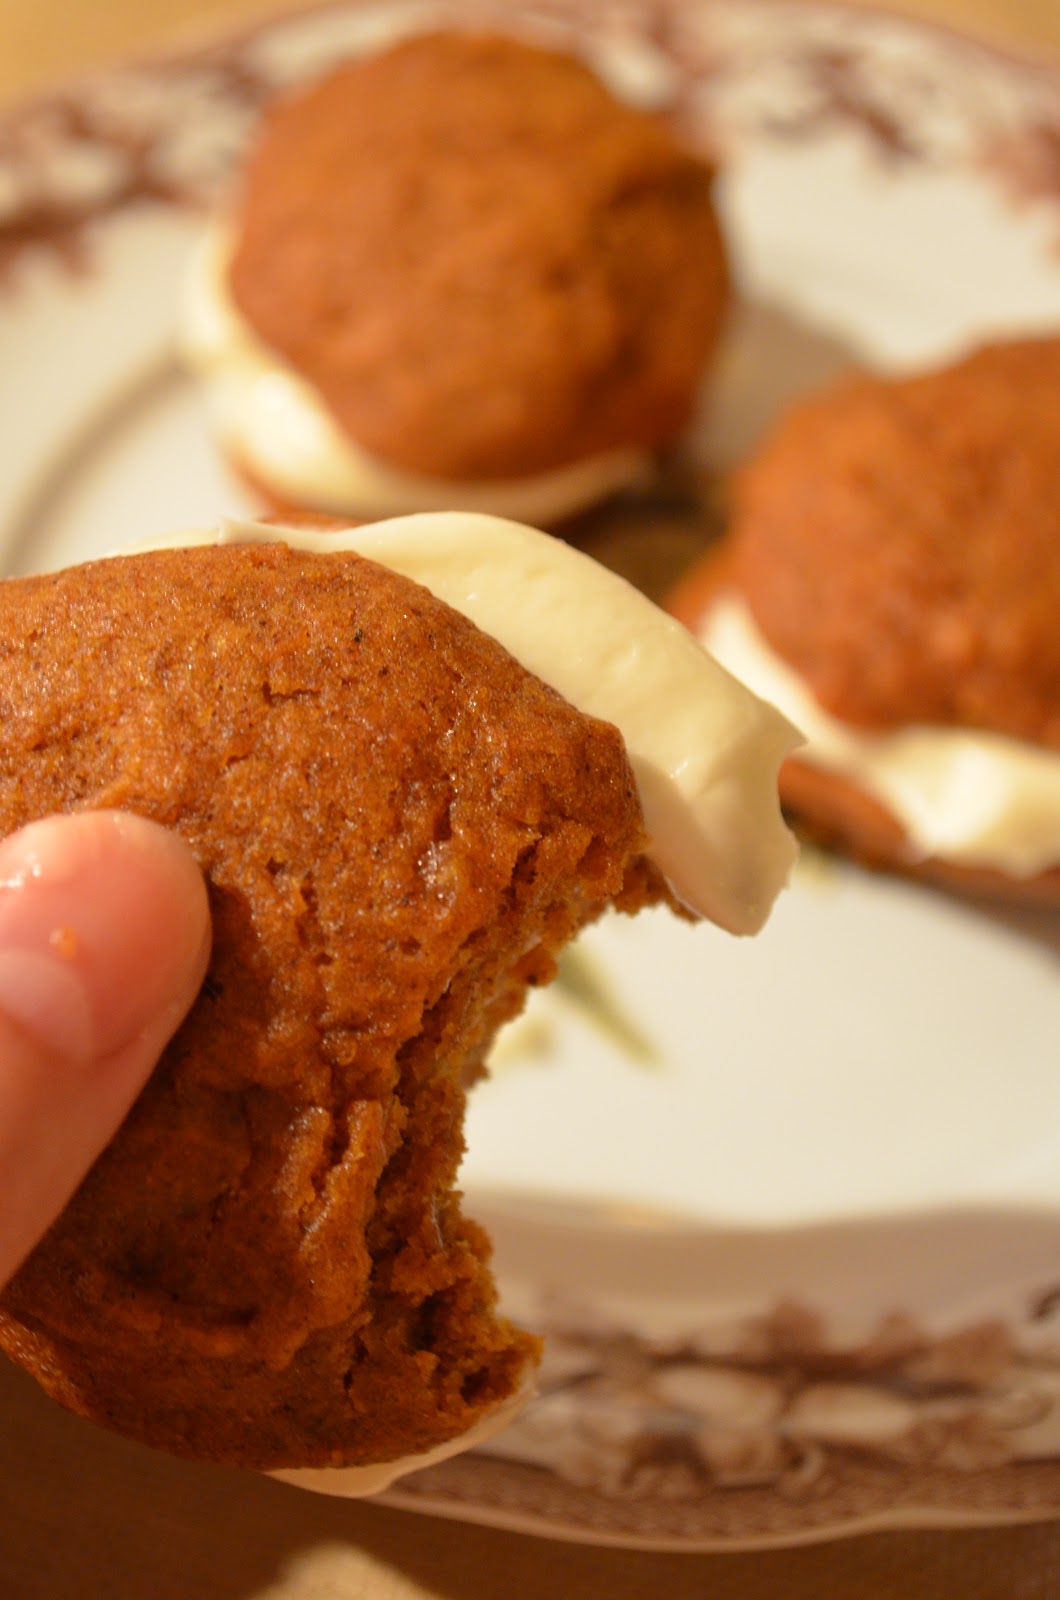
Malted Milk Sandwich Cookies
Adapted from Baked Explorations
I didn't have any malted milk powder so I just left it out and while I'm sure it would make for a delicious cookie, my batch did not suffer without it. 


For the cookies:
4 cups all-purpose flour
3/4 cup malt powder
2 teaspoons baking powder
1/2 teaspoon baking soda
1/2 teaspoon salt
1 cup (2 sticks) unsalted butter, at room temperature
1 cup firmly packed dark brown sugar
1 cup granulated sugar
2 eggs
1/3 cup sour cream
2 teaspoons pure vanilla extract 


For the vanilla filling:
5 ounces vegetable shortening, at room temperature
4 tablespoons (1/2 stick) unsalted butter, cut into small chunks, at room temperature
3 1/4 cups confectioners’ sugar, sifted
1/2 teaspoon salt
1 tablespoon pure vanilla extract
1 teaspoon light rum


To make the cookies
In a large bowl, whisk together the flour, malt, baking powder, baking soda, and salt. Set aside. 


In the bowl of a standing mixer fitted with the paddle attachment, beat the butter and sugars together until light and fluffy. Scrape down the bowl and add the eggs, one at a time, beating until each is incorporated. Add the sour cream and vanilla and beat until just incorporated. Add half of the dry ingredients all at once and beat for 15 seconds. Again, scrape down the bowl, then add the remaining dry ingredients and beat until just incorporated. The mixture should come together almost in a ball. 

Loosely shape the dough into two balls, wrap them tightly in plastic wrap, and refrigerate for at least 3 hours. 


Preheat the oven to 350°F. Line two baking sheets with parchment paper.


Divide each dough ball in half, to make four portions. Place one portion on a lightly flour-dusted work surface and return the other three to the refrigerator. 


Roll out the dough so that it is ¼ inch thick. The dough will be sticky, so you may have to flip and lightly flour it a few times while you work. Use a 2-inch round cookie cutter to create the sandwich tops and bottoms, and transfer them to the prepared baking sheets, leaving about 1 inch of space around each cookie. Extra dough scraps can be refrigerated and rerolled once more, if desired.


Bake the cookies for 10 to 12 minutes (mine took 7 min), or until they are just slightly browned.


Place the baking sheets on wire racks to cool for 5 minutes. Use a spatula to transfer the cookies to the racks to cool completely. While the cookies cool, prepare the filling. 


To make the vanilla filling
In the bowl of a standing mixer fitted with the paddle attachment, beat the shortening and butter until lump free and smooth. Add the sugar in three parts, mixing each part until just combined. Add the salt, vanilla, and rum and beat again for 10 seconds. The filling should be thick but spreadable (like the inside of an Oreo). If it is too thick, add a drop or two of water as needed. Keep adding water to reach desired consistency, but do not add too much water or the filling will be too thin.
Alternatively if the mixture is too thin, add a few tablespoons of confectioners’ sugar.  
To assemble the malted milk sandwich cookies
Use a pastry bag or a small spoon to apply about 2 tablespoons of filling to the flat side of a cookie. Place another cookie, flat side down, on top. Press down slightly so that the filling spreads to the edges of the cookie. Repeat until all the sandwich cookies are made. Let them set up for about 15 minutes before serving. Store the cookies at room temperature in an airtight container for up to 3 days.

Saturday, October 29, 2011

Sweet and Spicy Roasted Pumpkin Seeds


I have one last Halloween idea to share. If you are like my boss who doesn't let his kids carve their pumpkins until the day before Halloween (supposedly to avoid bugs and mold), you can still plan to make these roasted pumpkin seeds. I'm fairly certain I've done roasted pumpkin seeds before but I don't think they were very good (or I would have remembered...). This recipe is the tops. I roasted the seeds out of two pumpkins and ate half of them on Sunday. My jaw still hurts from that endeavor.


The hardest part of roasting pumpkin seeds is cleaning the seeds off of pumpkin gunk. When carving my pumpkins I usually have a garbage bowl and a colander over a bowl for the seeds. I find it easiest to clean the seeds in the sink under running water.


I opted to dry the seeds off a little before mixing them in a mixture of egg white, sugar, sea salt and cayenne pepper. The second time around I baked them for almost twice as long as the recipe suggested and ended up with really crunchy and caramelized pumpkin seeds. Majorly recommended. 


Besides just eating these by the handful, I've also thrown these into a lunch salad and on top of a Sweet Potato Soup with Goat Cheese.


But my favorite way to eat these is on top of an ice cream Sunday. If you dig the salty/sweet line, this is your Sunday: Vanilla Ice Cream + warm Bittersweet Chocolate Fudge Sauce + Marshmallow Fluff + chopped Walnuts + Sweet & Salty Roasted Pumpkin Seeds. It's the bomb diggity. 

Sweet & Spicy Pumpkin Seeds
Adapted from 101 Cookbooks

  • 1 cup pumpkin seeds, cleaned
  • 1 egg white
  • 1/4 cup sugar
  • 1/2 tsp cayenne pepper, ground
  • 1/2 tsp sea salt

Preheat oven to 375
Place your pumpkin seeds in a bowl and add just enough egg white to coat. In a small bowl combine the sugar, cayenne pepper and salt. Add the sugar mixture to the pumpkin seeds and toss to combine. Place the seeds in a single layer on a cookie sheet fitted with a silpat or parchment paper. Bake for 12-20 minutes until golden. To really get a nice color, you may want to bump your oven temp to 425 for the last 5 minutes. When you pull them out of the oven, sprinkle everything with some more sugar and cayenne pepper. 
Stores well in an airtight container for a few days. 

Thursday, October 27, 2011

A different kind of Jack O' Lantern

Tree Silhouette 
This year felt right for trying something different on my pumpkins. I really liked the natural and whimsical look of the arrangement on my porch and wanted the carvings to reinforce that feeling. I also figured that since I had spent quite a penny on these gourds, I should try to get them to last past Halloween.

I settled on doing some kind of polka dot design using whatever tools I could find which happened to be a pick from my father's "Bat Cave"...


...and my smallest biscuit cutter! I just used a hammer to whack the cutter through the flesh of the carved out pumpkin and recuperated it on the other side. I wouldn't necessarily recommend using your favorite biscuit cutter for this unless you have a rubber mallet because my cutter got a little bent out of shape. But then it is very cheap.


To keep the pretty stem intact, I hollowed this pumpkin out through a hole on the bottom. This also allowed me to illuminate the pumpkin with Christmas lights strung through the bottom hole. I would also recommend thinning out your pumpkin if the flesh is too thick. My pumpkins were really thick and it just made the whole thing more of a pain. 


While I started out thinking I was carving polka dots, I ended up with something almost celestial- which I love. I did three bands of Milk Way-looking carvings around this pumpkin, using three different sized tools- the pick and 2 different biscuit cutters. 


The only thing I would do differently next time would be to get some Christmas lights with white wiring so they would be better concealed inside the pumpkin. Otherwise, I'm pretty pleased with the way this turned out! 

Wednesday, October 26, 2011

Lunch Salads

My co-workers always want to know what I'm having for lunch. It usually leads to a soliloquy on How Easy it Was and Oh, These Are Just Some Done-Up Leftovers. My boss recently asked me, in all seriousness: "Do you cook.... every day?" Yeah! Don't you?

Well for those who can't wrap their heads around bringing in lunch from home, here are a few of my recent salads. I love a good salad. 


cherry tomatoes + crumbled bacon +chopped walnuts + avocado + spinach + honey balsamic vinaigrette

Tip: Cook the bacon in a 400 degree oven on a cookie rack placed over some aluminum foil on a cookie sheet. Takes about 15-20 minutes and won't smoke up your kitchen!


broconcini + roasted peppers with capers + slice of Great Harvest bread + baby carrots

Tip: These peppers are better the following day so they make a great lunch


cherry tomatoes + roasted red peppers + black olives + assorted cheeses + assorted deli meats + lemon vinaigrette + spinach

Tip: Raid your office's fridge! This was all leftover from a social event and I happened to have spinach. Free lunch!


spinach + roasted beets + toasted pine nuts + goat cheese + fried egg

Tip: Okay, so I did this salad at home because even I can't fry an egg at the office.. But I roasted the beets the day before while making dinner so all I had to do was peel the skins off and BAM: delicious salad

General Tips:

  • Clean, shred and bag your salad a day or two early. I like to keep my leafy greens at the ready in a large ziploc bag with a paper towel thrown in to absorb excess moisture. Romaine and spinach will hold up rather well and spinach is super good for you!
  • Make a big batch of vinaigrette in a mason jar. I happen to love a honey balsamic vinaigrette and can make do with only that option so whenever I make some, I usually make a lot so I have it on hand. Not that it's hard to make: In a mason jar combine 1 tsp dijon mustard, 1 tsp honey, a few cracks of pepper, pinch of salt, 1 finger of balsamic vinegar and 3 fingers of olive oil. Seal the mason jar and shake to combine. 
  • Aaah Nuts! I will add nuts to just about every salad, especially if it doesn't contain any other kind of protein. I have just about every nut out there and keep them fresh by freezing them. Don't let your nuts get rancid in your cupboard! 
  • Get some small Tupperware and sandwich bags. If you don't want to take a whole mason jar worth of dressing to work, put it in a tiny Tupperware container. These are also handy for transporting things like hummus, olives ect. I use my sandwich bags for toast (when the salad doesn't seem hearty enough to get me through the day), baby carrots, snacking nuts, crumbled bacon bits, roasted pumpkin seeds- cookies! 
  • Have dessert. I'm definitely not a chocoholic nor do I have a big sweet tooth but I have to admit that I'm a happier person if I finish my meal with something sweet. And it doesn't have to be big or "bad for you". I'm quite content with a piece of bittersweet chocolate or peach black tea sweetened with some honey. Treat yo'self 


Tuesday, October 25, 2011

Spooky Owls

I have a thing for owls and the word has gotten out. Last year while Christmas shopping, a reoccuring conversation went something like this:

Me: Aaaw look at the owl [insert any object]!! It's so cute!
Someone else: And you said you don't have a thing about owls?
Me: Nope, I DO NOT have a thing about owls.

Later

Someone else: Look Claire, an owl [insert any object]!
Me: If I had a thing for owls, I would find that very cute.

I wasn't really surprised when I ended up with quite a few owl related items this past Christmas. Everything from a set of owl mugs, to an owl coin purse, owl necklace and a set of owl nesting dolls. A few owl figurines have also shown up in my life and in thinking about what to do for Halloween on a budget I started thinking about my little parliament of owls (and no, I won't admit to having a collection). Not all owls are cute- some are downright sinister:


Pretty spooky, right? but it gets better at dusk:


I mostly used stuff from around the house including the large basket, two apothecary jars, some green Christmas lights and an ostrich egg.


I knew I wanted to create creepy nests in the apothecary jars and once I found the extra large basket I figured I could make an extra large nest to hold everything. I would have used branches and twigs out of my backyard but it had been raining for about a week so I bought a grapevine wreath ( $4.99) and some Spanish moss ($6.99) at Michael's. I tore the wreath apart and wedged pieces of it into the apothecary jars to form a nest which I accented with raffia, torn bits of muslin, feathers and Spanish moss. I also got that paper mache skull at Michaels for $1.99 and loved how it looked so I added that to the jar before assembling the nest.


The tall apothecary jar got a similar treatment and then I started adding some bugs and skeleton hands. I got a pack of snakes from Target for $1.99 and the skeleton hands at Micheal's for $1.99. 


This big guy is a leftover from Halloweens past. His brother is currently residing in the candy jar at my office.
I coiled the green christmas lights around the bases of the apothecary jars and topped it all off with more Spanish moss. I also added some more pieces of the grapevine wreath around the inside of the basket to reinforce the idea of a large nest.


What really brought the whole thing together was this guy. He's so sinister and yet kinda reminds me of my cat....


It's the "wide" haunches.

Monday, October 24, 2011

My Monster Plant

 I have a monster and it lives on my front porch. 


Try not to upset it or it might bite


Haunted Hedge from Target

Pear Sorbet

I don't think people like pears as much as I do. I know my dad loves them, but he's not around to help me get through a full container of this pear sorbet I recently made. 

A great way to use up those less then beautiful pears

My CSA recently included some pears in my box but by the time they made it to my door, they were looking rough. I was hoping that I could find something to do with them in my Canal House Cookbooks and I was quite lucky.

That pear has got to be mealy by now
They have an easy recipe for pear sorbet that includes pear brandy and I happen to have a bottle of Pear Brandy that my dad has lugged around since before I was born. I mean, the bottle looks old enough, doesn't it? And I have distinct memories of looking at this bottle as a child and wondering how they got that pear in there. 


I've been slowly eating away at the entire container of this pear sorbet. It's amazing and I hope there is still some left when my dad finally gets back for Thanksgiving.


Pear Sorbet
I've been eating this sorbet with scoops of vanilla because I like the contrast between the creamy and the fragrant. I also love it topped with toasted hazelnuts and salted caramel sauce. 

  • 5 fragrant, juicy, ripe pears
  • 3/4 cup sugar
  • 1/4 cup pear brandy
Make the simple syrup by combining the sugar with 1/2 cup water in a small saucepan. Heat the mixture while stirring until the sugar is dissolved. Let cool

Meanwhile peel and core the pears. Cut them into chunks and add them to a food processor. Puree the mixture until smooth. In a medium bowl combine the pear puree, the simple syrup and the pear brandy. Make sure the mixture is quite cold before processing it in your ice cream maker.  The sorbet will firm up in the freezer after a few hours. 

The recipe says this sorbet is best eaten within 1 week, but I'm quite content with mine and it's already been a few weeks. 


Tuesday, October 18, 2011

Pumpkins


Pumpkin and apple picking last week was a blast and then it rained. And rained. I haven't seen rain like that in a while. I even took a video but it really doesn't come through... so I'll spare you. But here is a picture:

Some yellow leaves are appearing and my monster plant is quite happy

So for about a week I couldn't do anything with my haul of pumpkins but stare and hope they didn't rot.


And the sun finally came out so I finally played around with them. I had visions of piling them high atop a cafe table, like I had seen online but my table was a little too wobbly and my pumpkins were kinda massive. In the end I ended up with this-


I grabbed a plastic urn planter that still had some mint and lemon verbena growing in it and plopped a Cinderella pumpkin on top and topped that with a Boer Squash


This little orange guy was the one we actually picked from an actual pumpkin patch! Tip: bring a knife! 


My brother Tristan hates this cement dog so my mom called it Tristan. There is another cement dog on the other side of the door also named Tristan. My mom is hilarious. 


And I've been wanting to make Whoopie Pies for a while- and all I needed was an excuse: Boss Day! Did you know it was Boss Day on Monday?


I have loved everything I've made out of my Baked cookbook so I had no hesitations in making their Pumpkin Whoopie Pies. 


Just don't eat more than one. Promise? After testing my batch I thought this picture would surely be enhanced by having one pie with a bite mark but then you can't just put the pie back on the plate after that- so I naturally ate it. And regretted it. These are moist, creamy and decadent. Don't get greedy!

Just one Whoopie Pie

Pumpkin Whoopie Pies
Makes 12-24 whoopie pies
(I used a 1/2 inch ice cream scoop and got about 24 pies that seemed big enough for me)

3 cups all-purpose flour
1 teaspoon salt
1 teaspoon baking powder
1 teaspoon baking soda
2 tablespoons ground cinnamon
1 tablespoon ground ginger
¼ teaspoon ground nutmeg
2 cups firmly packed light brown sugar
1 cup canola oil
3 cups chilled pumpkin puree
2 large eggs
1 teaspoon pure vanilla extract
3 cups confectioners’ sugar
½ cup (1 stick) unsalted butter, softened
8 ounces cream cheese, softened
1 teaspoon pure vanilla extract

Preheat the oven to 350*F. Line two baking sheets with parchment or silicone mats.

In a medium bowl, whisk the flour, baking soda, baking powder, salt, cinnamon, ginger, and nutmeg.

In a large bowl, whisk the brown sugar and oil until mixed. Add the pumpkin and whisk to combine. Add the eggs and vanilla, whisk to combine.
Sprinkle the flour over the pumpkin mixture and whisk to combine. 
Use a small ice cream scoop to drop spoonfuls of dough an inch apart onto baking sheets. Bake for 12-14 minutes or until the cookies are cracked on top and an inserted toothpick comes out clean. Allow cookies to cool completely on the pans.
For the icing, sift the confectioners’ sugar into a medium bowl.
Fit an electric mixer with the paddle attachment. Mix the butter and cream cheese on medium speed until smooth and combined. Add the confectioners’ sugar and beat until combined. Lower speed and add the vanilla, beat until just mixed.
Place about 1-2 tbls of filling on the flat side of one cookie and sandwich with another. Press gently to spread the filling to the edges of the cookies. Store covered in the refrigerator, separating layers of whoopie pies with waxed paper.

Thursday, October 13, 2011

Apple Picking and Apple Cider

I had so much fun peach picking this summer that I was determined to go apple picking this fall. I just didn't know when that would be. And then a free day materialized out of a nowhere and so Kris and I packed up our stuff and this time headed North to Maryland's Larriland Farm for some time in the country. 


Although the first half of the drive was a little "urban" the last half winds you through gorgeous fields and overarching trees. 


The farm is on a huge track of land and seeing that it was a Tuesday, we pretty much had the place to ourselves.  

It might seem obvious to say this- but you can only pick what is ripe and so that means you are only allowed in certain orchards and fields. 

For us that meant we could choose from beets, chard, pumpkins and a couple varieties of apple: Stayman, Ida Red and Braebrun.


Kris will want me to tell you that when we first made it into a Staymen apple orchard I was almost convinced that we were supposed to gather the apples from the ground since it seemed that there were none of the trees and most of the ones on the ground looked fine.


But once we got far enough down the row, we found plenty of trees still full of apples. 

We weren't as tempted to eat the fruit right off the branch like we had for the peaches.

It's probably because these apples are kinda dirty and need a good scrubbing, in the sink or on your pant leg, before you take a bite 

The next orchard over was taller and if we're being honest, more exciting. Ladders! 

I made Kris move a ladder to a tree with unreachable apples so I could go up and rescue them. 

I think Kris definitely dressed the part. Way to go, Fashionista! 

 Next was the pumpkin patch

 I was hoping for some white pumpkins but they only grow the orange variety- I'm not really complaining though because they had a great selection. The patch was a little surreal and almost felt like a set. 

 On our way back from the fields. Little ghosts on the island. 

 They had all sorts of varieties of gourds at the barn and I treated myself to a Cinderella Pumpkin (among a few others....). I justified my rather large haul by reminding myself that these are all edible. We'll have to see what I come up with in November to eat them all! 


In the meantime, here is a little recipe I've been using on a regular basis to turn apple cider into a drink worthy of desert status.

Creamy Double Apple Cider
For 1
  • 1-2 cups apple cider
  • a few glugs of maple syrup
  • 1/4-1/2 tsp vanilla extract
  • a few glugs of Laird's Applejack Brandy
  • Whipped cream
  • Pumpkin pie spice
Warm the apple cider in a thick mug in the microwave. Once the cider is warm enough, add the maple syrup, vanilla extract and brandy. Taste and adjust according to your preference. Top the whole thing with a thick swirl of whipped cream and a dash of pumpkin pie spice.