




 Well that's a bit of a lie as I didn't really get to rip anything off- see the trick to recovering a couch is to keep the pieces of fabric intact, only ripping the seams- this was you will already have a pattern for each piece you need to cut out from your new material.
A couple things to keep in mind:
1- You want to make sure that you are keeping the seams in mind (on my old fabric the seams are the rolled up edges) so either lay them down as you are cutting or just cut 1/4- 1/2 inch away from the original fabric to account for seam allowance.
 We used a staple gun for 80% of this recovering, a sewing machine for the rest and only needed a hammer to reinforce some staples that hadn't gone in all the way. Use a very light touch when hammering in the staples as the hammer tends to leave unsightly black marks on the fabric (no matter how clean you think it is).
 To finish it off, we had to find some trim to cover all those staples. The orignal couch had some really gross white braided satin trim, but once we sanded down the wooden features, the couch was feeling a little beachy so I just bought some twine from the hardware store (far too much twine, I might add).
 This part was actually the most painful- it took 4 episode of Law & Order, 2 rows of twine and 3 severe burns to my fingers.
 But looking back at this monstrosity....
 Detail shot! Hello beautiful wooden features!
 aaaaaah- Totally worth it.
Kris is still super happy about our purchase!


Boing-y springs!
We decided to replace the old straps with new vinyl straps meant for lawn furniture. It took us two bags of $14.99 to recover the bottom and we found the vinyl very easy to use. We started off by trying to reuse some of the old nails, but my shinny new staple gun turned out to be much more practical and efficient.
The couch was naturally sectioned into 3, so we did them one at a time- stapling the straps on both sides along the width first, not worrying about the springs and then stapling one length at a time, weaving it through the cross straps (over, under, over ect.) while the other person pushed the springs down.
 It was pretty easy once we worked out a system.
 Kris did mess up the over, under pattern a few times, which wasn't be the end of the world, but writing this now about a month after the fact, the sections with no crossing mistakes are holding up perfectly whereas the other section has had a spring start to pop out.
Beautiful perfection on this side!
We finished everything off by folding over a length of strapping and stapling them down the middle of the 2 sections for extra support since that what had been on the couch before we ripped it all up.
Now if we really wanted to make this professional, we would have hand tied the springs but we (or maybe I) are just too lazy- plus I wasn't sure how to do it at the people who constructed our couch used some fancy metal attachments instead- but I recently stumbled on this blog which shows some professionals doing exactly this with a chair very similar to our couch!
Although it did take the better part of a evening and a morning to complete, the redo has been a huge success and we're no longer afraid of falling through the bottom.


 Got myself 4 of these

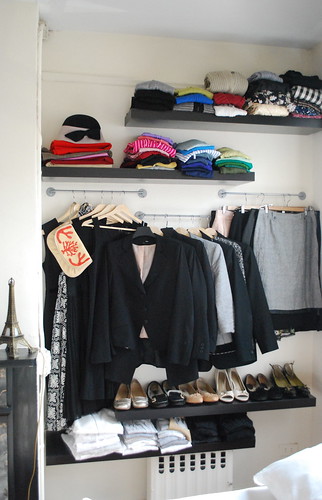 Ta da!!! And I have Kris to thank for all the manual labor- he did a really fantastic job with this and none of the shelves have even fallen off!
Now all i need is a night stand- What do you think between this recycled aluminum one and this nestling table set?


 Gotta use that shelf my mom bequeathed to us!